Hello and welcome to SnobBots!
SnobBots is an advanced AI-powered automation platform designed to help businesses improve customer engagement, automate communication, generate leads, and streamline support through intelligent conversational AI.
Whether you are a small business, growing company, agency, or enterprise, SnobBots provides the tools needed to create smarter digital customer experiences while reducing manual workload and improving operational efficiency.
The platform combines AI chatbots, lead capture, website analysis, content generation, automation tools, and customer communication systems into one powerful and easy-to-manage platform.
With SnobBots, you can:
- Deploy intelligent AI chatbots on your website
- Provide instant 24/7 responses to customer enquiries
- Train AI using your website content and business data
- Capture leads directly through chatbot conversations
- Review full visitor conversation histories
- Connect visitors directly to your WhatsApp support team
- Generate AI-powered blogs, FAQs, and content
- Analyse website performance using AI website audits
- Monitor chatbot performance through analytics and insights
- Customise chatbot behaviour, tone, and responses
- Offer white-label AI solutions for clients and resellers
SnobBots is designed to act as a digital AI assistant for your business — helping visitors find information faster, improving support response times, increasing conversions, and enhancing customer experiences around the clock.
One of the platform’s key strengths is its intelligent Lead Capture System, which allows businesses to collect visitor information such as names, email addresses, and enquiry history directly from chatbot conversations. This helps businesses better understand customer intent and follow up with qualified leads more effectively.
The platform also includes integrated WhatsApp connectivity, allowing customers to seamlessly transition from AI conversations to direct human support whenever needed.
In addition, SnobBots includes AI Website Audit tools that help businesses identify performance issues, SEO opportunities, and optimisation improvements to strengthen their online presence.
This documentation will guide you through the SnobBots platform, dashboard, chatbot setup process, integrations, training systems, analytics tools, and other core features to help you get the most from your AI automation experience.
About SnobBots
SnobBots is a next-generation AI platform designed to help businesses automate communication, improve customer engagement, and streamline digital workflows through intelligent AI automation.
Powered by advanced language models, SnobBots enables businesses to deploy smart AI chatbots that deliver natural, accurate, and personalised responses to customers 24/7 across websites and digital platforms.
SnobBots allows you to:
- Assist website visitors in real-time
- Automate repetitive communication tasks
- Provide instant answers using your business data
- Improve sales conversions and customer support efficiency
- Capture and manage customer leads automatically
- Connect visitors directly to your WhatsApp team
- Generate AI-powered content and workflows
- Analyse website performance with AI-driven audits
SnobBots is not just a chatbot platform.
It is a complete AI-powered digital assistant system designed to help businesses communicate smarter, respond faster, and convert more visitors into customers.
One of the platform’s key features is the integrated Lead Capture System. When a visitor interacts with your chatbot, SnobBots can automatically collect important customer details such as:
- Name
- Email address
- Contact information
- Conversation history
This allows businesses to review exactly what the visitor was asking for, understand customer intent, and follow up more effectively with qualified leads.
SnobBots also includes WhatsApp Integration, allowing businesses to connect their chatbot directly to WhatsApp. Visitors can instantly continue the conversation with a real person when needed, creating a seamless transition between AI automation and human support.
In addition, the platform includes an AI Website Audit System that helps businesses analyse website performance, identify technical and SEO-related issues, and uncover opportunities for improvement.
News
Nothing to Update. All systems running smoothly.
What is SnobBots?
SnobBots is an advanced AI-powered automation platform designed to help businesses improve customer communication, generate more leads, and automate support through intelligent conversational AI.
Built for modern businesses, agencies, and resellers, SnobBots enables companies to deploy smart AI chatbots that can engage with website visitors in real-time, answer questions instantly, and provide accurate responses based on your own business data and website content.
Unlike traditional chat systems, SnobBots combines AI automation, lead generation, customer engagement, and business intelligence into one unified platform.
With SnobBots, businesses can:
- Deploy intelligent AI chatbots across websites
- Train chatbots using website content, files, and custom data
- Capture customer leads automatically during conversations
- Review full visitor conversation histories and enquiries
- Connect visitors directly to WhatsApp support teams
- Generate AI-powered blogs, FAQs, and content
- Analyse website performance using AI website audits
- Track chatbot engagement and performance analytics
- Customise chatbot tone, behaviour, and branding
- Offer full white-label AI solutions for agencies and resellers
SnobBots is designed to act as a 24/7 digital assistant for your business — helping visitors find information faster, improving support response times, and increasing conversion opportunities without requiring constant manual intervention.
The platform’s intelligent Lead Capture System allows businesses to automatically collect visitor details such as names, email addresses, and enquiry history directly from chatbot conversations. This enables teams to better understand customer intent and follow up with highly qualified leads.
SnobBots also includes integrated WhatsApp connectivity, allowing website visitors to seamlessly transition from AI chat support to live communication with your business through WhatsApp when needed.
In addition, the built-in AI Website Audit tools help businesses identify website issues, optimisation opportunities, and performance improvements to strengthen their digital presence.
Whether you are a small business looking to automate customer support, an enterprise improving operational efficiency, or an agency providing AI solutions to clients, SnobBots provides a scalable and intelligent platform built for modern digital communication.
– Creating your account
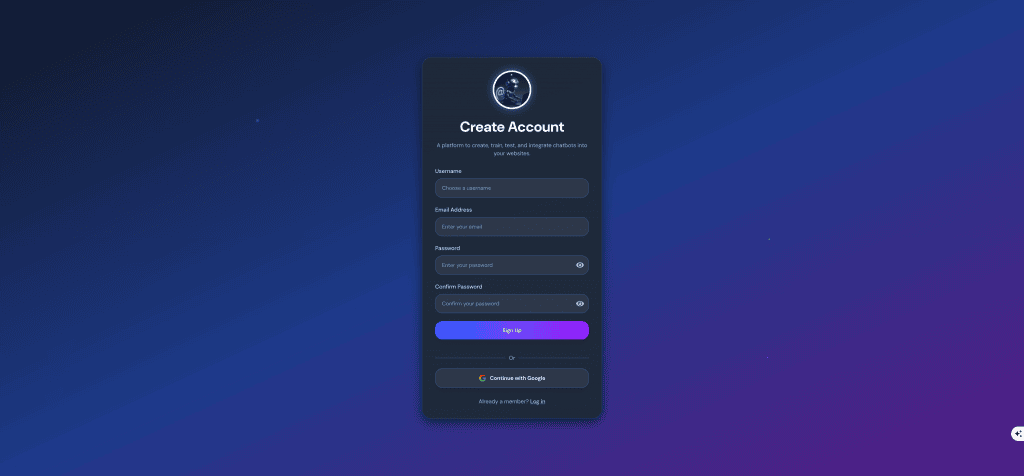
To get started with SnobBots, create your account by completing the registration form.
Enter the following information:
- Username
- Email Address
- Password
- Confirm Password
Once all required fields have been completed, click Sign Up.
You can also register using your Google account by selecting Continue with Google.
Verify Your Email Address
After registering, SnobBots will send a verification email to the email address you provided.
- Open your inbox.
- Locate the verification email from SnobBots.
- Click the verification link to activate your account.
Note: If you do not receive the email within a few minutes, please check your Spam or Junk folder before requesting another verification email.
Your account must be verified before you can log in.
Log In
Once your email has been verified:
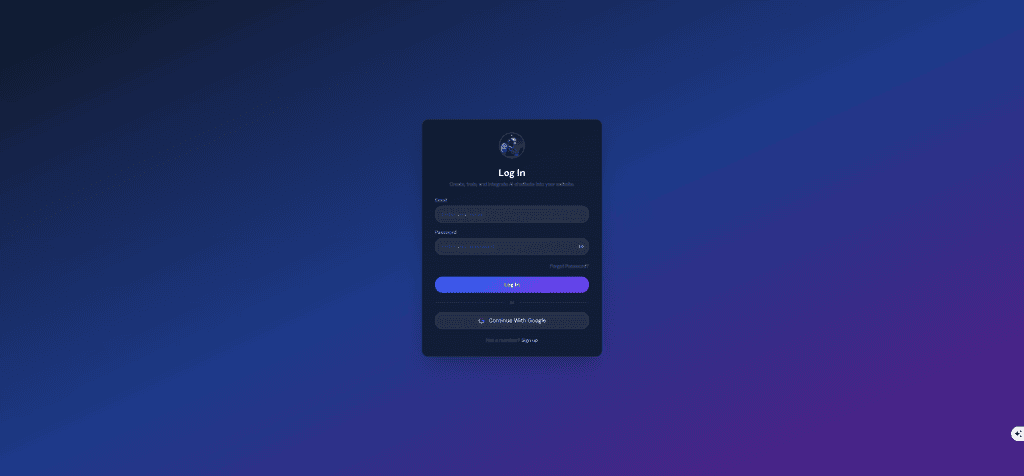
- Open the SnobBots login page.
- Enter your registered email address and password.
- Click Log In.
Alternatively, you can sign in using Continue with Google if you registered with your Google account.
If you’ve forgotten your password, select Forgot Password? to begin the password recovery process.
Your Dashboard
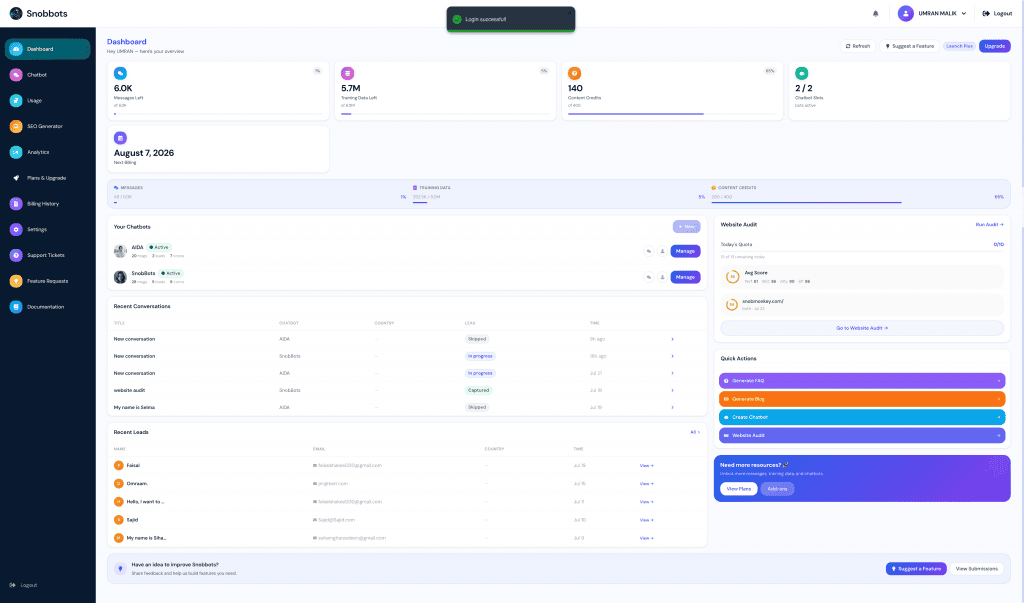
After successfully logging in, you’ll be taken to your Dashboard.
The dashboard provides a quick overview of your account, including:
- Remaining Messages
- Training Data Usage
- Available Content Credits
- Active Chatbots
- Website Audit Summary
- Recent Conversations
- Recent Leads
- Quick Actions
- Billing Information
From the dashboard, you can access all SnobBot’s features using the navigation menu on the left-hand side.
– Navigating the dashboard
The Dashboard is your central control panel. It gives you a quick overview of your account activity, chatbot performance, available resources, recent leads, and shortcut actions — all from one screen.
Whether you are managing chatbots, generating SEO content, or reviewing customer conversations, the dashboard helps you monitor everything efficiently.
Dashboard Overview
When you log in, you are automatically taken to the Dashboard.
The dashboard is designed to give you a high-level summary of your account and access to the platform’s main tools.
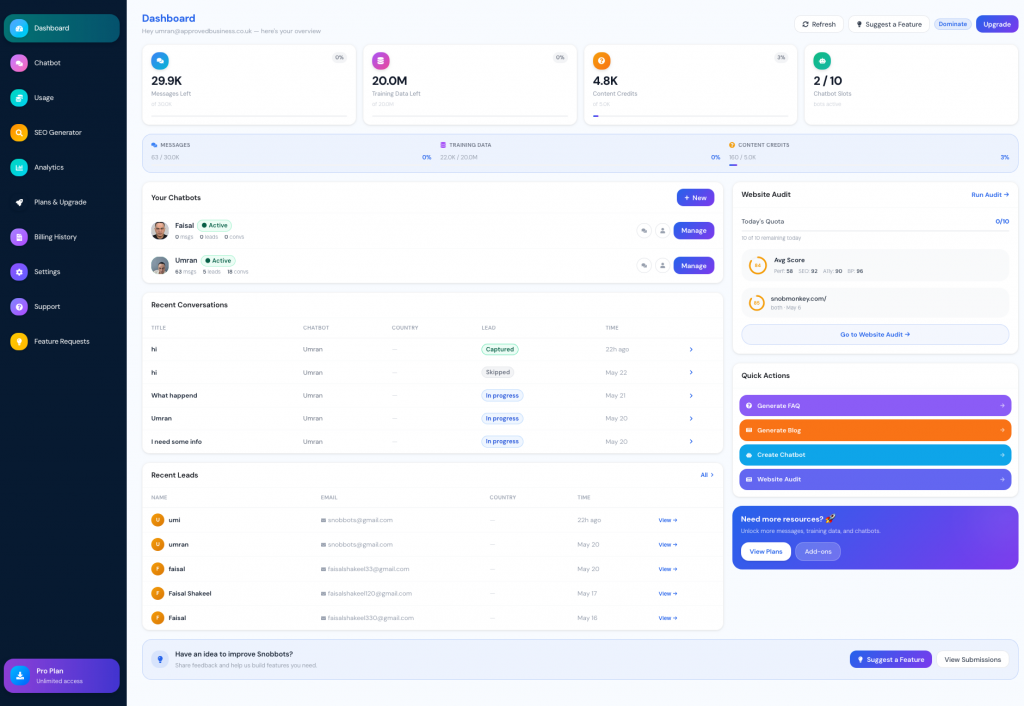
Main Areas of the Dashboard
- Resource Usage Summary
At the top of the dashboard, you will see your account usage statistics.
These include:
- Messages Left
Shows how many AI chatbot messages remain in your plan. - Training Data Left
Displays how much training data storage is still available. - Content Credits Left
Used for AI-generated content such as blogs and FAQs. - Chatbot Slots Used
Shows how many chatbot slots are currently active on your account.
Example:
If your plan allows 10 chatbots and you have created 2, the dashboard will display 2 / 10.
- Your Chatbots
The Your Chatbots section displays all chatbots currently connected to your account.
For each chatbot, you can view:
- chatbot name
- active status
- message count
- leads generated
- conversation count
You can also click Manage to open and edit a chatbot.
To Manage a Chatbot
- Locate the chatbot in the list
- Click the Manage button
- Open the chatbot settings and configuration panel
- Website Audit Summary
The Website Audit panel provides a quick SEO and website performance overview.
You can:
- view your audit score
- monitor SEO performance
- run a new website audit
To Run a Website Audit
- Click Run Audit
- Enter your website URL
- Start the scan
- Review recommendations and scores
- Recent Conversations
This section displays the latest chatbot conversations from your visitors.
You can quickly see:
- conversation title
- chatbot used
- lead status
- date and time
Lead statuses may include:
- Captured
- In Progress
- Skipped
This helps you monitor chatbot engagement and customer interactions.
- Recent Leads
The Recent Leads section stores visitor leads collected through your AI chatbots.
Information shown includes:
- lead name
- email address
- capture date
To view more details:
- Locate the lead
- Click View
- Quick Actions
Quick Actions provide shortcuts to commonly used tools.
Available shortcuts include:
- Generate FAQ
- Generate Blog
- Create Chatbot
- Website Audit
These shortcuts allow you to access important tools without navigating through multiple menus.
- Plans & Resources
The lower-right section allows you to:
- upgrade your plan
- purchase add-ons
- unlock additional resources
Examples include:
- extra chatbot slots
- additional messages
- more training data
- extra content credits
- Feature Suggestions
At the bottom of the dashboard, you can submit feature requests directly to the team.
To Suggest a Feature
- Click Suggest a Feature
- Enter your idea or request
- Submit the suggestion
The team reviews user feedback for future platform improvements.
Left Navigation Menu
The left sidebar contains the main navigation menu for the platform.
Available sections include:
- Dashboard / Chatbot / Usage / SEO Generator / Analytics / Plans & Upgrade / Billing History / Settings / Support / Feature Requests
Your current subscription plan is also displayed at the bottom of the menu.
Creating a Chatbot
Creating a new AI chatbot in SnobBots only takes a few steps. Each chatbot can be configured individually, allowing you to create separate AI assistants for different websites, businesses, departments, services or purposes.
Create a New Chatbot
From the SnobBots dashboard, select Chatbot from the main navigation menu.
This will take you to the My Chatbots section, where you can view and manage all of the chatbots associated with your account.
The My Chatbots screen also provides an overview of your chatbots, including their current status, message usage and training information.
To create a new chatbot, click + Create Bot in the top-right corner of the screen.
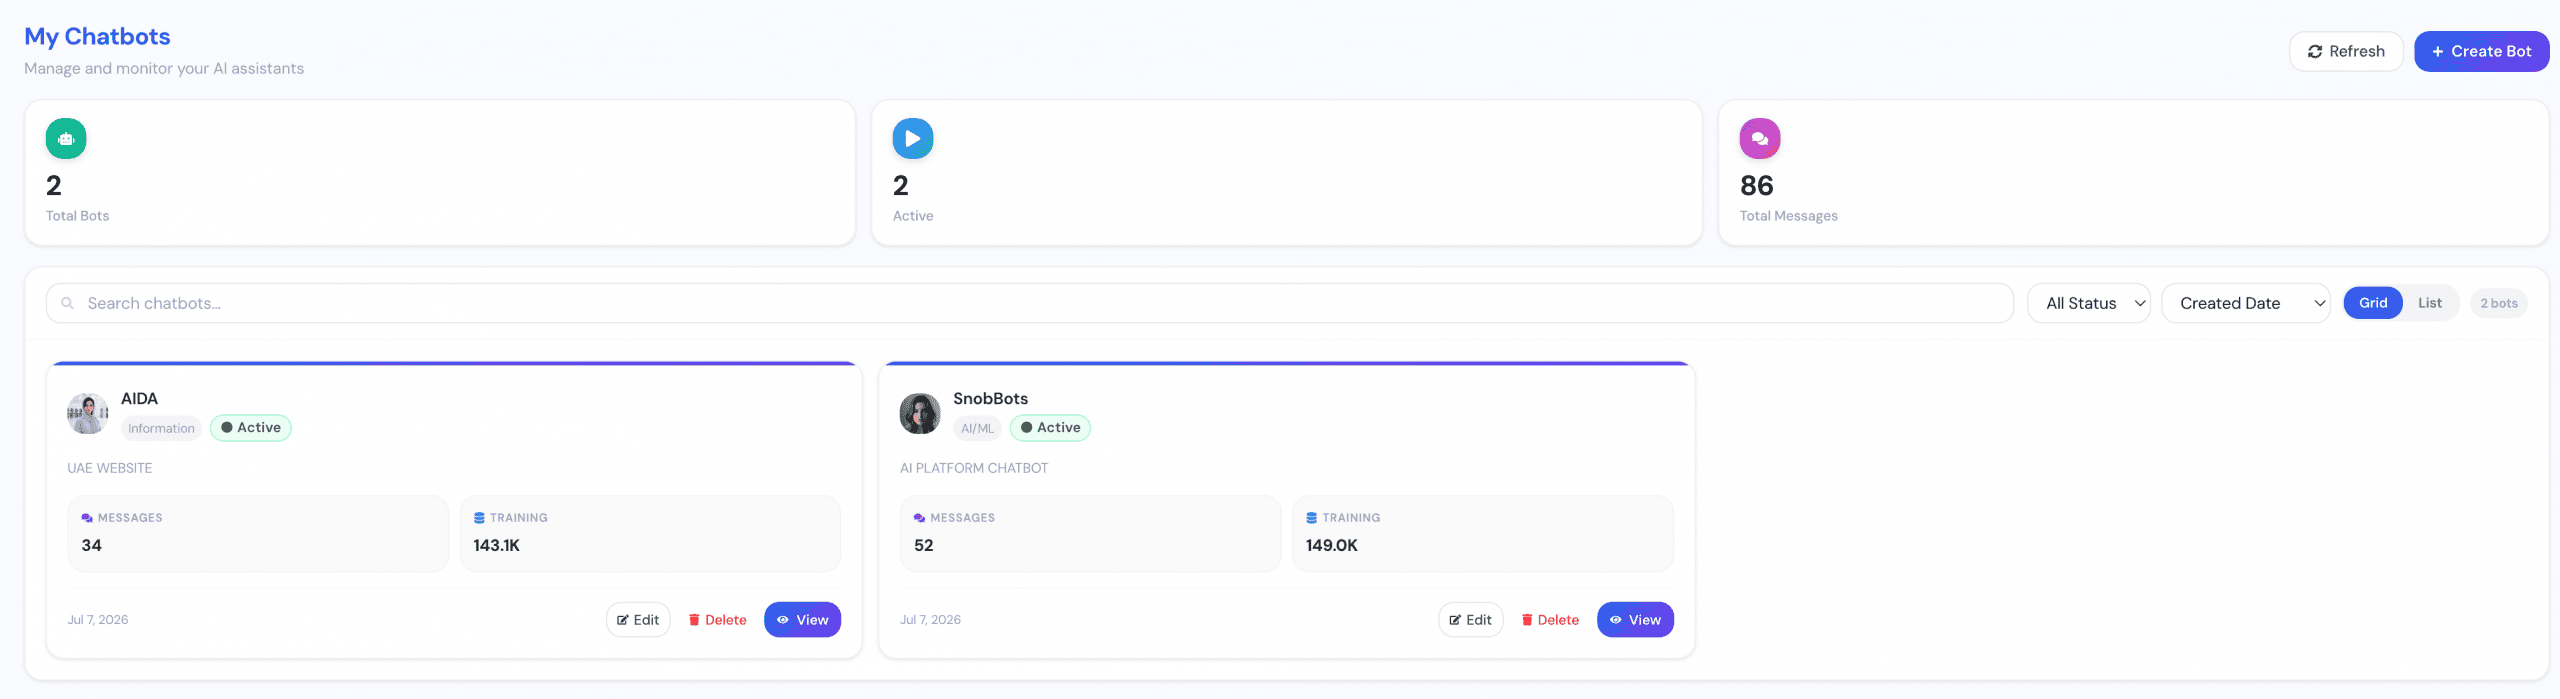
Configure Your Chatbot
You will now be taken to the Create New Chatbot screen.
Here, you can enter the basic information that will help you identify and organise your chatbot.
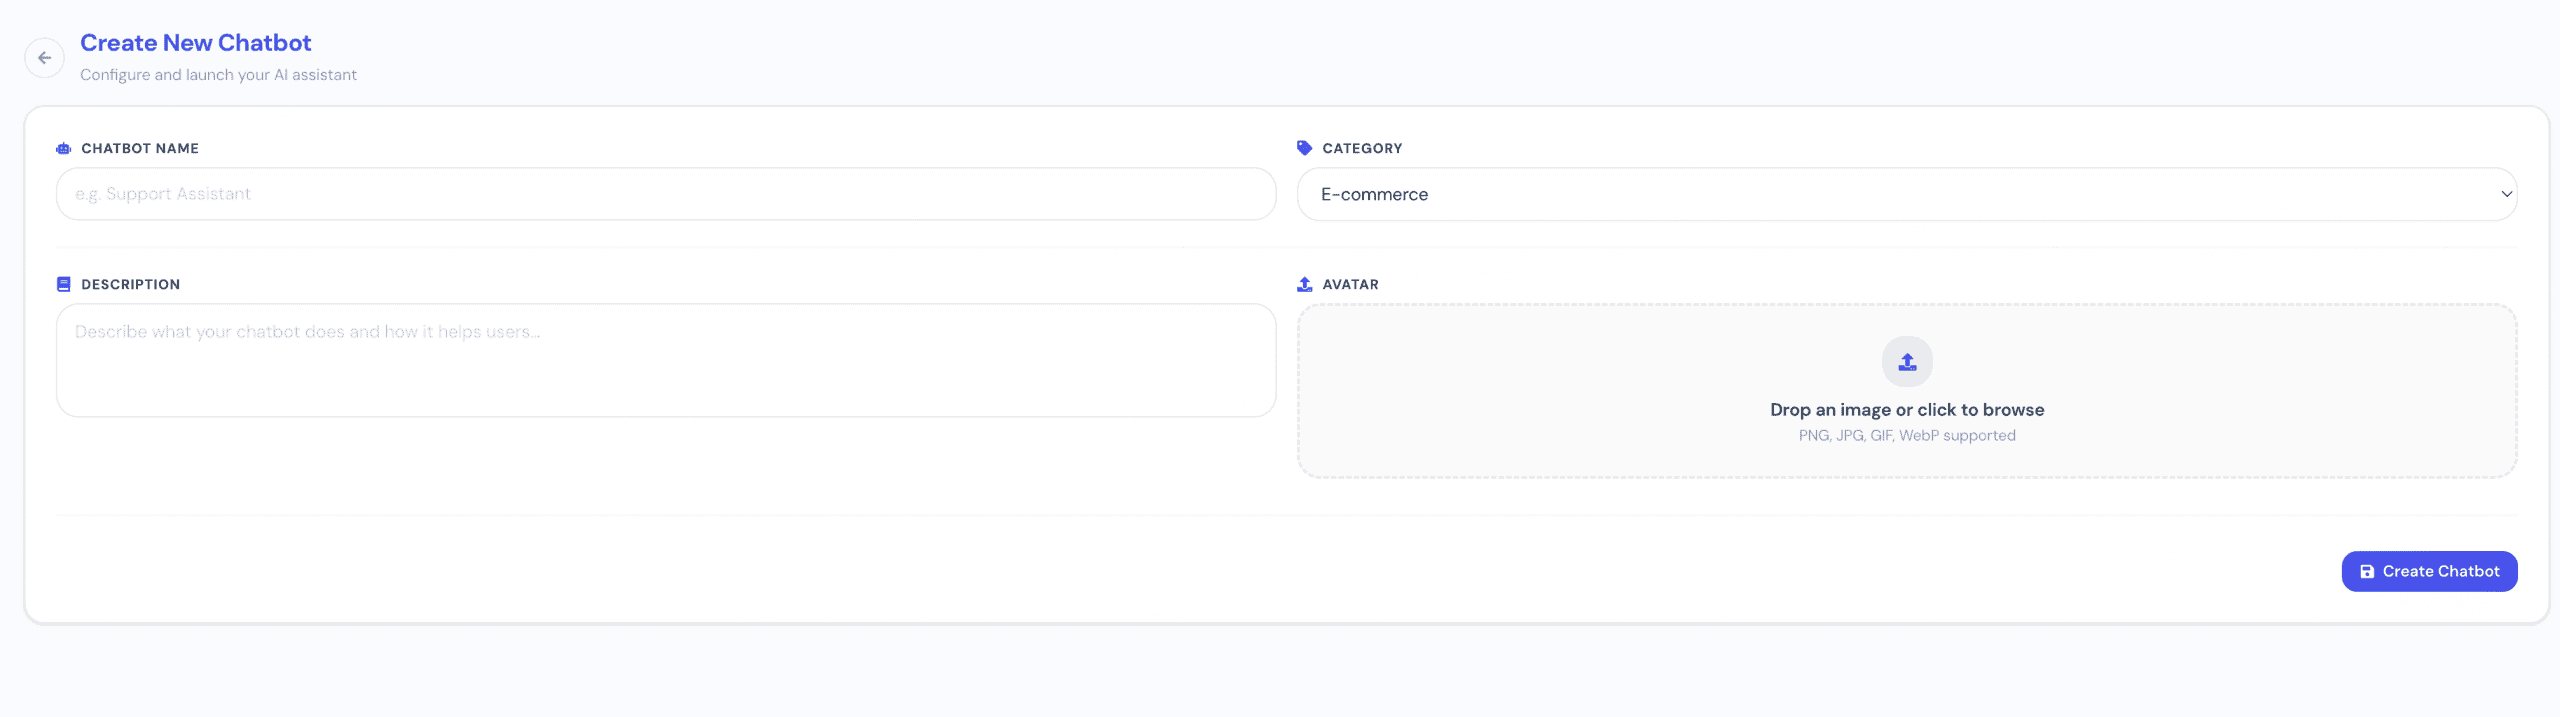
Chatbot Name
Enter a name for your chatbot.
This could be the name of your business, website, service or the role the chatbot will perform.
For example:
-
Customer Support
-
Sales Assistant
-
Website Assistant
-
Product Support
-
AIDA
Choose a name that makes the chatbot easy to identify, particularly if you intend to manage several chatbots within your SnobBots account.
Category
Choose a category that best represents the purpose of your chatbot.
Categories help you organise your chatbots, especially when managing multiple AI assistants for different businesses, websites or purposes.
Depending on your requirements, categories could include areas such as E-commerce, Services, Solutions or Help & Support.
You can select an existing category or create a new category to suit the way you want to organise your chatbots.
Description
Add a short description explaining what the chatbot is intended to do.
The description is particularly useful when you have several chatbots, as it allows you to quickly identify the purpose of each one.
For example:
AI assistant for answering customer questions about our products, services, pricing and support.
Keeping the description clear and concise will make managing multiple chatbots much easier.
Avatar
You can upload your own image to use as the chatbot’s avatar.
Simply drag and drop an image into the Avatar area or click the upload area to browse your device.
Supported image formats include PNG, JPG, GIF and WebP.
Your avatar could be a company logo, brand icon, character, team member or another image that represents the chatbot.
Don’t worry if you do not have an avatar ready when creating the chatbot. Once the chatbot has been created, you can customise its appearance further and choose from the available SnobBots avatar options.
Create Your Chatbot
Once you have entered the required information, click Create Chatbot.
SnobBots will create your new AI assistant and add it to your account.
The new chatbot will then be available within My Chatbots and can also be accessed through your Dashboard.
From here, you can continue setting up your chatbot by adding training data, customising its appearance, configuring integrations and preparing it for use on your website.
Tip: If you plan to create several chatbots, use clear names, categories and descriptions from the beginning. This makes it much easier to identify and manage each chatbot as your account grows.
Training Your Chatbot
Training your chatbot gives it the knowledge it needs to provide accurate, relevant answers about your business, products and services.
SnobBots provides several ways to train your AI chatbot. You can use your website content, upload documents, create specific question-and-answer pairs, or enter information directly as text. These methods can be used individually or together to build a more comprehensive knowledge base.
To begin, open the chatbot you want to manage and select the Training tab.
Training Methods
Within the Training section, you will find four ways to add knowledge to your chatbot:
-
Web Crawling – Discover and train from pages on your website.
-
File Upload – Upload documents containing additional business information.
-
Q&A – Add specific questions together with the answers you want the chatbot to provide.
-
Direct Text – Enter or paste information directly into the chatbot’s knowledge base.
You can combine all four methods. This is particularly useful when important information about your business is not published on your website.
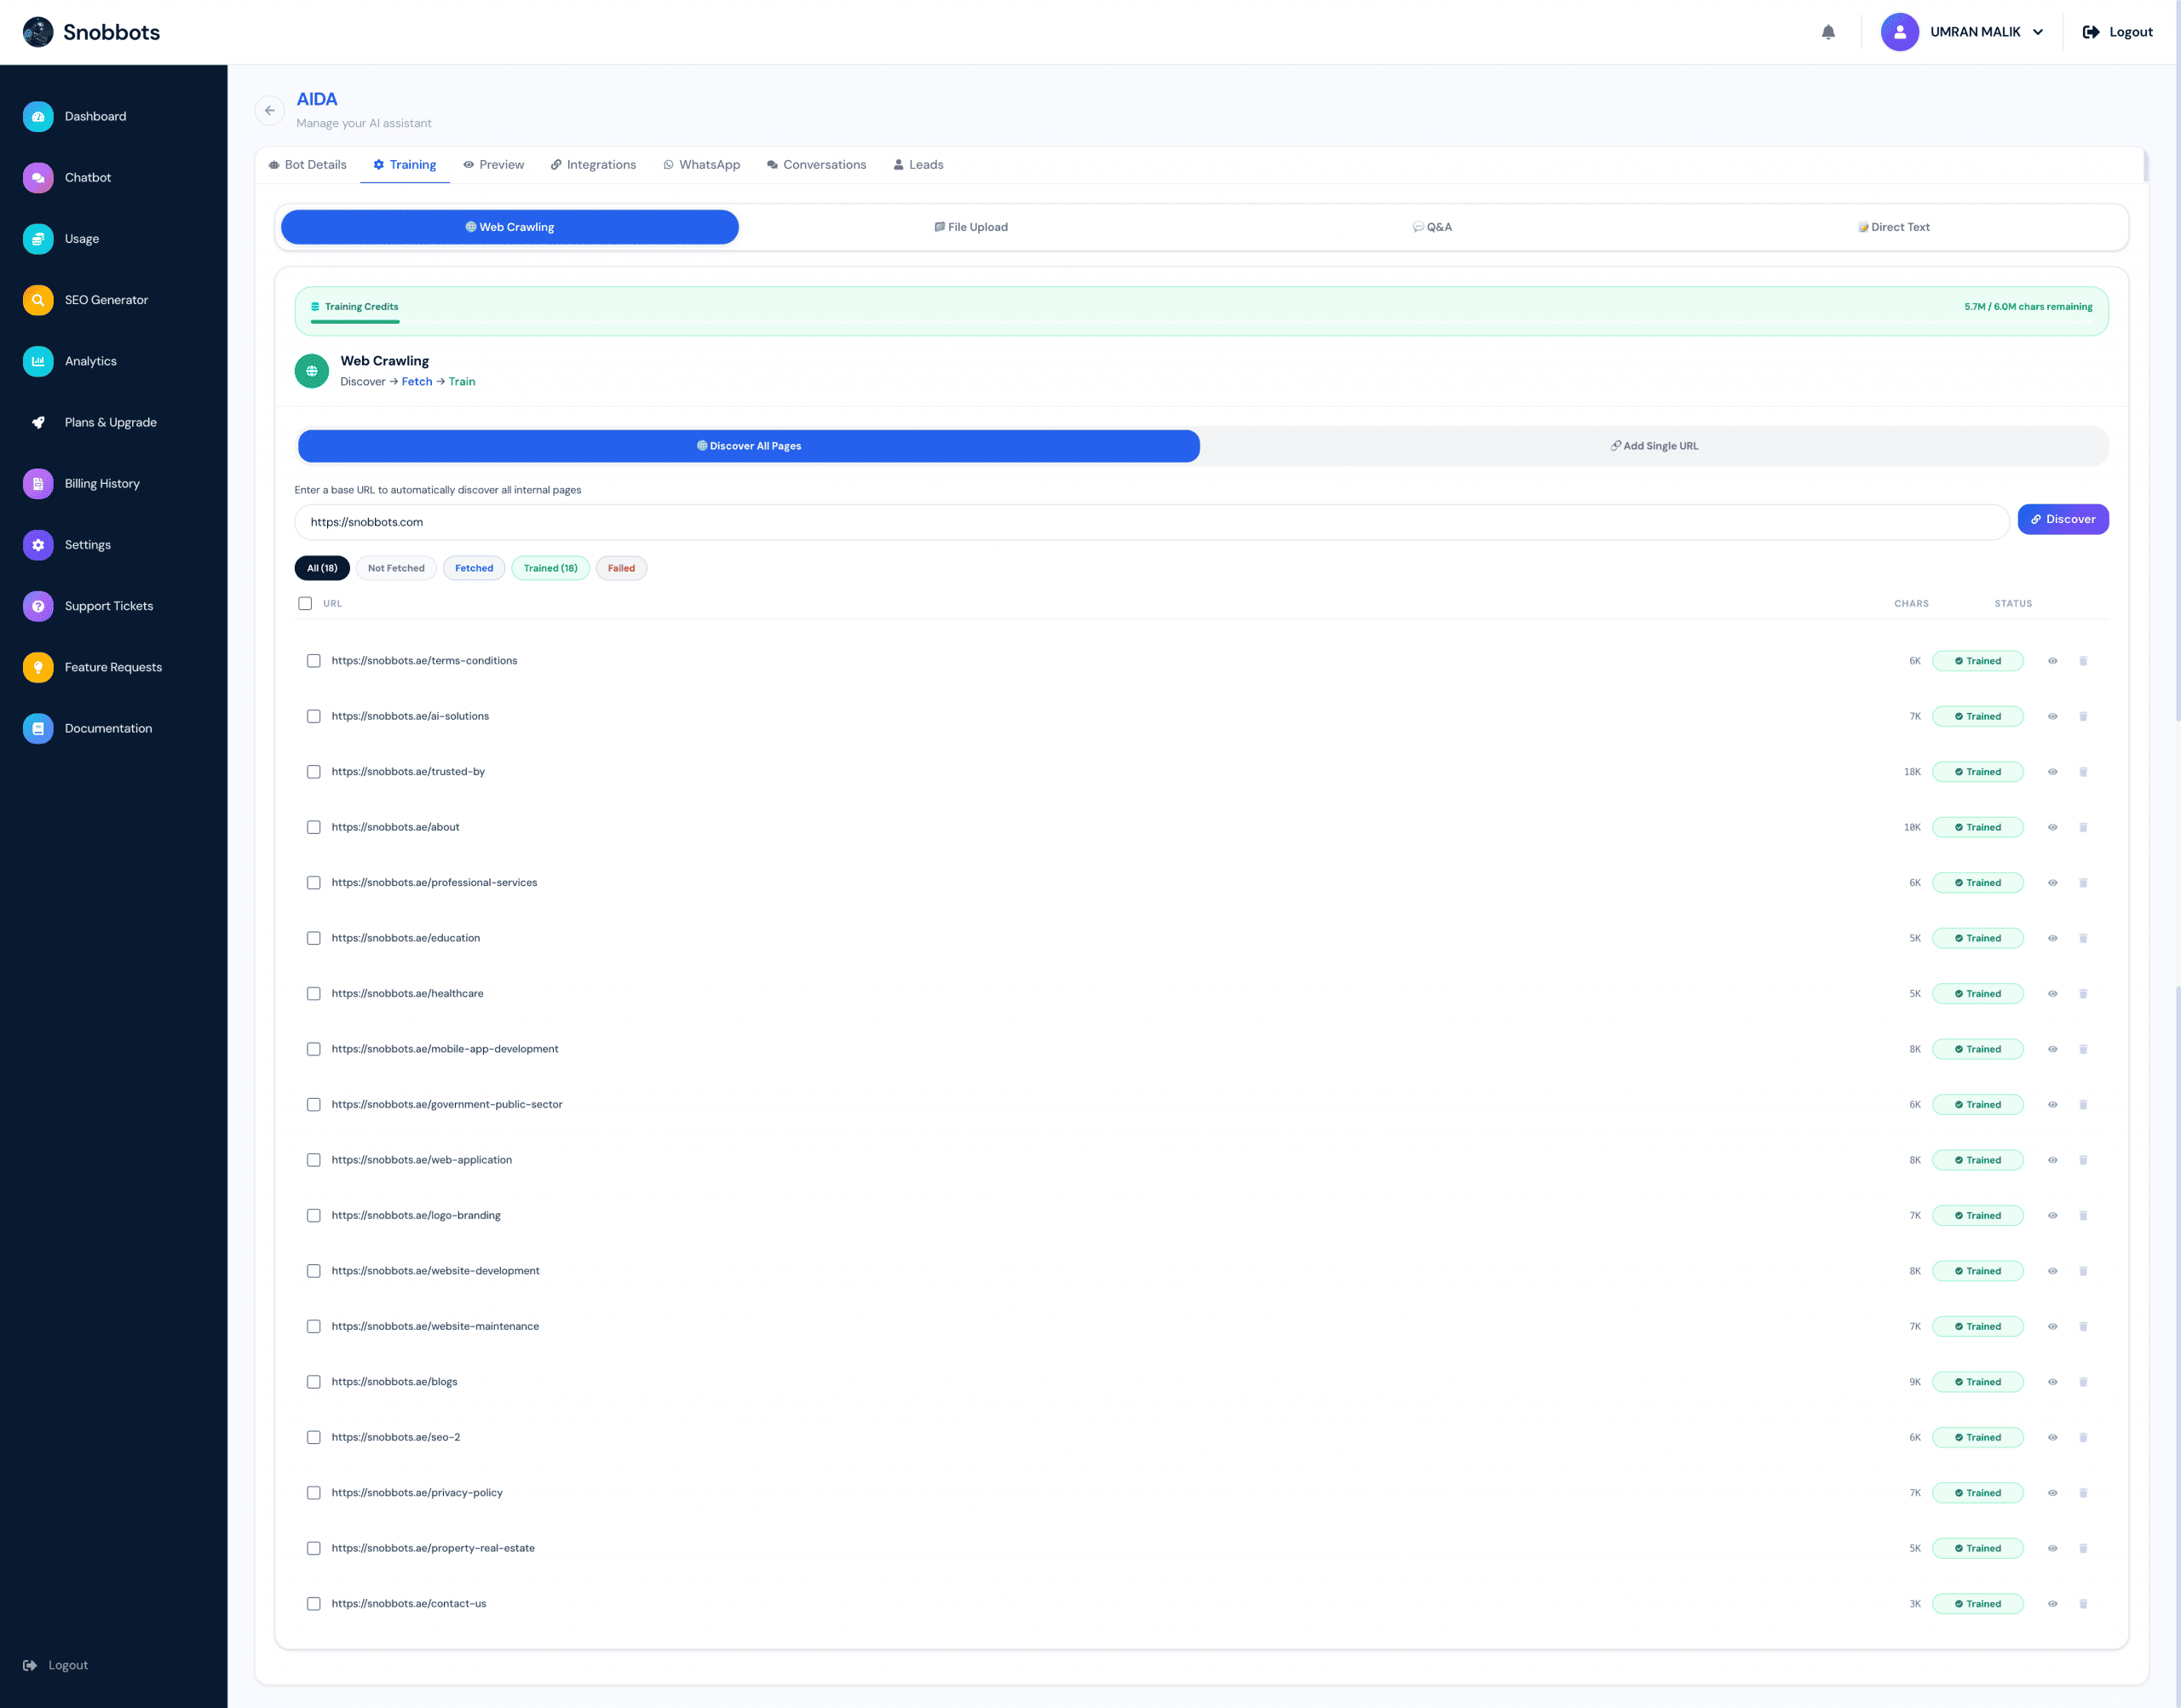
Web Crawling
Web Crawling allows SnobBots to discover pages on your website and use their content to train your chatbot.
Enter your website address into the URL field and click Discover.
SnobBots will crawl the website and identify the pages it can find. Once discovery is complete, the available URLs will appear underneath the website address.
You can then select all pages or choose only the individual pages containing information you want the chatbot to learn.
Once you have made your selection, click Train.
SnobBots will process the selected pages and add their content to the chatbot’s knowledge base.
The page filters allow you to keep track of the training process, including:
-
All – View all discovered pages.
-
Not Fetched – Pages that have not yet been successfully retrieved.
-
Fetched – Pages whose content has been successfully collected.
-
Trained – Pages that have been successfully added to the chatbot’s knowledge base.
-
Failed – Pages that could not be processed successfully.
After training, you can use the Trained section to confirm which pages are currently being used by your chatbot. If a page appears under Failed, you can investigate the page and attempt to process it again.
If your website changes significantly, you can retrain relevant pages so that your chatbot’s knowledge remains up to date.
File Upload
Your chatbot does not have to rely solely on information published on your website.
The File Upload section allows you to provide additional documents containing information about your company, products, services, procedures or other material that may be useful when answering customer questions.
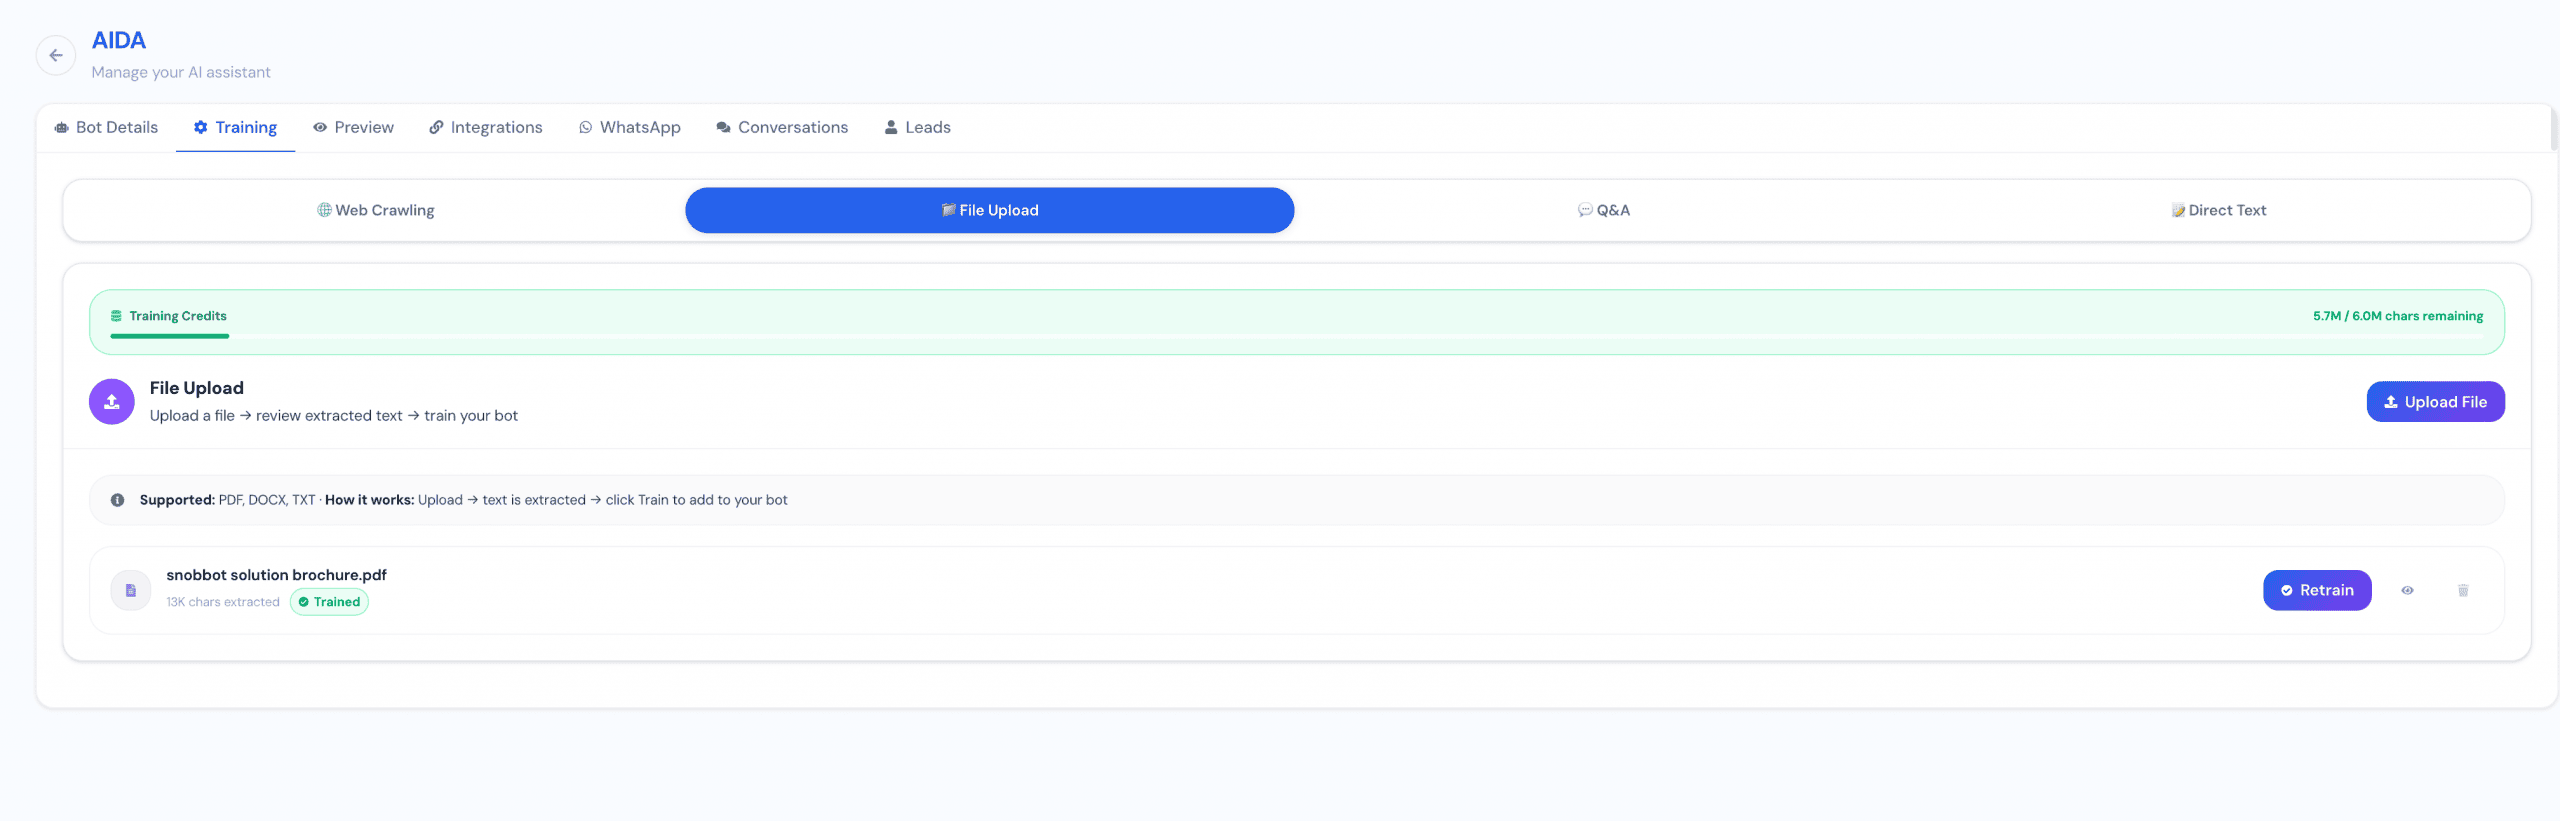
Click Upload File and select the document you want to add.
Once uploaded, SnobBots extracts the relevant text from the file. You can review the extracted information before training the chatbot.
This is useful for information such as:
-
Product and service information
-
Company brochures
-
Internal knowledge documents
-
Price or service information
-
Policies and procedures
-
Product specifications
-
Frequently asked questions
-
Sales and customer service information
-
Other business information that may not appear on your website
Once the information has been processed, train the file to add its content to the chatbot’s knowledge base.
Previously trained files are displayed within the File Upload section, allowing you to see which documents have already been used. If the information in a document changes, you can upload the updated version or use the available Retrain option where appropriate.
Q&A Pairs
The Q&A section gives you greater control over how your chatbot handles particular questions.
Enter a Question and the corresponding Answer you would like the chatbot to know, then train the pair.
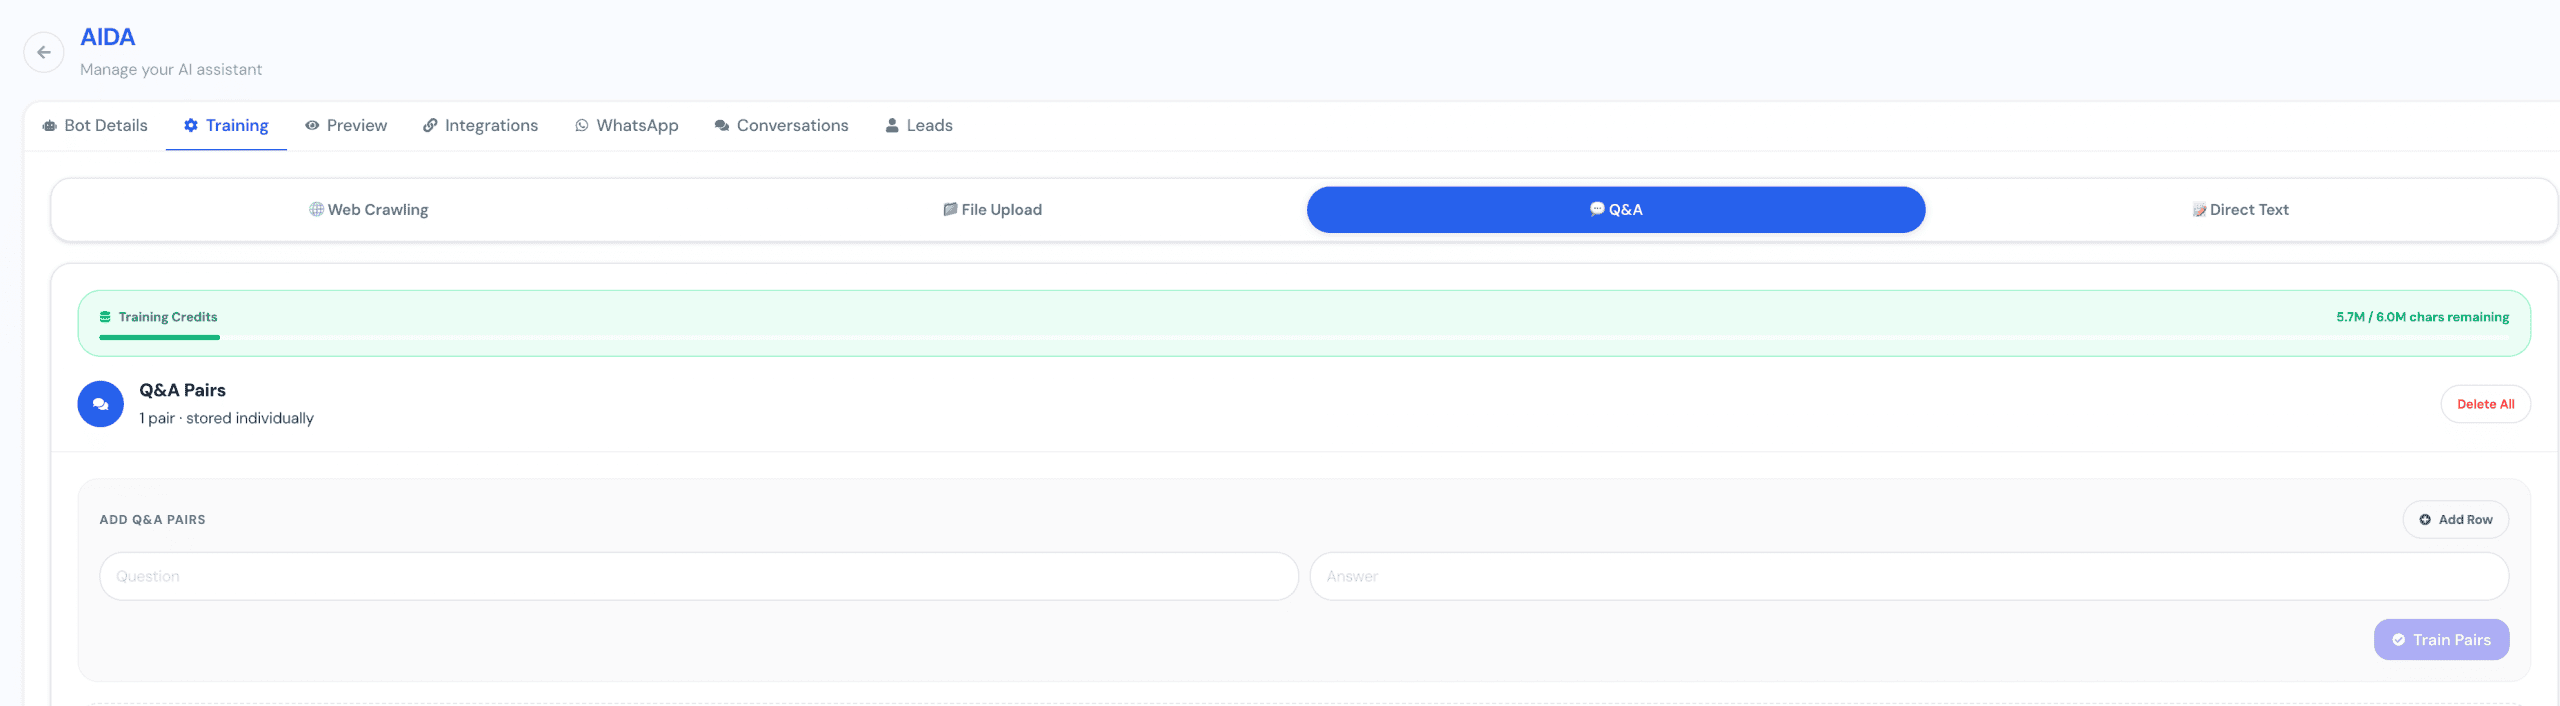
For example:
Question: Do you offer website maintenance?
Answer: Yes. We provide ongoing website maintenance services covering updates, security, backups, performance and technical support.
You can add multiple Q&A pairs and train them individually.
This feature is particularly useful when you know customers regularly ask certain questions or when you want to make sure the chatbot has specific information available when responding to a particular type of enquiry.
Q&A pairs can also cover information that does not appear anywhere on your public website.
Direct Text
The Direct Text section allows you to type or paste information directly into SnobBots and use it to train your chatbot.
This is one of the quickest ways to provide additional knowledge without creating a webpage or document first.
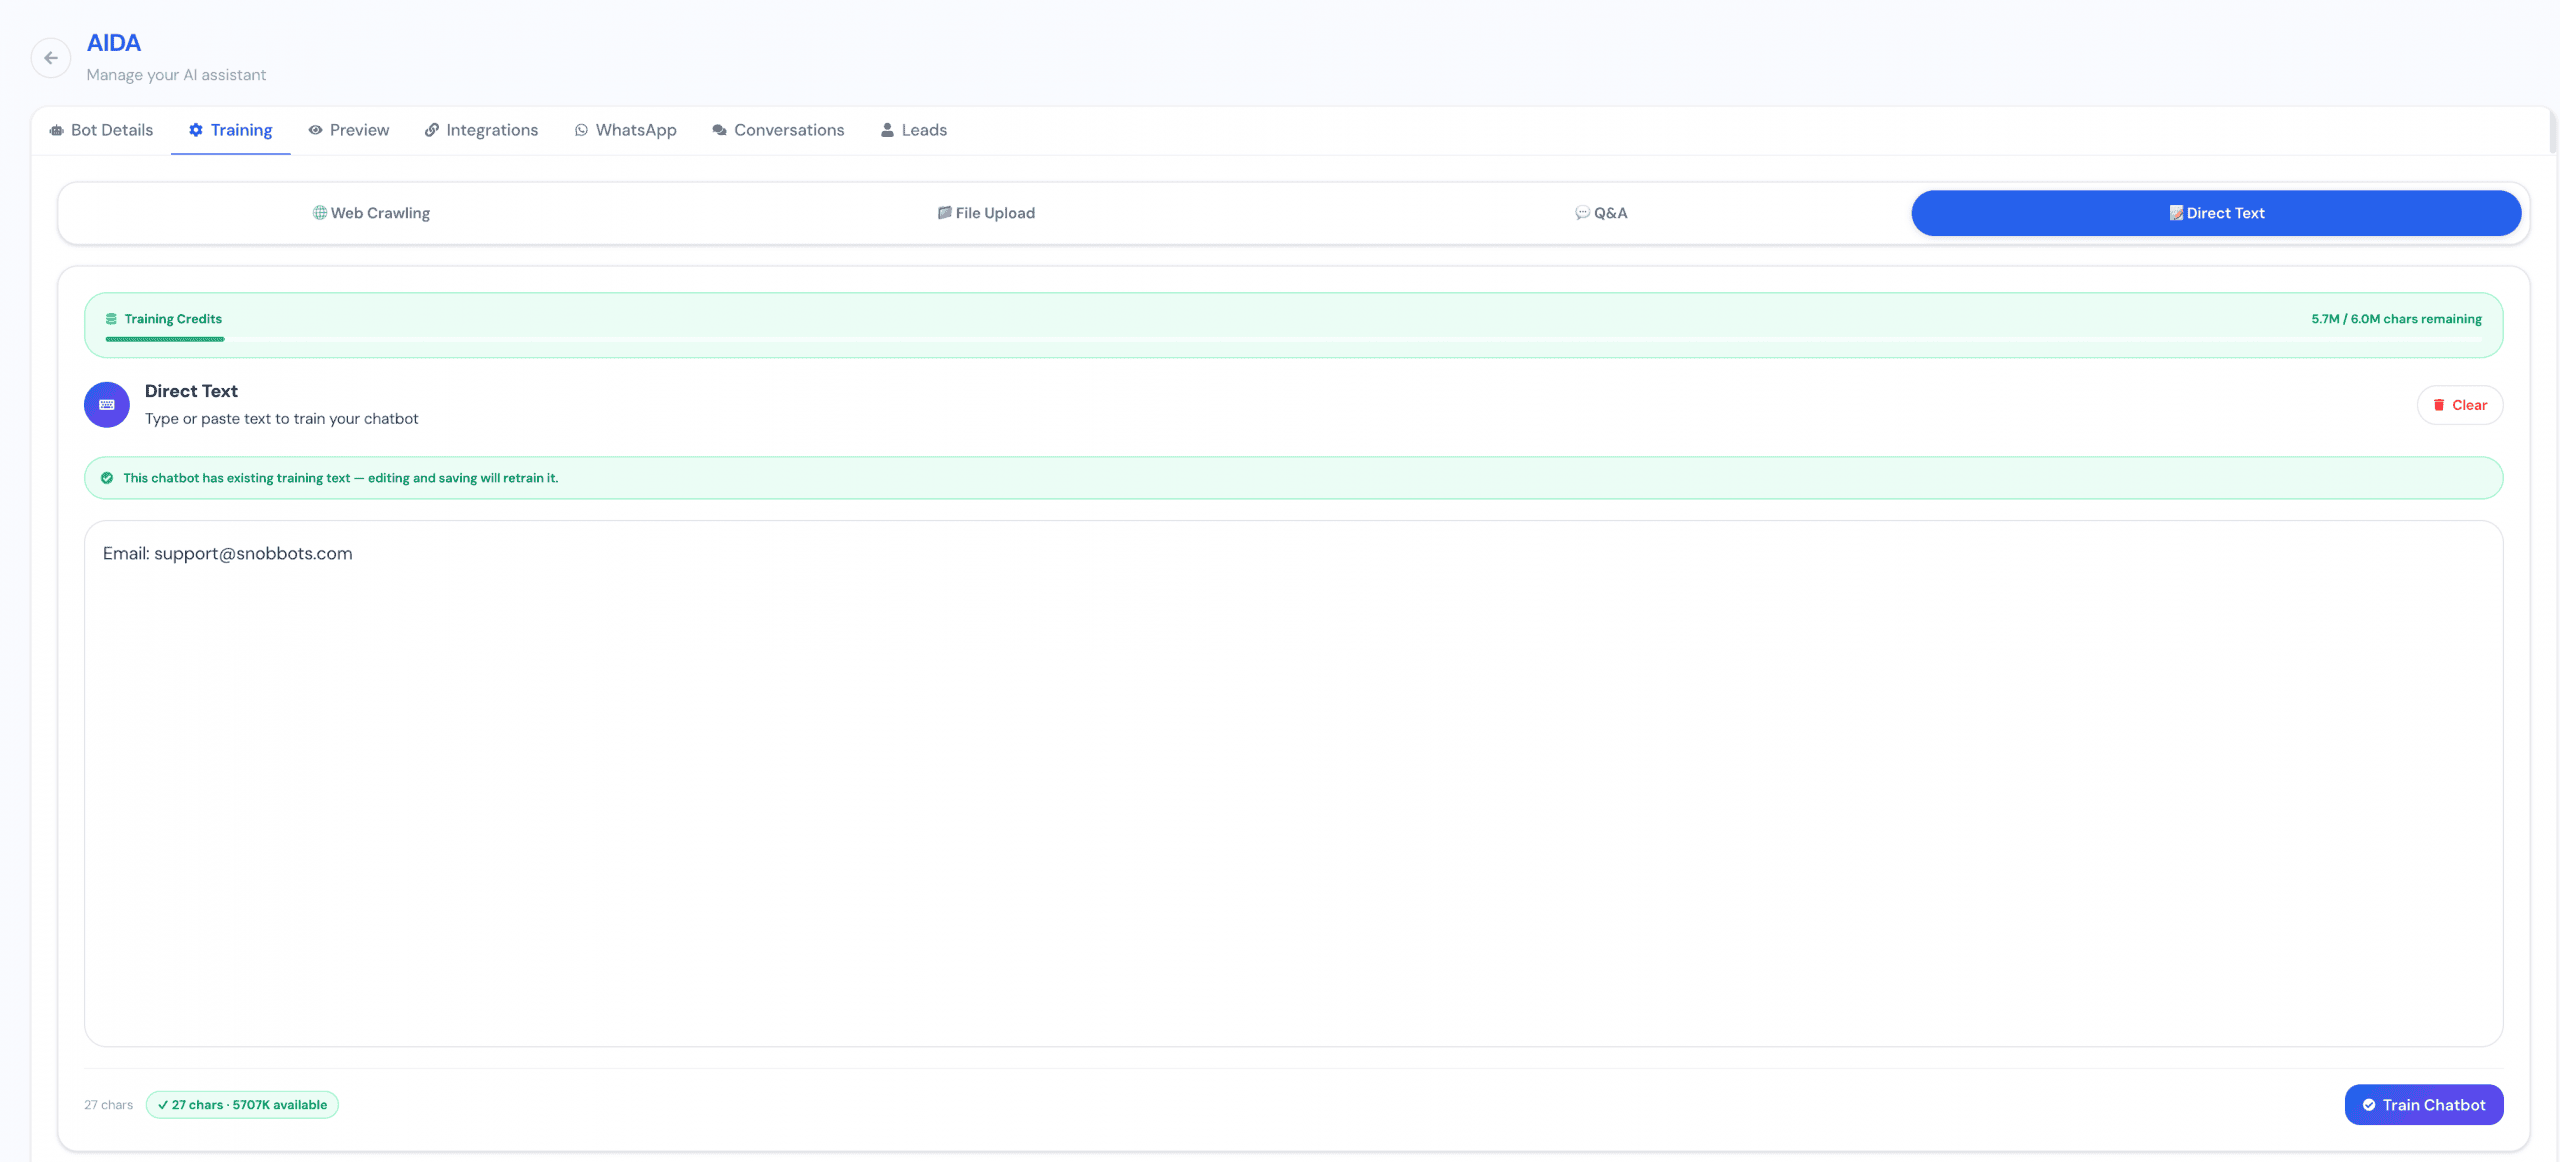
For example, you could add:
Our customer support team is available Monday to Friday. For support enquiries, customers can email support@snobbots.com.
Enter or paste the information into the text area and click Train Chatbot.
The text will then become part of the chatbot’s knowledge base.
Direct Text is useful for information such as temporary business information, contact details, special instructions, service details, company policies or other information you want your chatbot to understand.
If Direct Text has already been trained, you can edit the existing information and train it again to update the chatbot’s knowledge.
Using Multiple Training Sources
For the best results, you do not need to choose just one training method.
A chatbot might be trained using your main website pages through Web Crawling, a detailed product brochure through File Upload, common customer enquiries through Q&A, and additional business information through Direct Text.
Together, these sources create a broader knowledge base and help the chatbot answer questions that may not be covered by your website alone.
Training Credits
At the top of the Training section, SnobBots displays your available Training Credits.
Training content uses characters from your available training allowance. The dashboard shows how many characters remain, helping you monitor your usage before adding additional websites, files or text.
Your available allowance depends on your current SnobBots plan and any additional training credits you have purchased.
Keeping Your Chatbot Up to Date
Your chatbot is only as current as the information it has been trained on.
Whenever you make significant changes to your website, introduce new products or services, change policies, update pricing or modify important business information, review your chatbot’s training data and update or retrain the relevant content.
Keeping your training data accurate and current helps your SnobBots AI chatbot provide more useful and reliable answers to your customers.
Tip: Include information customers are likely to ask about even when that information is not currently available on your website. Combining Web Crawling, File Uploads, Q&A Pairs and Direct Text gives your chatbot a much stronger understanding of your business.
Customising Chatbots
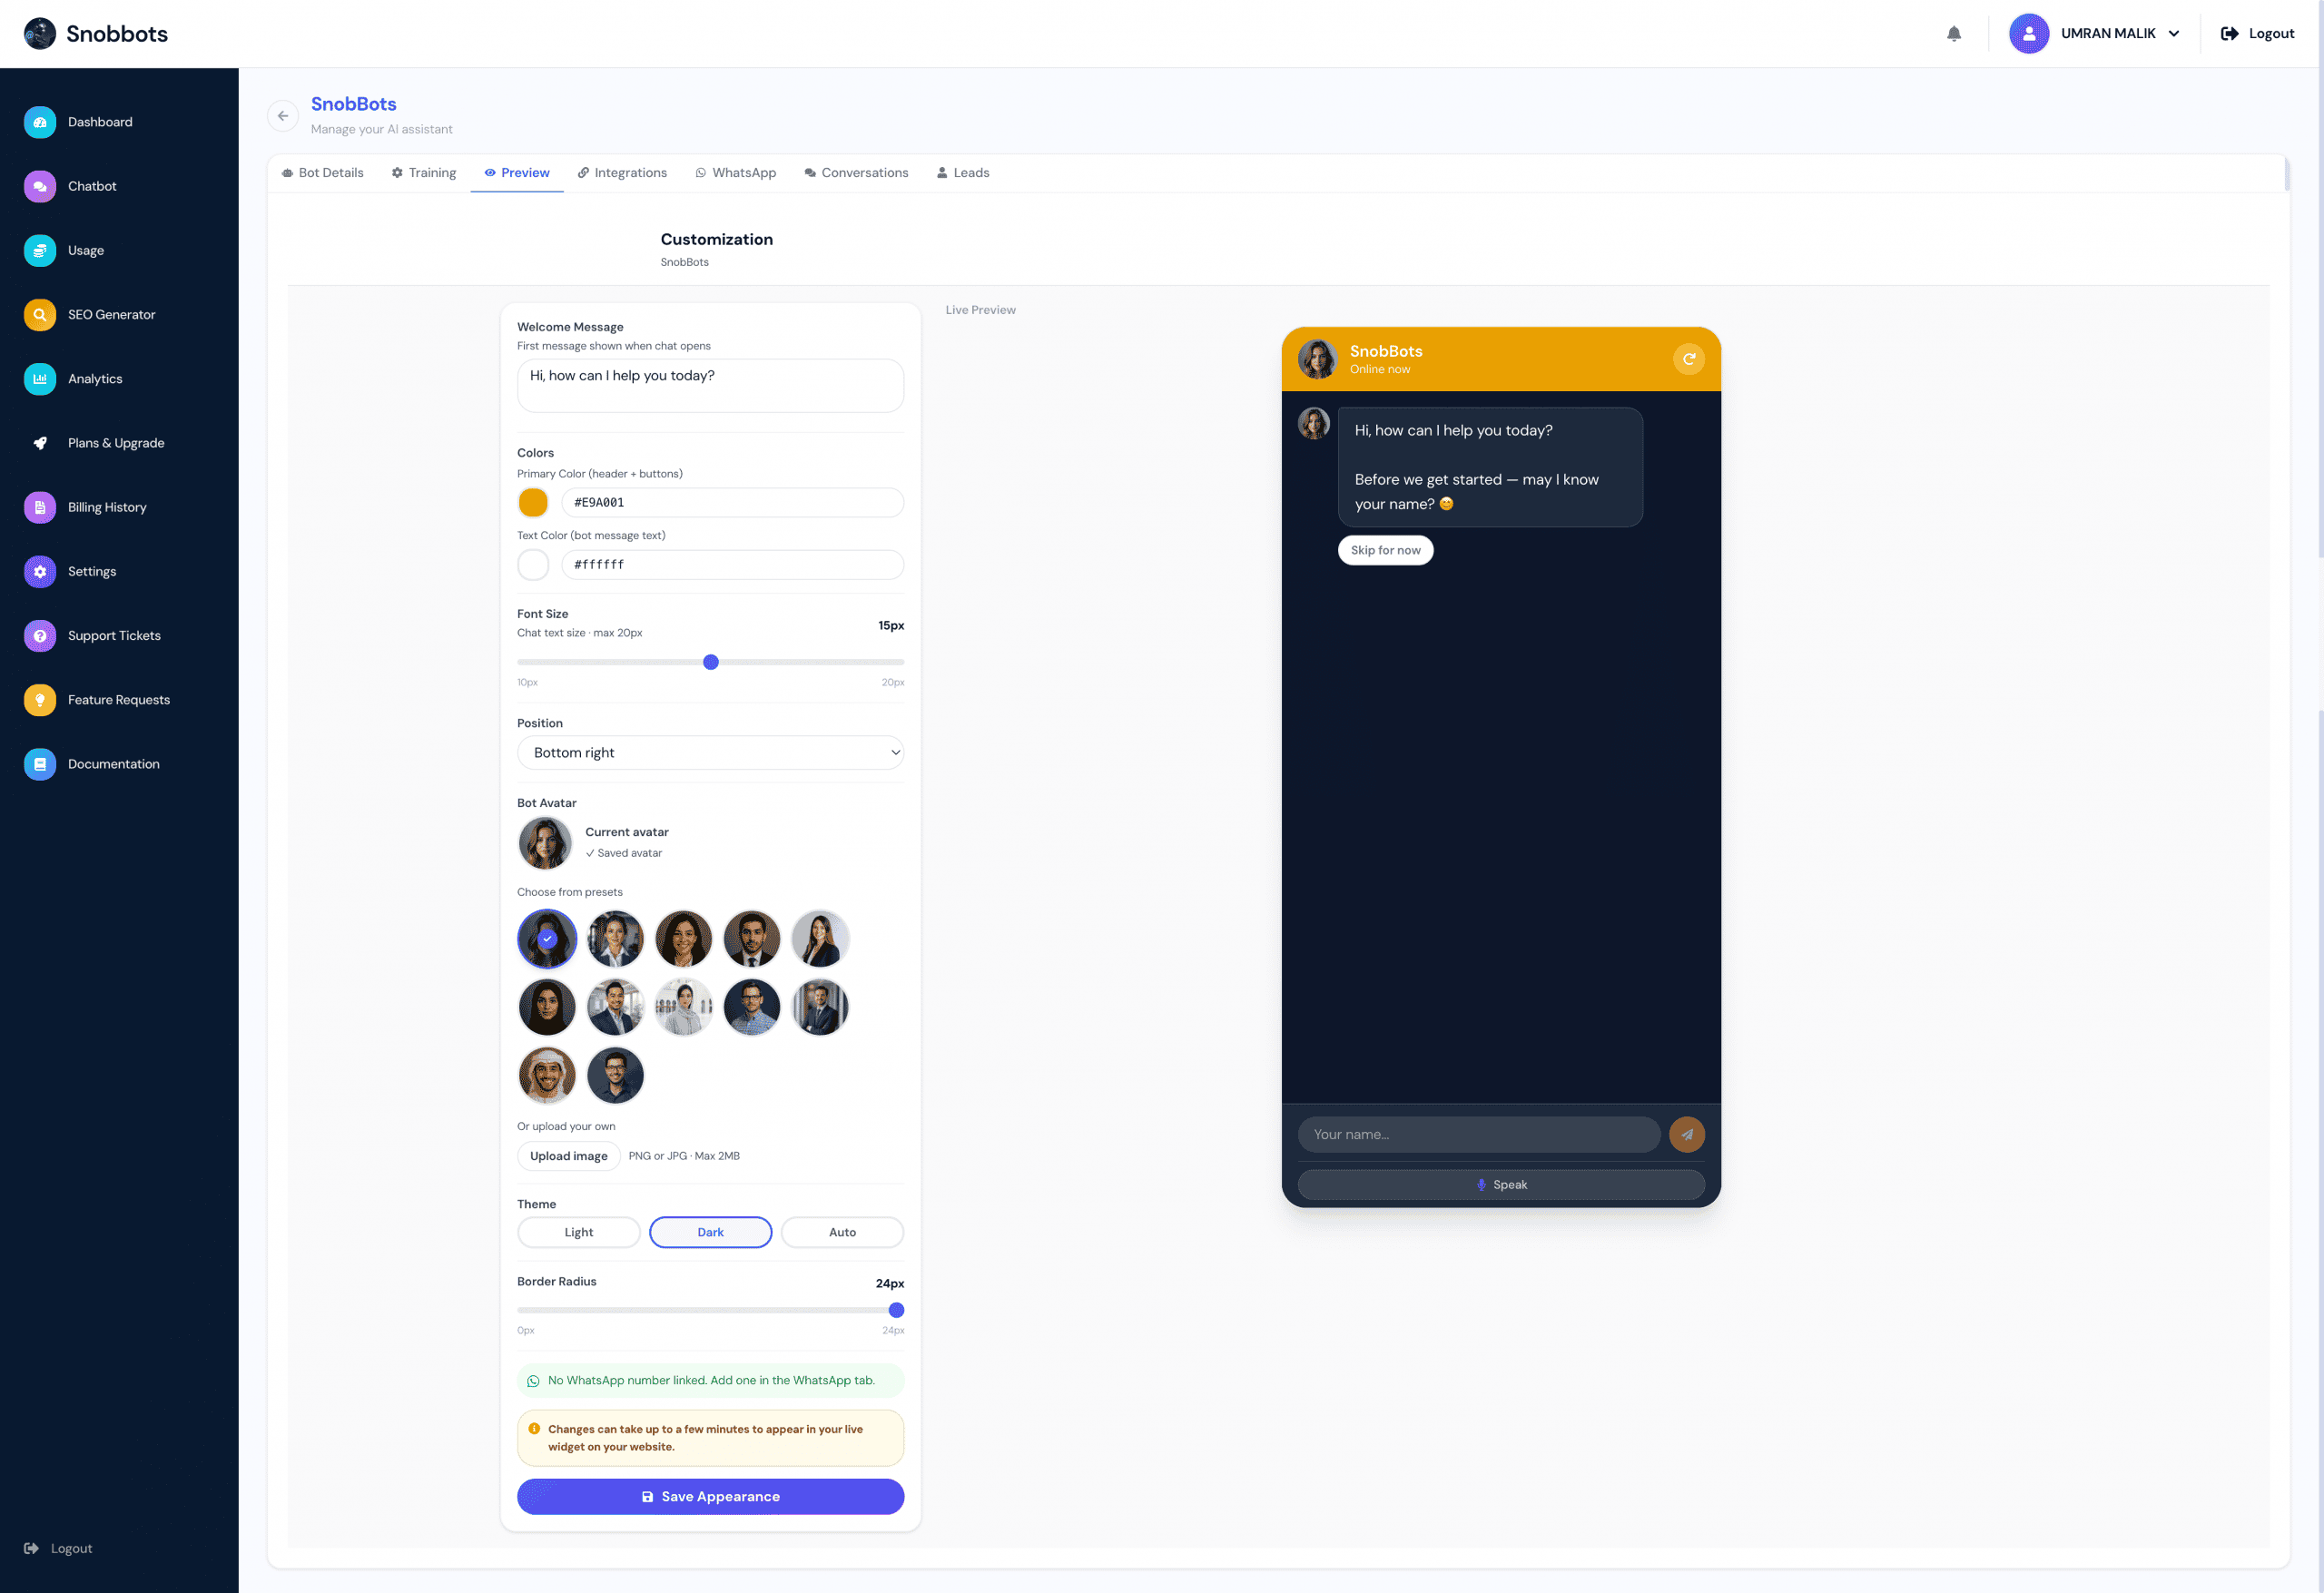
The Preview section allows you to customise the appearance of your chatbot so that it matches your website and brand identity.
You can change the welcome message, colours, text size, widget position, avatar, theme and corner style. You can also connect a WhatsApp Business number, allowing visitors to move from the chatbot to a conversation with a member of your team.
Accessing the Customisation Settings
To customise your chatbot:
- Log in to your SnobBots account.
- Select Chatbot from the left-hand navigation menu.
- Open the chatbot you want to customise.
- Select the Preview tab from the top navigation menu.
The customisation controls will appear on the left, with a live preview of the chatbot displayed on the right.
Welcome Message
The Welcome Message is the first message visitors see when they open the chatbot.
Use this field to introduce the chatbot, welcome visitors or explain how it can help them.
Example:
“Hi, how can I help you today?”
Keep the welcome message short, friendly and relevant to your business.
Primary Colour
The Primary Colour setting controls the main accent colour used throughout the chatbot.
This colour is applied to areas such as:
• The chatbot header.
• Action buttons.
• The send button.
• Other highlighted elements.
You can select a colour using the colour picker or enter a specific hexadecimal colour code.
Using your main brand colour helps the chatbot feel like a natural part of your website.
Text Colour
The Text Colour setting controls the colour of the text displayed inside the chatbot’s message areas.
You can select the colour manually or enter a hexadecimal colour code.
Choose a colour that provides sufficient contrast against the message background so conversations remain easy to read.
Font Size
Use the Font Size slider to adjust the size of the chatbot’s conversation text.
The available size ranges from 10px to 20px.
• Move the slider to the left to make the text smaller.
• Move the slider to the right to make the text larger.
Choose a size that is comfortable to read on both desktop and mobile devices.
Chatbot Position
The Position setting controls where the chatbot widget appears on your website.
Select your preferred position from the dropdown menu. For example, you can place the chatbot in the bottom-right corner of the screen.
Make sure the chatbot does not cover important website elements, navigation buttons or other floating tools.
Choosing a Bot Avatar
The Bot Avatar is the profile image displayed beside the chatbot’s name and messages.
You can select one of the available preset avatars or upload your own image.
To select a preset avatar:
- Review the available avatar options.
- Select the avatar you want to use.
- Confirm that it appears as the current avatar.
The selected avatar will be marked to show that it is active.
Uploading Your Own Avatar
To upload a custom avatar:
- Select Upload Image.
- Choose an image from your device.
- Confirm that the image appears as the current avatar.
Uploaded images must meet the following requirements:
• File format: PNG or JPG.
• Maximum file size: 2MB.
For the best result, use a clear, square image with the subject positioned in the centre.
Choosing a Theme
The Theme setting controls the overall light or dark appearance of the chatbot.
The following options are available:
• Light – Displays the chatbot using a light background and darker text.
• Dark – Displays the chatbot using a dark background and lighter text.
• Auto – Automatically selects the appropriate theme based on the visitor’s device or browser preference.
Choose the theme that best matches your website while maintaining good readability.
Adjusting the Border Radius
The Border Radius setting controls how rounded the corners of the chatbot appear.
Use the slider to select a value between 0px and 24px.
• A lower value creates straighter, more square-shaped corners.
• A higher value creates softer, more rounded corners.
Choose a value that matches the buttons, cards and other design elements used on your website.
Using the Live Preview
The Live Preview shows how your chatbot will look with the selected settings.
Use it to review:
• The welcome message.
• Header and button colours.
• Message text colour.
• Font size.
• Avatar.
• Theme.
• Border radius.
Review the complete chatbot before saving to ensure the colours are readable and the design matches your brand.
Saving Your Appearance
After completing your changes, select Save Appearance.
Changes may take a few minutes to appear on the live chatbot installed on your website.
If the updated appearance does not appear immediately, wait a few minutes and refresh your website before checking again.
WhatsApp Integration
The WhatsApp Integration feature allows you to connect a WhatsApp Business number to your chatbot.
Once connected, visitors will see a Talk to a human on WhatsApp option. This gives them a simple way to continue the conversation with a real person when they need additional help.
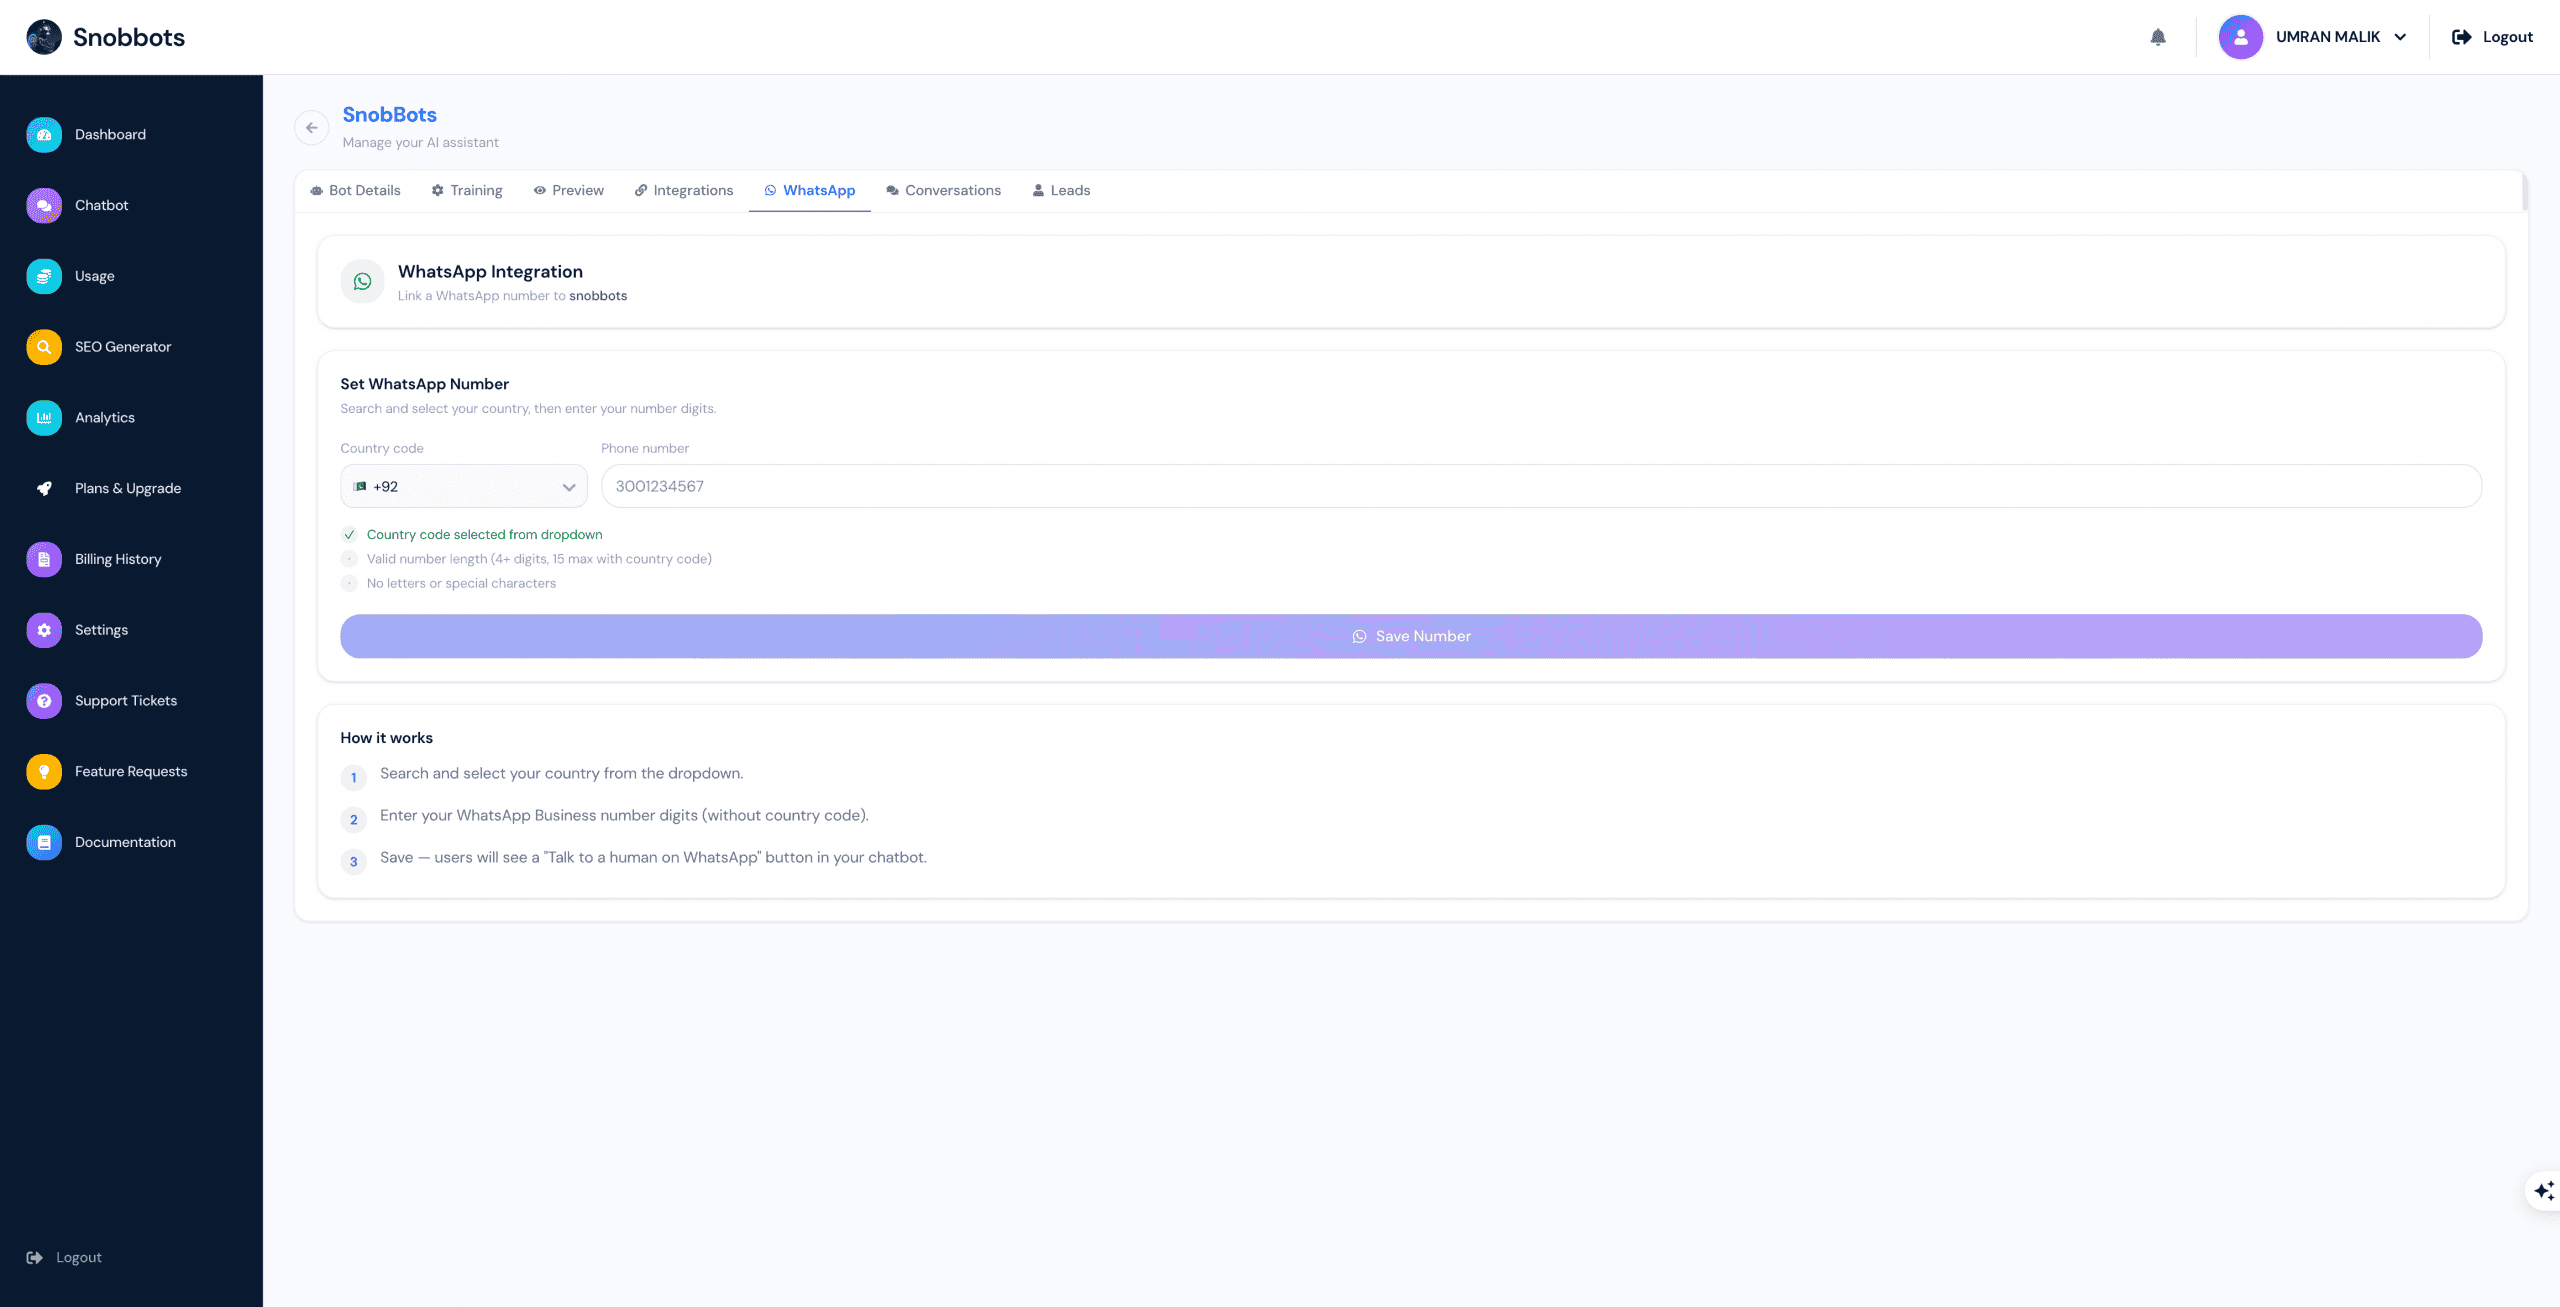
Accessing WhatsApp Integration
To connect a WhatsApp number:
- Open the chatbot you want to manage.
- Select the WhatsApp tab from the top navigation menu.
- Locate the Set WhatsApp Number section.
Selecting Your Country Code
Use the Country Code dropdown to search for and select the country associated with your WhatsApp Business number.
The correct international dialling code will be added automatically.
Do not enter the country code again in the Phone Number field.
Entering Your WhatsApp Number
Enter your WhatsApp Business number in the Phone Number field.
When entering the number:
• Enter the number without the country code.
• Use numbers only.
• Do not include letters.
• Do not include spaces or special characters.
• Make sure the number contains at least four digits.
• The complete number, including the country code, must not exceed 15 digits.
The page will show whether the country code and phone number meet the required format.
Saving the WhatsApp Number
After checking the country code and phone number:
- Select Save Number.
- Wait for the number to be saved.
- Return to the Preview section to confirm that the WhatsApp number is linked.
Once the number has been saved, visitors using your chatbot will see the Talk to a human on WhatsApp option.
What Visitors Will See
When a visitor selects the WhatsApp option, they can move from the automated chatbot conversation to WhatsApp and contact your business directly.
This is useful when a visitor:
• Wants to speak to a real person.
• Needs help with a more detailed enquiry.
• Wants to discuss a product or service.
• Requires sales or customer support assistance.
Important Checks
Before enabling WhatsApp integration, make sure:
• The number is active and registered with WhatsApp Business.
• The correct country code has been selected.
• The number has been entered without the country code.
• The number does not contain spaces, letters or special characters.
• Your team is available to respond to incoming WhatsApp enquiries.
If the Preview section shows that no WhatsApp number is linked, return to the WhatsApp tab and check that the number has been entered and saved correctly.
Deploying the Chatbot
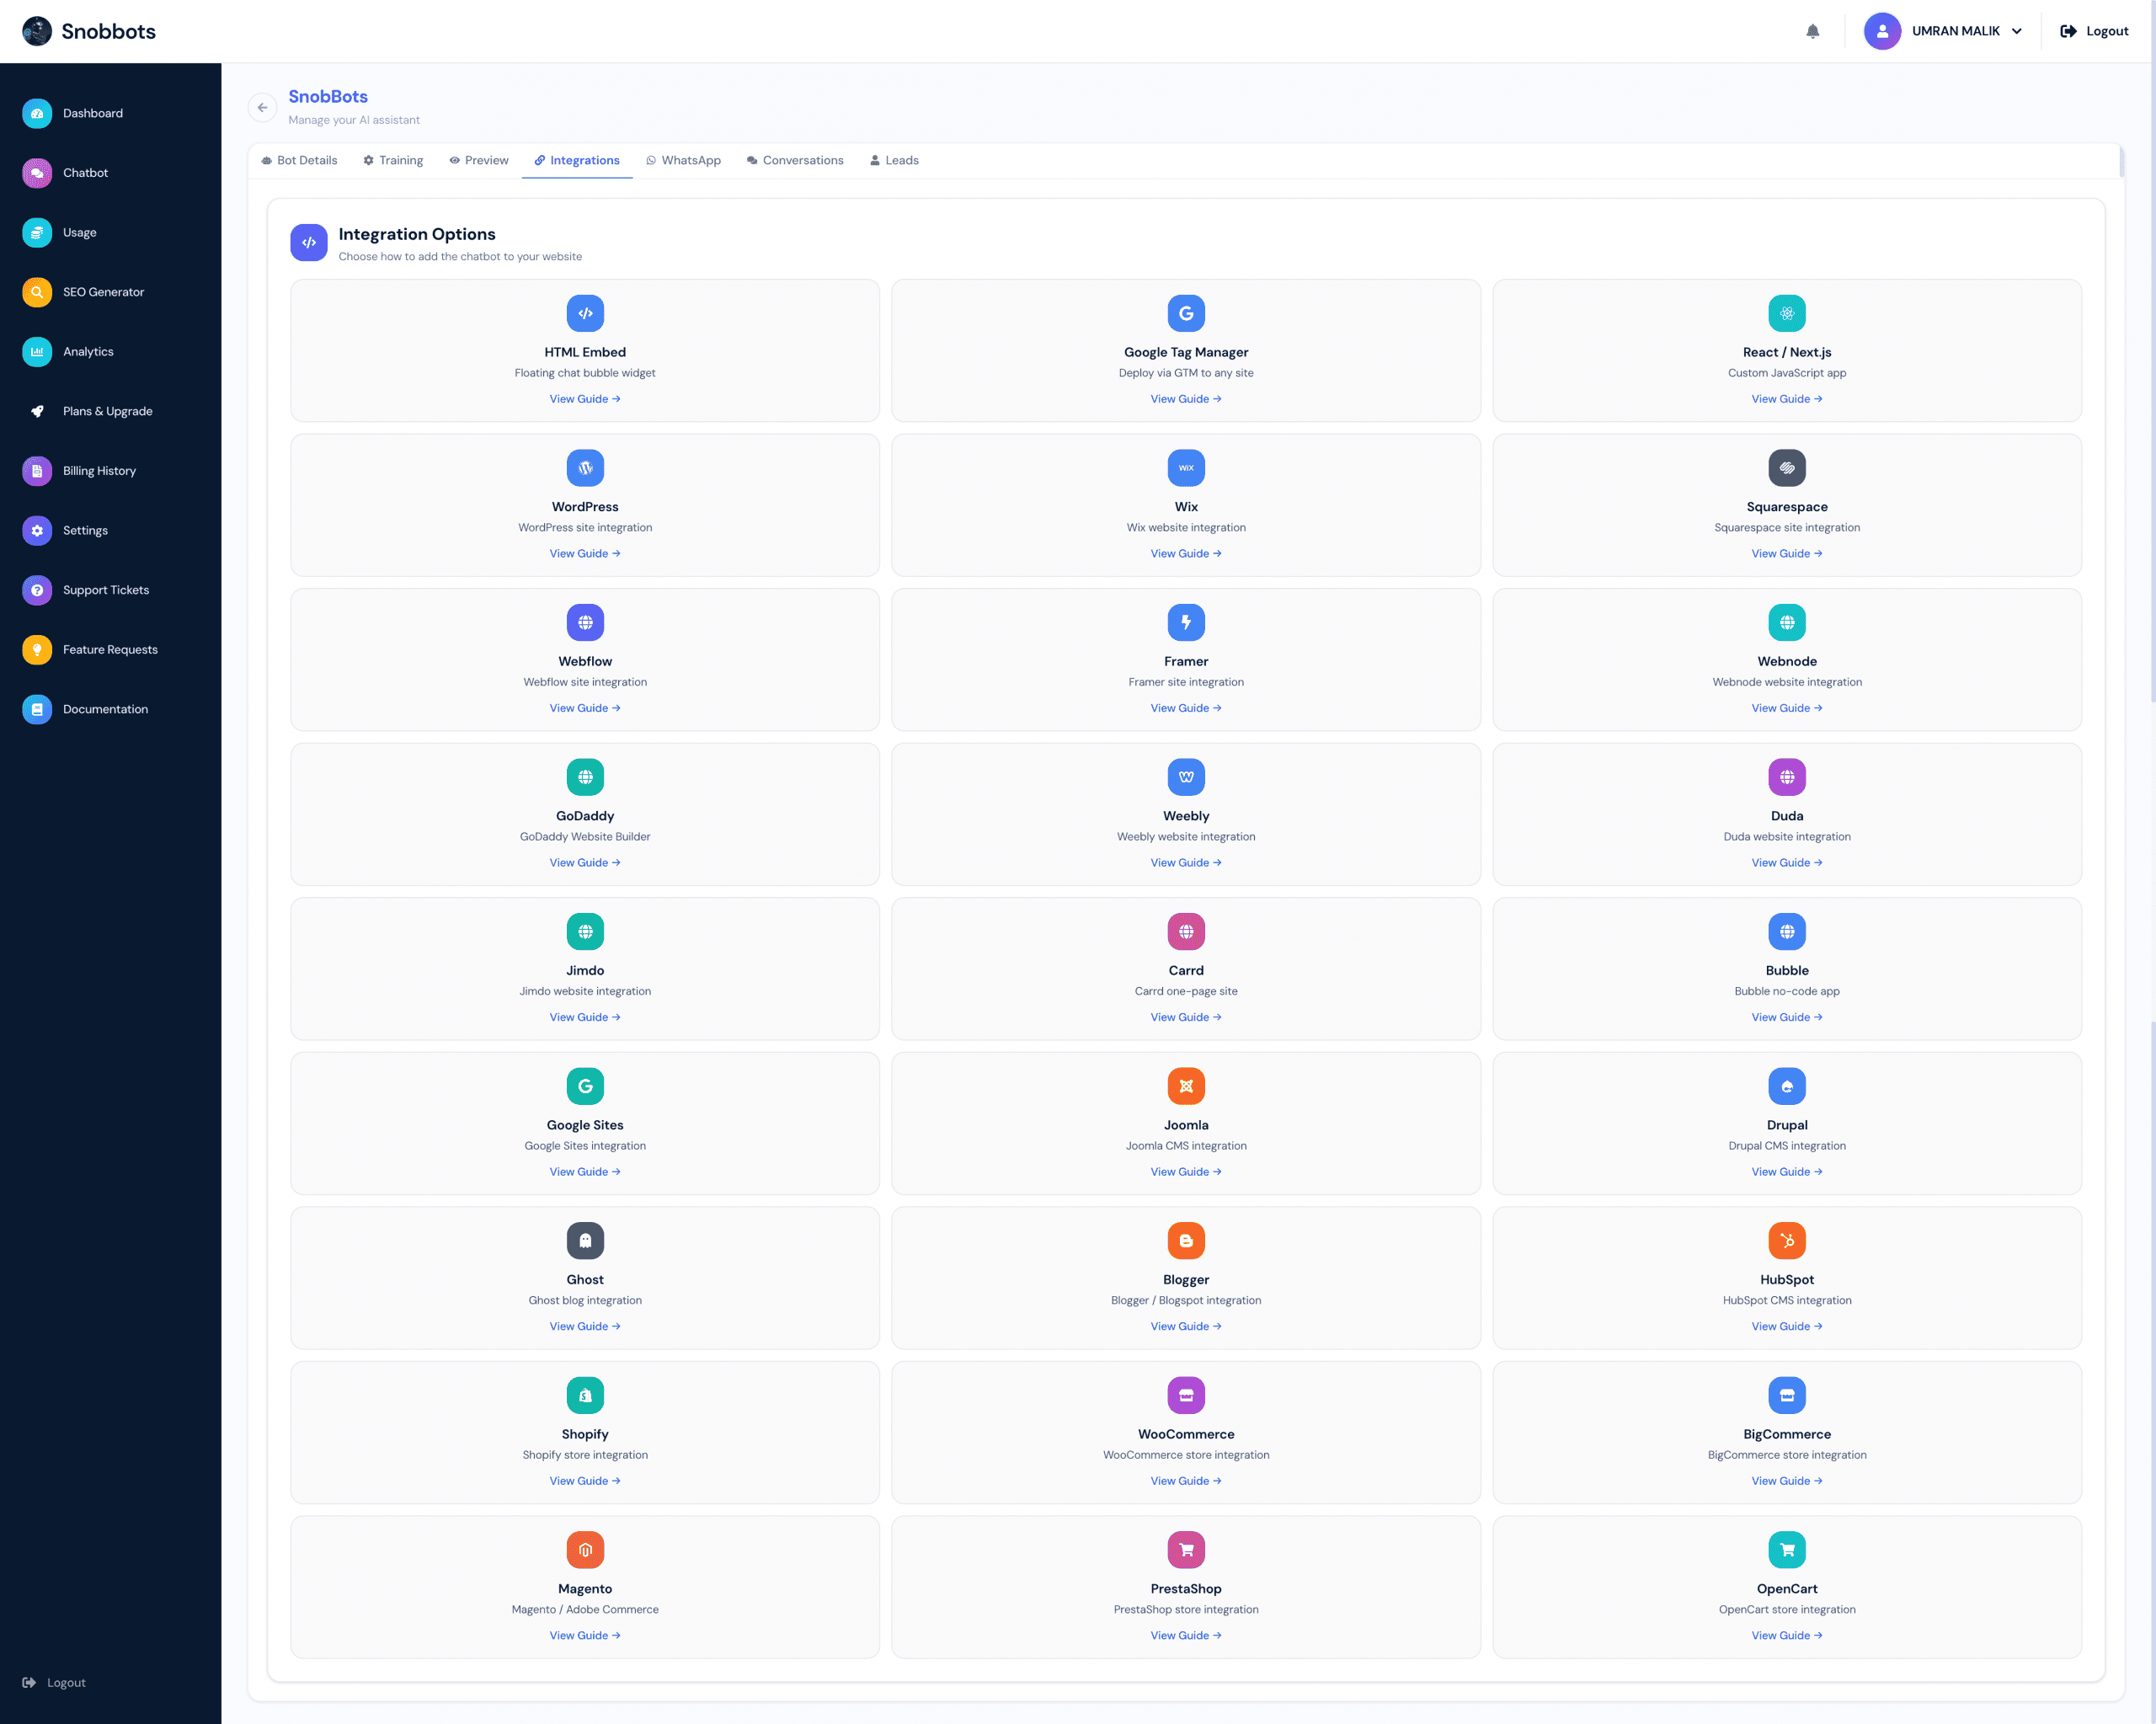
The Integrations section allows you to deploy your SnobBots chatbot on a website, content management system, e-commerce store or custom web application.
SnobBots provides platform-specific integration guides and a unique embed code for each chatbot. Once installed, the code adds a floating chat bubble to your website. Visitors can select the bubble to open the chatbot without leaving the page.
Before Deploying Your Chatbot
Before installing the chatbot, make sure you have:
• Completed the chatbot’s basic details.
• Added and reviewed its training information.
• Tested its responses.
• Customised its appearance.
• Selected the correct avatar, colours, theme and widget position.
• Connected WhatsApp if you want visitors to contact a member of your team.
Completing these steps before deployment helps ensure the chatbot is ready when it becomes visible to website visitors.
Accessing the Integration Options
To access the available integration methods:
-
Log in to your SnobBots account.
-
Select Chatbot from the left-hand navigation menu.
-
Open the chatbot you want to deploy.
-
Select the Integrations tab from the top navigation menu.
The Integration Options page will display the available website platforms and installation methods.
Available Integration Methods
SnobBots supports a wide range of websites, applications, content management systems and e-commerce platforms.
Available integration options include:
• HTML Embed.
• Google Tag Manager.
• React and Next.js.
• WordPress.
• Wix.
• Squarespace.
• Webflow.
• Framer.
• Webnode.
• GoDaddy Website Builder.
• Weebly.
• Duda.
• Jimdo.
• Carrd.
• Bubble.
• Google Sites.
• Joomla.
• Drupal.
• Ghost.
• Blogger.
• HubSpot.
• Shopify.
• WooCommerce.
• BigCommerce.
• Magento.
• PrestaShop.
• OpenCart.
Additional integration options may be added as the SnobBots platform develops.
Choosing the Correct Integration
Select the integration method that matches the platform used to build your website.
For example:
• Select WordPress if your website is built using WordPress.
• Select Shopify if you operate a Shopify store.
• Select Wix, Squarespace, Webflow or Framer if your website uses one of those builders.
• Select React or Next.js if you have a custom JavaScript application.
• Select Google Tag Manager if you want to deploy the chatbot through your website’s tag management container.
• Select HTML Embed if your website allows you to add custom HTML or JavaScript code directly.
If you are unsure which option to choose, ask your website developer or hosting provider which platform your website uses.
Opening an Integration Guide
Each integration option includes a View Guide link.
To open the instructions:
-
Locate your website platform.
-
Select View Guide.
-
Review the installation steps displayed in the window.
-
Locate the unique Embed Code for your chatbot.
-
Follow the instructions for your selected platform.
The steps will vary depending on the website platform, but each guide explains where the chatbot code should be placed.
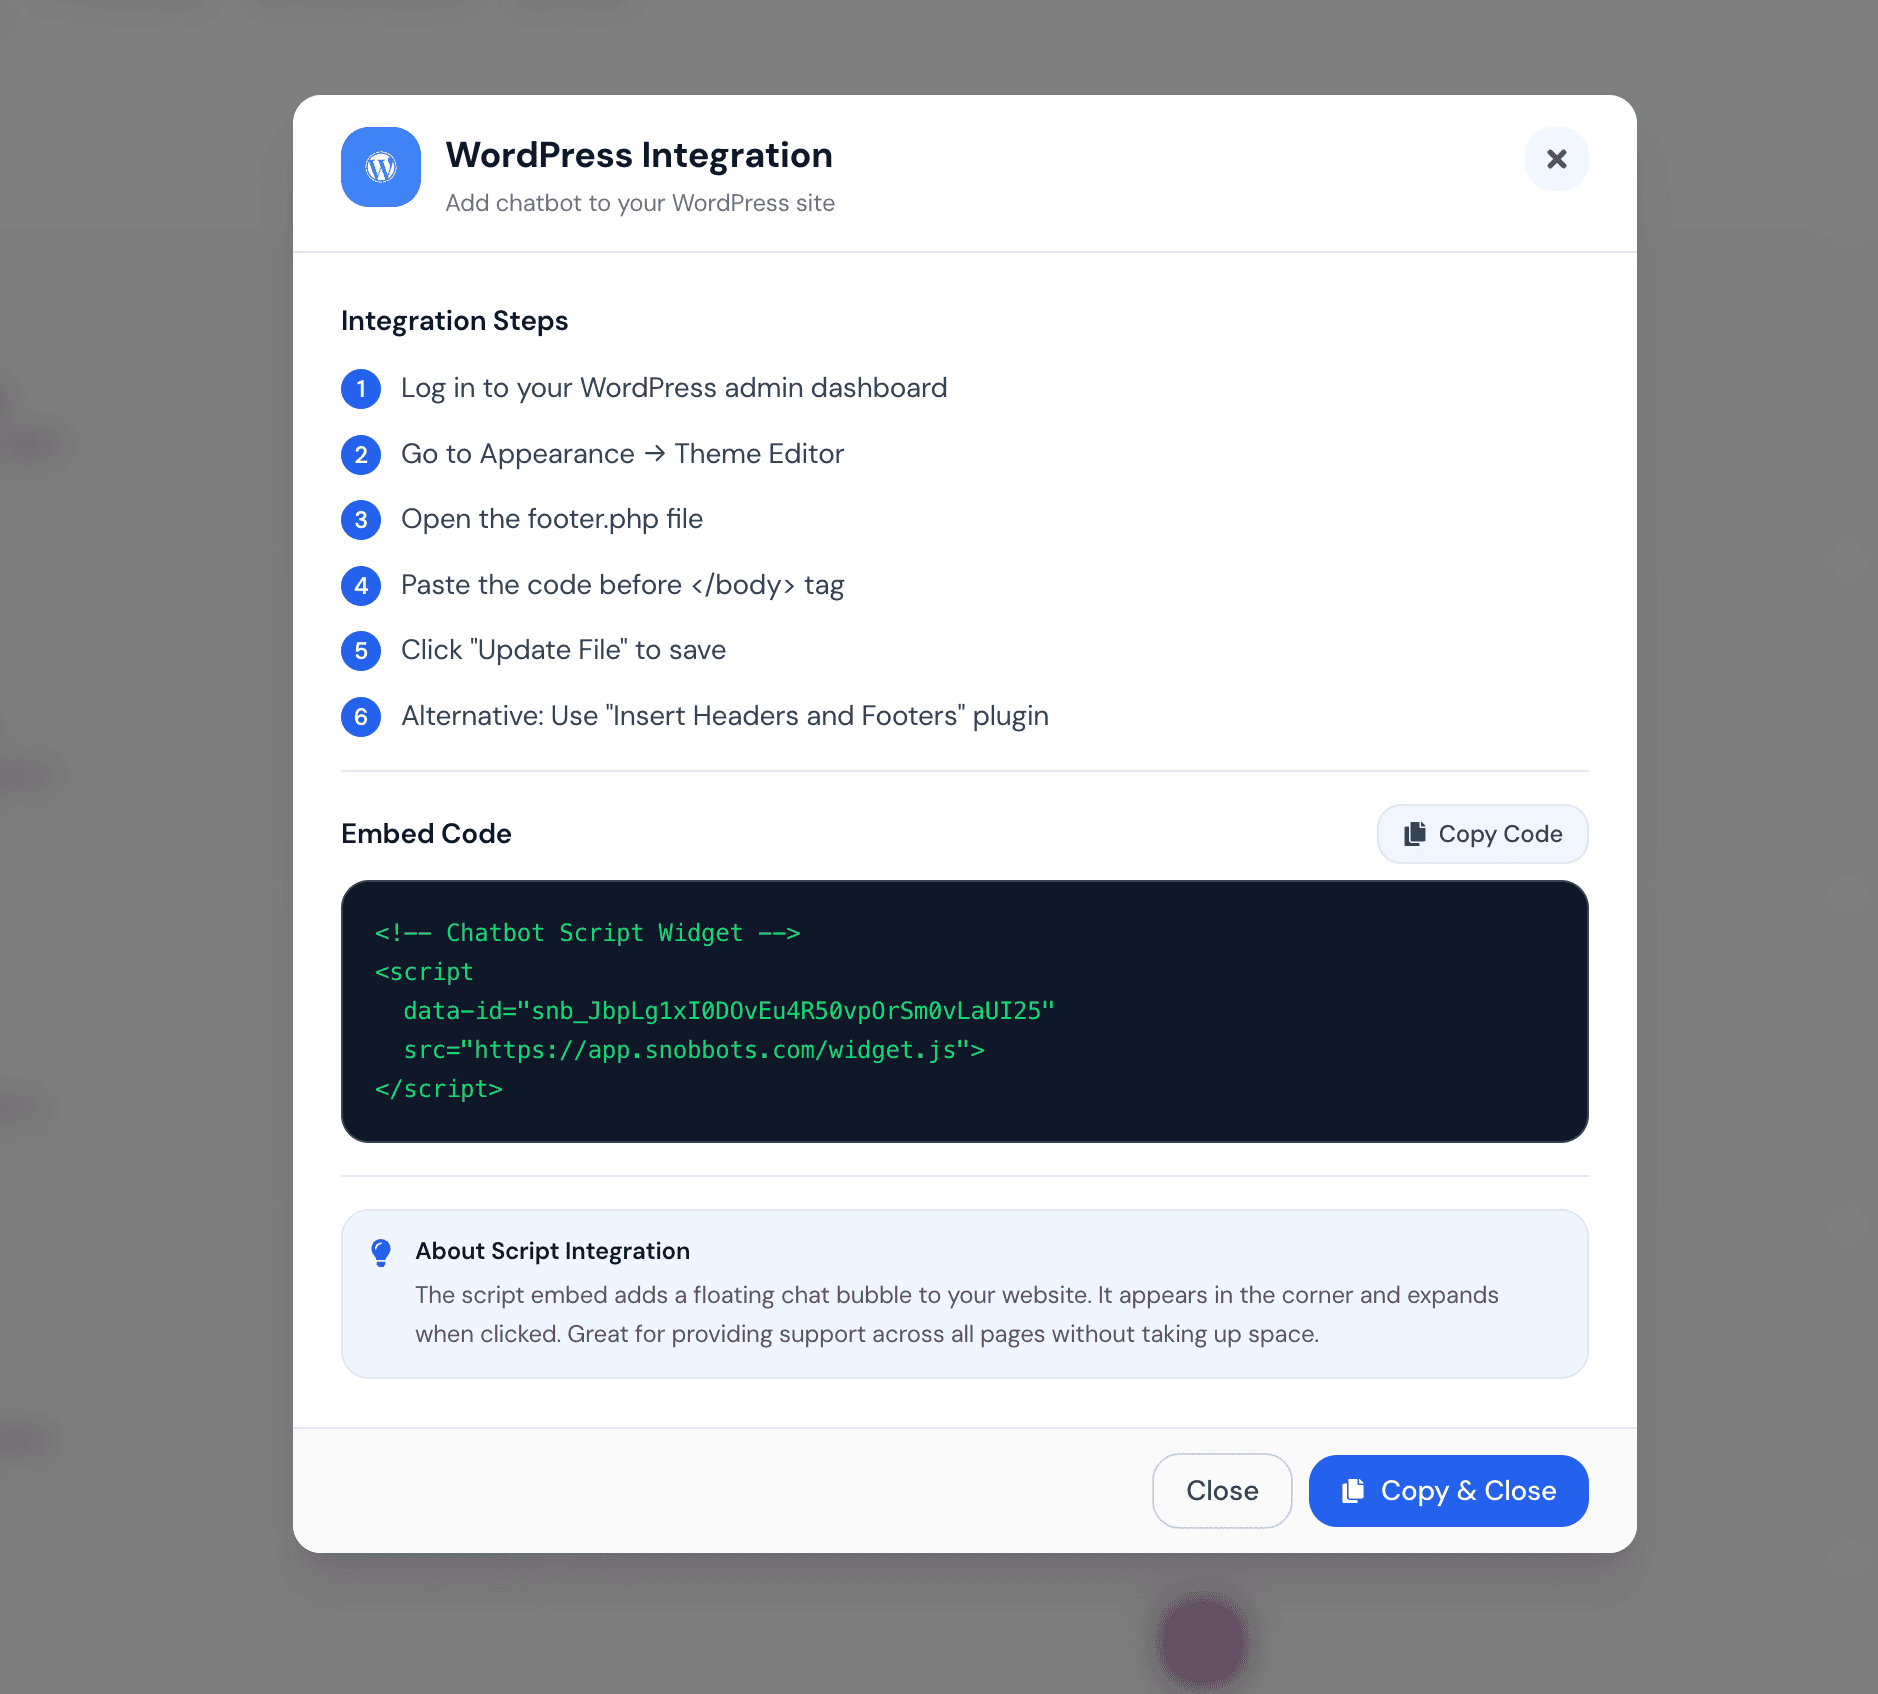
Understanding the Embed Code
The Embed Code is a short JavaScript snippet that connects your website to your SnobBots chatbot.
The code contains a unique chatbot identification value. This tells SnobBots which chatbot should appear on your website.
When working with the embed code:
• Copy the complete code without removing or changing any part of it.
• Use the code generated inside your own chatbot account.
• Do not copy code from screenshots, demonstrations or another chatbot.
• Do not alter the chatbot identification value.
• Avoid installing the same code more than once on the same page.
Changing or removing part of the code may prevent the chatbot from loading correctly.
Copying the Embed Code
The integration guide provides two ways to copy the code:
• Copy Code – Copies the embed code while keeping the integration guide open.
• Copy & Close – Copies the embed code and closes the integration guide.
After copying the code, paste it into the location described in the platform-specific instructions.
How the Script Integration Works
The script adds a floating chatbot bubble to your website.
The chatbot:
• Appears in the selected corner of the website.
• Expands when a visitor selects it.
• Remains available without taking up permanent page space.
• Can appear across every page where the script has been installed.
• Uses the appearance, training and behaviour settings saved in your SnobBots account.
Installing the code in a site-wide footer or global code area normally allows the chatbot to appear throughout the website.
WordPress Integration Example
To add the chatbot to a WordPress website:
-
Open the WordPress integration option in SnobBots.
-
Select View Guide.
-
Copy the unique Embed Code displayed in the integration window.
-
Log in to your WordPress administration dashboard.
-
Go to Appearance.
-
Open the Theme Editor or Theme File Editor.
-
Locate and open the footer.php file.
-
Find the closing body tag.
-
Paste the SnobBots embed code immediately before the closing body tag.
-
Select Update File to save the changes.
Once the file has been updated, open the public website and check that the chatbot bubble appears.
Using the WordPress Theme Editor
When adding the script directly through the WordPress Theme Editor, take care not to change or remove any existing theme code.
Before making changes:
• Create a backup of the website.
• Copy the existing footer.php content before editing it.
• Paste only the SnobBots embed code.
• Make sure the code is placed before the closing body tag.
• Do not paste the code inside another script.
Direct changes to a theme file may be overwritten when the theme is updated.
Alternative WordPress Installation Method
Instead of editing footer.php directly, you can use an Insert Headers and Footers plugin or another trusted code-management plugin.
To use this method:
-
Install and activate the appropriate plugin.
-
Open the plugin’s settings.
-
Locate the section for footer scripts.
-
Paste the complete SnobBots embed code.
-
Save the changes.
-
Clear the website cache if necessary.
-
Open the public website and test the chatbot.
This method can be easier to manage and helps prevent the code from being removed during a theme update.
Deploying Through Google Tag Manager
If your website uses Google Tag Manager:
-
Open the Google Tag Manager integration guide in SnobBots.
-
Copy the chatbot embed code.
-
Log in to your Google Tag Manager account.
-
Open the correct website container.
-
Create a new Custom HTML tag.
-
Paste the SnobBots embed code into the tag.
-
Set the trigger to the pages where the chatbot should appear.
-
Save the tag.
-
Preview and test the container.
-
Publish the changes.
Use an All Pages trigger if you want the chatbot to appear throughout the website.
Deploying on Website Builders
Website builders such as Wix, Squarespace, Webflow, Framer, Webnode, GoDaddy, Weebly, Duda, Jimdo, Carrd and Google Sites usually provide an area for custom code, footer scripts, embeds or site-wide code.
To deploy the chatbot:
-
Select the correct platform from the SnobBots Integration Options page.
-
Open its View Guide.
-
Copy the embed code.
-
Log in to the website builder.
-
Open the custom code, embed or footer settings.
-
Paste the code into the location specified in the guide.
-
Save and publish the website.
-
Open the public website and test the chatbot.
The exact menu names may differ between platforms or subscription plans.
Deploying on Content Management Systems
For platforms such as Joomla, Drupal, Ghost, Blogger and HubSpot:
-
Open the relevant integration guide.
-
Copy the unique chatbot code.
-
Log in to the platform’s administration area.
-
Locate the site template, footer, custom code or script settings.
-
Paste the code into the recommended location.
-
Save and publish the changes.
-
Check the public website.
Use a global template or site-wide code area if you want the chatbot to appear on every page.
Deploying on E-Commerce Platforms
SnobBots can also be deployed on e-commerce platforms including:
• Shopify.
• WooCommerce.
• BigCommerce.
• Magento.
• PrestaShop.
• OpenCart.
Select the relevant platform and follow its View Guide.
Where possible, install the script in the store’s global theme or footer so the chatbot can assist visitors across product pages, category pages, the basket and other areas of the website.
Before making changes to an e-commerce theme, create a backup or duplicate of the active theme.
Deploying on React or Next.js
For React, Next.js or another custom JavaScript application:
-
Open the React or Next.js integration guide.
-
Copy the chatbot code.
-
Add the script to the appropriate global layout, document or application component.
-
Make sure the script loads only once.
-
Save the changes.
-
rebuild and deploy the application.
-
Open the live application and test the chatbot.
If you are not familiar with JavaScript development, ask your developer to complete this installation.
Deploying with HTML Embed
Use HTML Embed when your website allows direct access to its HTML or global footer code.
To install the chatbot:
-
Open the HTML Embed guide.
-
Copy the complete embed code.
-
Open your website’s HTML or template editor.
-
Locate the closing body tag.
-
Paste the code immediately before it.
-
Save and publish the changes.
-
Test the chatbot on the public website.
Installing the code in a global template allows the chatbot to appear across multiple pages.
Checking the Deployment
After installing the chatbot:
-
Open your public website in a new browser window.
-
Check that the chatbot bubble appears in the selected position.
-
Select the bubble to open the chatbot.
-
Confirm that the correct chatbot name and avatar are displayed.
-
Check that the colours and theme appear correctly.
-
Send a test message.
-
Confirm that the chatbot responds.
-
Test the chatbot on both desktop and mobile devices.
-
Check several pages to confirm where the chatbot appears.
-
Review the Conversations section in SnobBots to confirm that the test conversation was recorded.
Using a private or incognito browser window can help you test the website without previously stored browser data affecting the result.
If the Chatbot Does Not Appear
If the chatbot does not appear after installation:
• Confirm that the complete embed code was copied.
• Check that the correct chatbot code was used.
• Make sure the code was saved and published.
• Confirm that the script was placed in the correct location.
• Check that the code was not pasted inside another script.
• Clear the website, plugin, server and browser caches.
• Temporarily disable script optimisation or deferral settings to test whether they are blocking the widget.
• Check whether a security or cookie tool is preventing the script from loading.
• Test the website in a private or incognito browser window.
• Allow a few minutes for recent changes to become visible.
If the problem continues, contact your website developer or submit a support ticket through your SnobBots account.
If the Chatbot Appears More Than Once
If two or more chatbot bubbles appear on the same page, the embed code has probably been installed more than once.
Check:
• The website theme or footer.
• Custom code settings.
• Header and footer plugins.
• Google Tag Manager.
• Page-level embed blocks.
Remove the duplicate installation and leave only one copy of the chatbot code active.
If the Chatbot Appears on Only Some Pages
If the chatbot appears on one page but not others, the code may have been added to an individual page rather than a global website area.
Move the code to:
• A site-wide footer.
• A global theme file.
• A global custom-code section.
• An All Pages Google Tag Manager trigger.
The correct location will depend on the platform used to build the website.
Updating the Chatbot After Deployment
You do not normally need to reinstall the embed code when you update the chatbot.
Changes made inside SnobBots, including training information, colours, welcome messages, avatars and other appearance settings, are applied to the existing chatbot installation.
After saving changes, allow a few minutes for the updated version to appear on the live website. Clear the website or browser cache if the previous version continues to display.
Removing the Chatbot from a Website
To remove the chatbot from your website:
-
Locate the SnobBots embed code in your website platform.
-
Remove the complete script.
-
Save or publish the website changes.
-
Clear the website cache.
-
Open the public website and confirm that the chatbot no longer appears.
If the chatbot was installed through Google Tag Manager, pause or remove the relevant tag and publish the container again.
Chatbot Conversations
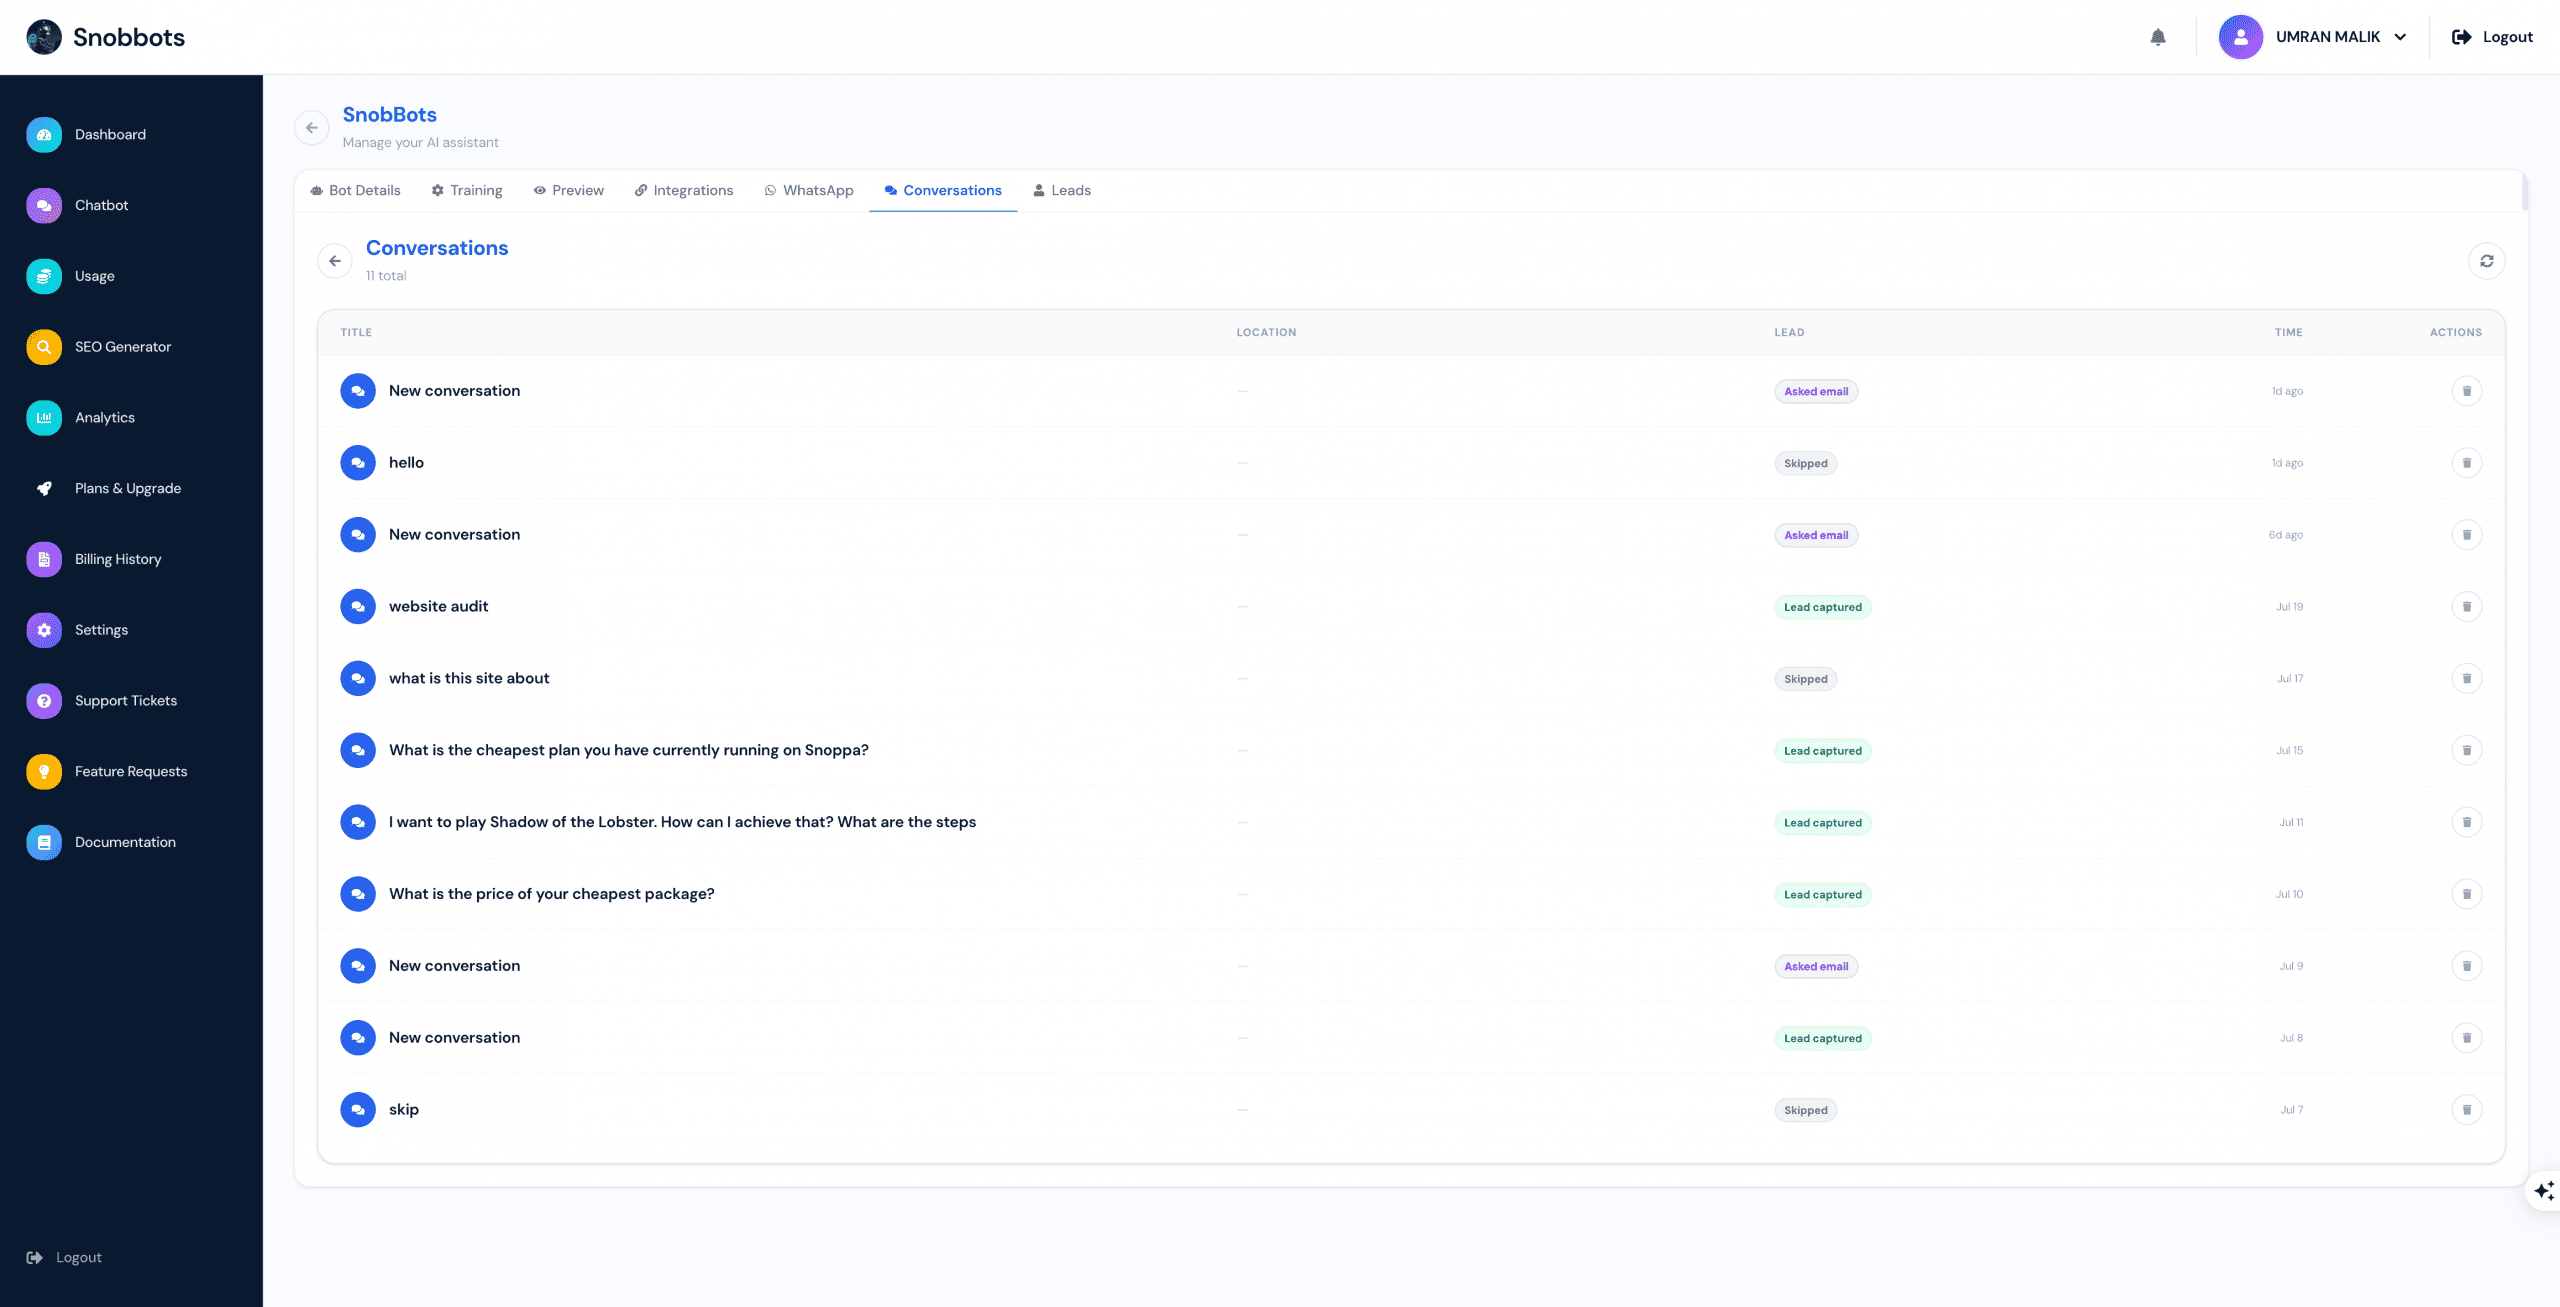
The Conversations section stores the interaction history between website visitors and your chatbot.
You can review complete conversations, see whether a visitor was asked for contact information, identify captured leads, check when each interaction occurred and delete conversation records that are no longer required.
Accessing Conversations
To view conversations for a chatbot:
-
Log in to your SnobBots account.
-
Select Chatbot from the left-hand navigation menu.
-
Open the chatbot you want to review.
-
Select the Conversations tab from the top navigation menu.
The page will display all conversations recorded for the selected chatbot.
Total Conversations
The total number of stored conversations is displayed beneath the Conversations heading.
This total relates to the chatbot currently being viewed.
Each visitor interaction appears as a separate record in the conversation list.
Understanding the Conversation List
The conversation list contains the following columns:
• Title – A short title representing the conversation.
• Location – The visitor’s detected location, where available.
• Lead – The current lead-capture status.
• Time – When the conversation occurred.
• Actions – Available actions for the conversation, including deletion.
Conversation Titles
The title helps identify what the visitor asked about.
A title may be based on the visitor’s opening message or the main subject of the conversation.
If a clear title cannot be created, the conversation may appear as New conversation.
Examples include:
• Website audit.
• What is this site about?
• What is the price of your cheapest package?
• New conversation.
Select the title or conversation row to open the complete conversation.
Visitor Location
The Location column displays the visitor’s location when that information is available.
If the location cannot be detected or was not provided, a dash may appear instead.
More detailed location information may also be shown inside the conversation record if it is available.
Understanding Lead Statuses
The Lead column shows what happened during the lead-capture process.
Possible statuses include:
• Asked email – The chatbot asked the visitor to provide an email address, but a complete lead has not yet been captured.
• Skipped – The visitor chose to skip the lead-capture request or continued without providing their details.
• Lead captured – The visitor provided the required contact information and a lead record was successfully created.
The status helps you identify conversations that resulted in potential customer enquiries.
Refreshing the Conversation List
Select the refresh icon in the upper-right corner of the Conversations page to reload the list.
This allows you to check for new conversations without leaving the section.
Opening a Conversation
To review a conversation:
-
Locate the required conversation in the list.
-
Select the conversation title or row.
-
The complete conversation record will open.
The record displays the full message history and any available lead information.
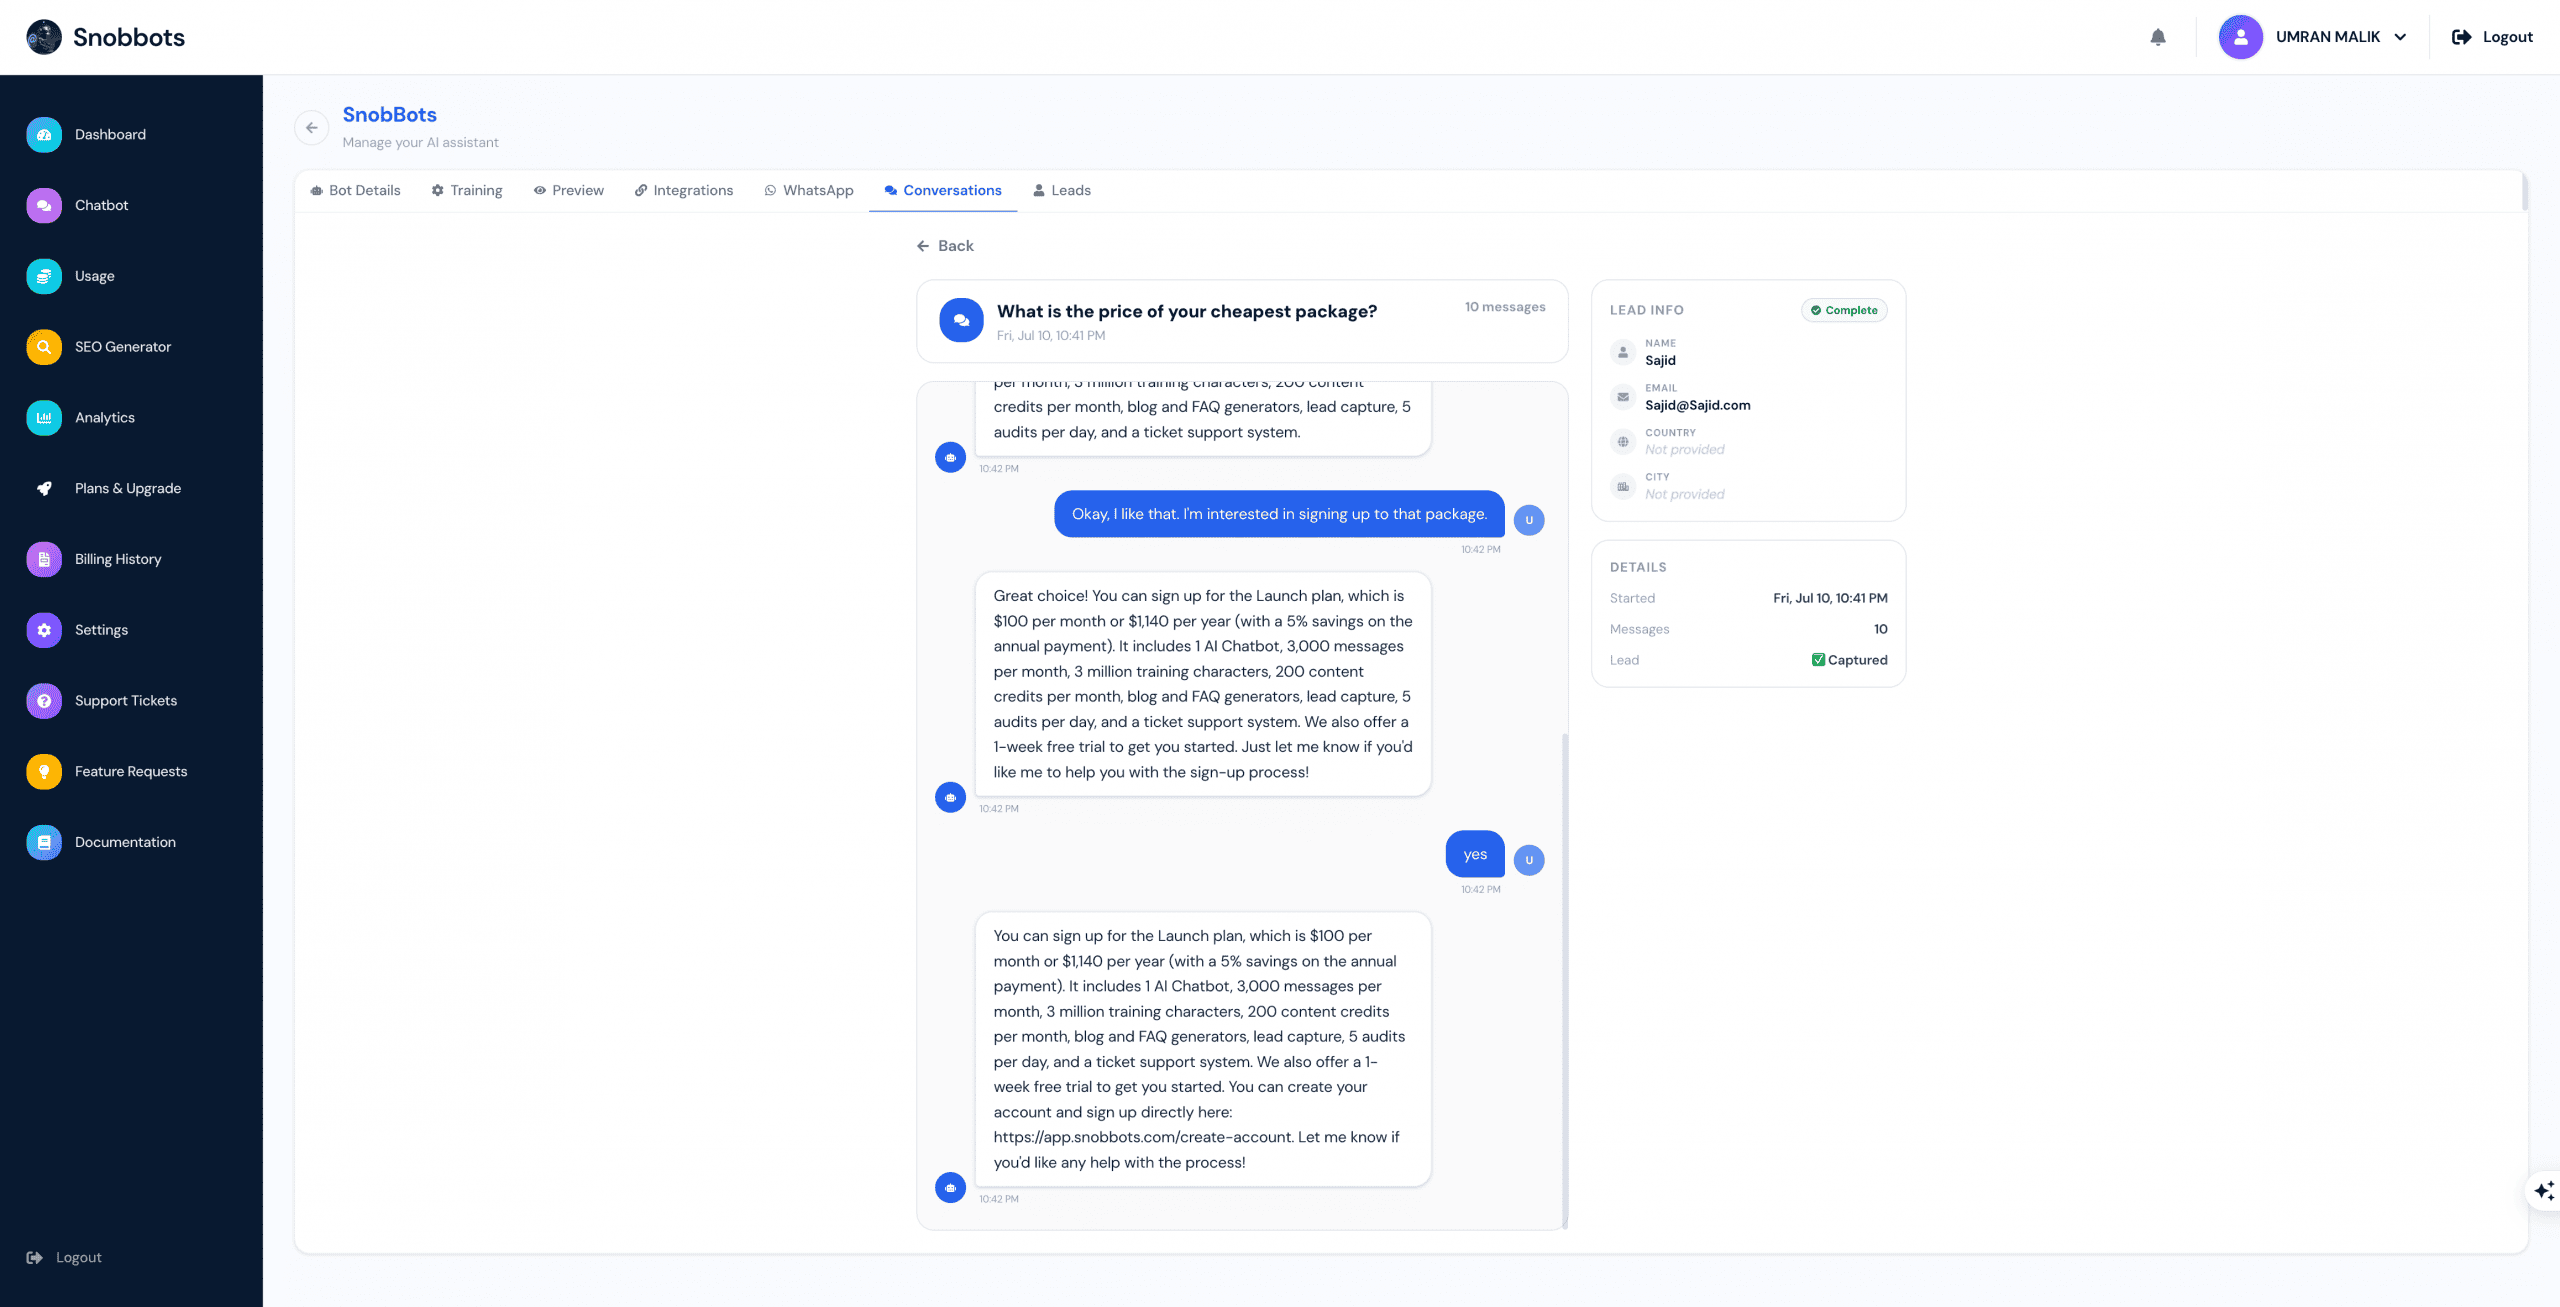
Conversation Summary
At the top of an opened conversation, you will see a summary containing:
• The conversation title.
• The date and time the conversation started.
• The total number of messages exchanged.
This provides a quick overview before you review the full transcript.
Reviewing the Conversation Transcript
The main conversation panel displays every message exchanged between the visitor and the chatbot.
Chatbot responses and visitor messages are shown separately, making it easy to follow the conversation.
Each message may display the time it was sent.
Use the transcript to understand:
• What the visitor was looking for.
• Which questions they asked.
• How the chatbot responded.
• Whether the visitor showed interest in a product or service.
• Whether the chatbot provided accurate information.
• Whether the conversation resulted in a captured lead.
Scroll through the conversation panel to review the complete exchange.
Understanding Chatbot and Visitor Messages
Chatbot responses and visitor messages use different colours and positions.
This makes it easier to see who sent each message.
The transcript allows you to review the exact wording used by both the visitor and the chatbot rather than relying only on the conversation title.
Lead Information
When contact information has been captured, the Lead Info panel displays the available visitor details.
This may include:
• Name.
• Email address.
• Country.
• City.
If information was not supplied or could not be detected, the field will display Not provided.
A Complete status indicates that the lead-capture process was successfully completed.
Conversation Details
The Details panel provides additional information about the interaction.
This includes:
• Started – The date and time the conversation began.
• Messages – The total number of messages exchanged.
• Lead – Whether a lead was captured.
This summary makes it easy to confirm the length of the conversation and its lead status.
Returning to the Conversation List
Select Back above the conversation record to return to the complete conversation history.
You can then open another conversation or continue managing the existing records.
Using Conversations for Lead Follow-up
When a conversation has produced a lead, review the full transcript before contacting the visitor.
The transcript can help you understand:
• What the visitor was interested in.
• Which product, service or plan they asked about.
• Any questions or concerns they raised.
• What information the chatbot already provided.
• The appropriate next step for your team.
This allows your sales or support team to follow up with better context.
Using Conversations to Improve Your Chatbot
Conversation history can also help improve chatbot performance.
Review conversations regularly to identify:
• Questions the chatbot answered well.
• Questions it could not answer accurately.
• Information missing from its training data.
• Repeated customer questions.
• Confusing or incomplete responses.
• Opportunities to improve lead capture.
If the chatbot gives an incorrect or incomplete answer, update its training information so future visitors receive a better response.
Deleting a Conversation
Each conversation includes a delete icon in the Actions column.
To delete a conversation:
-
Locate the conversation you want to remove.
-
Select the delete icon.
-
Review any confirmation message displayed.
-
Confirm the deletion if you want to continue.
Only delete conversations that are no longer required.
Deleted conversation records may not be recoverable, so review the conversation carefully before removing it.
When to Delete Conversations
You may want to delete a conversation when:
• It was created during testing.
• It contains no useful information.
• It is a duplicate record.
• It was generated by spam or irrelevant activity.
• It is no longer required under your data-retention policy.
Do not delete a conversation if it is still needed for customer follow-up, support, reporting or lead management.
Handling Conversation and Lead Data
Conversation records may contain personal information supplied by visitors.
When reviewing or managing this information:
• Only use it for legitimate business purposes.
• Limit access to authorised team members.
• Do not share visitor details unnecessarily.
• Follow applicable privacy and data-protection requirements.
• Delete information when it is no longer required.
Conversations and Leads
The Conversations and Leads sections work together but serve different purposes.
The Conversations section stores the complete message history for every chatbot interaction.
The Leads section focuses on visitors whose contact information was successfully captured.
A visitor can have a stored conversation even if they skipped the lead-capture request or did not provide an email address.
Lead Capture
Hi, this documentation will show you how to use the Lead Capture feature in the SnobBots AI platform.
The Lead Capture system automatically collects and stores contact information from visitors who interact with your AI chatbot. It allows you to view captured leads, review conversation history, and export lead data for follow-up and sales activities.
This feature is ideal for:
- Business owners
- Sales teams
- Marketing teams
- Customer service teams
- Agencies managing client enquiries
What is Lead Capture?
Lead Capture enables your AI chatbot to collect visitor information during conversations.
When a visitor provides their details, the system stores information such as:
- Name
- Email address
- Country (if available)
- City (if available)
- Conversation history
- Date captured
- Associated chatbot
All captured leads are stored inside your dashboard for easy access and follow-up.
How Lead Capture Works
- A visitor starts a conversation with your chatbot.
- The chatbot requests contact information when appropriate.
- The visitor provides their details.
- The information is automatically saved as a lead.
- The complete conversation history is linked to that lead.
This allows you to see not only who contacted you, but also exactly what they were interested in.
Viewing Leads from the Dashboard
The quickest way to access captured leads is through your dashboard.
Step 1
Log into your SnobBots account.
Step 2
Navigate to your Dashboard.
Step 3
Scroll down to the Recent Leads section.
Step 4
Click View to open the lead details.
Viewing Lead Information
When you open a lead, you will see detailed information about that contact.
This may include:
- Name
- Email address
- Country
- City
- Date captured
- Lead status
You can also see which chatbot generated the lead.
This is particularly useful if you operate multiple chatbots across different websites or campaigns.
Viewing Conversation History
One of the most valuable features of Lead Capture is the ability to view the entire conversation.
When viewing a lead:
- Open the lead record.
- Scroll through the conversation panel.
- Review every message exchanged between the visitor and the chatbot.
This helps you understand:
- What the visitor was looking for
- Questions they asked
- Products or services they were interested in
- Any issues they experienced
Having the full conversation provides valuable context before contacting the lead.
Understanding the Lead Details Panel
Alongside the conversation history, you will find a Lead Details section.
This section typically displays:
Lead Information
- Name
- Email address
- Country
- City
Conversation Information
- Chatbot used
- Conversation date
- Number of messages exchanged
- Lead capture status
This provides a complete overview of each lead in one place.
Accessing Leads from a Specific Chatbot
You can also access leads directly from an individual chatbot.
Step 1
Open the Chatbot section.
Step 2
Select the chatbot you wish to manage.
Step 3
Click View.
Step 4
Select the Leads tab.
You will now see all leads captured by that specific chatbot.
This is useful when managing multiple bots for different businesses, departments, or websites.
Searching for Leads
The Leads page includes a search feature.
You can search by:
- Name
- Email address
- Location
This makes it easy to find specific contacts, especially when managing a large number of leads.
Exporting Leads
The Leads section includes an Export CSV option.
To export your leads:
- Open the Leads page.
- Click Export CSV.
- Download the file.
The exported file can be used for:
- CRM imports
- Sales follow-ups
- Marketing campaigns
- Reporting and analysis
Viewing Conversations Separately
In addition to the Leads section, conversation history can also be accessed independently.
Step 1
Open your chatbot.
Step 2
Click the Conversations tab.
Step 3
Browse the conversation list.
Step 4
Select any conversation to view its full history.
This allows you to review chatbot activity even when a lead was not captured.
Relationship Between Leads and Conversations
The Lead Capture and Conversations features work together.
When a lead is captured:
- The contact details are stored in Leads.
- The conversation is stored in Conversations.
- Both records remain linked together.
This gives you complete visibility into customer interactions.
Content Generator Overview
The Content Generator inside SnobBots AI is designed to help improve your website’s SEO, content quality, and overall website optimisation.
It combines three AI-powered tools into one central workspace:
- FAQ Generator
- Blog Generator
- Website Audit
These tools help businesses:
- improve SEO rankings
- generate website content faster
- optimise websites for search engines
- identify technical website issues
- improve website quality based on modern SEO standards
- meet Google best practices
The Content Generator is ideal for:
- business owners
- marketers
- SEO specialists
- agencies
- website managers
Why the Content Generator Matters
The Content Generator helps automate time-consuming SEO and website optimisation tasks.
Instead of manually:
- researching FAQs
- writing SEO content
- auditing websites
- checking optimisation issues
SnobBots AI helps streamline the process using AI-powered analysis and generation tools.
This helps businesses:
- improve search visibility
- create content faster
- optimise pages more efficiently
- identify website issues
- align with modern SEO standards and best practices
Generate FAQs
The FAQ Generator helps you automatically create SEO-optimised Frequently Asked Questions (FAQs) from any webpage URL using AI.
Instead of manually writing FAQs yourself, SnobBots analyses your webpage content and generates relevant question-and-answer pairs automatically.
This helps improve:
- SEO rankings
- website content structure
- search visibility
- Google optimisation
- overall website quality
The FAQ Generator is especially useful for:
- business websites
- service pages
- landing pages
- about pages
- eCommerce stores
- agency websites
What the FAQ Generator Does
The tool scans the content of a webpage and automatically creates relevant FAQs based on the information found on that page.
Generated FAQs can then be:
- added to your website
- used for SEO improvements
- given to your web developer
- placed in FAQ sections
- reused for support or knowledge base content
Why FAQs Matter for SEO
Well-structured FAQs help search engines better understand your content.
Benefits include:
- improved SEO structure
- enhanced search relevance
- better user experience
- stronger keyword coverage
- improved content quality
FAQs also make webpages more informative and organised for both visitors and search engines.
Accessing the FAQ Generator
To open the FAQ Generator:
- Log into your SnobBots dashboard
- Click SEO Generator from the left navigation menu
- Select the FAQ Generation tab
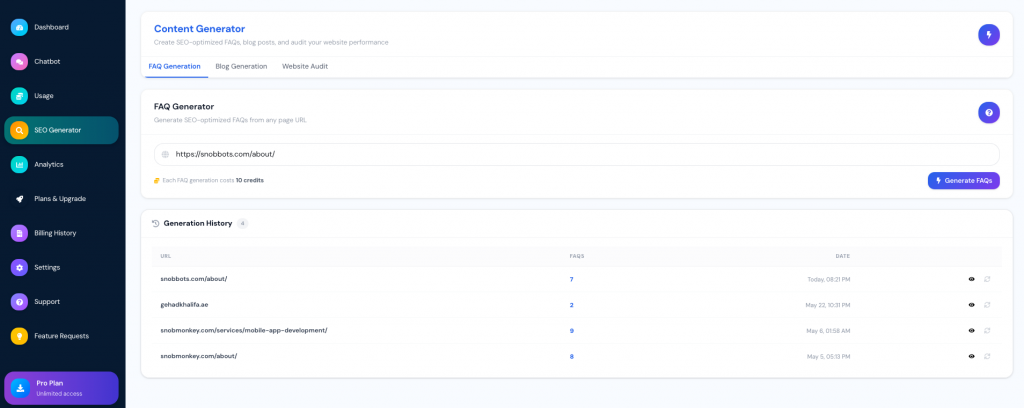
How to Generate FAQs
Step 1 — Enter a Webpage URL
Paste the webpage URL you want to analyse into the URL field.
Example pages:
- homepage
- about page
- service page
- landing page
The system works best with pages that contain detailed written content.
Step 2 — Review Credit Usage
Below the URL field, SnobBots displays how many credits will be used for the FAQ generation.
This allows you to monitor resource usage before generating content.
Step 3 — Generate FAQs
Click the Generate FAQs button.
The system will begin:
- scraping the webpage
- analysing the content
- generating relevant FAQs
Generation usually takes:
- approximately 10–20 seconds
Timing may vary depending on:
- page size
- amount of content
- website complexity
Step 4 — Review Generated FAQs
Once complete, the AI generates a list of question-and-answer pairs based on the webpage content.
You can:
- copy individual FAQs
- copy all FAQs at once
A confirmation message appears after copying.
Step 5 — Add FAQs to Your Website
After copying the generated FAQs, you can:
- send them to your web developer
- add them to your website manually
- place them at the bottom of service pages
- use them inside FAQ sections
Generation History
The FAQ Generator automatically saves previously generated FAQs in the Generation History section.
This allows you to:
- revisit previous generations
- reopen generated FAQs
- copy them again later
- track past activity
The history section displays:
- webpage URL
- number of generated FAQs
- generation date and time
Viewing Previous FAQ Generations
To reopen a previous FAQ generation:
- Scroll to the Generation History section
- Locate the webpage entry
- Click the View icon (eye icon)
The generated FAQs will reopen and can be copied again at any time.
Blog Generator
Accessing the Blog Generator
- Log in to your account.
2. Select SEO Generator from the left-hand menu.
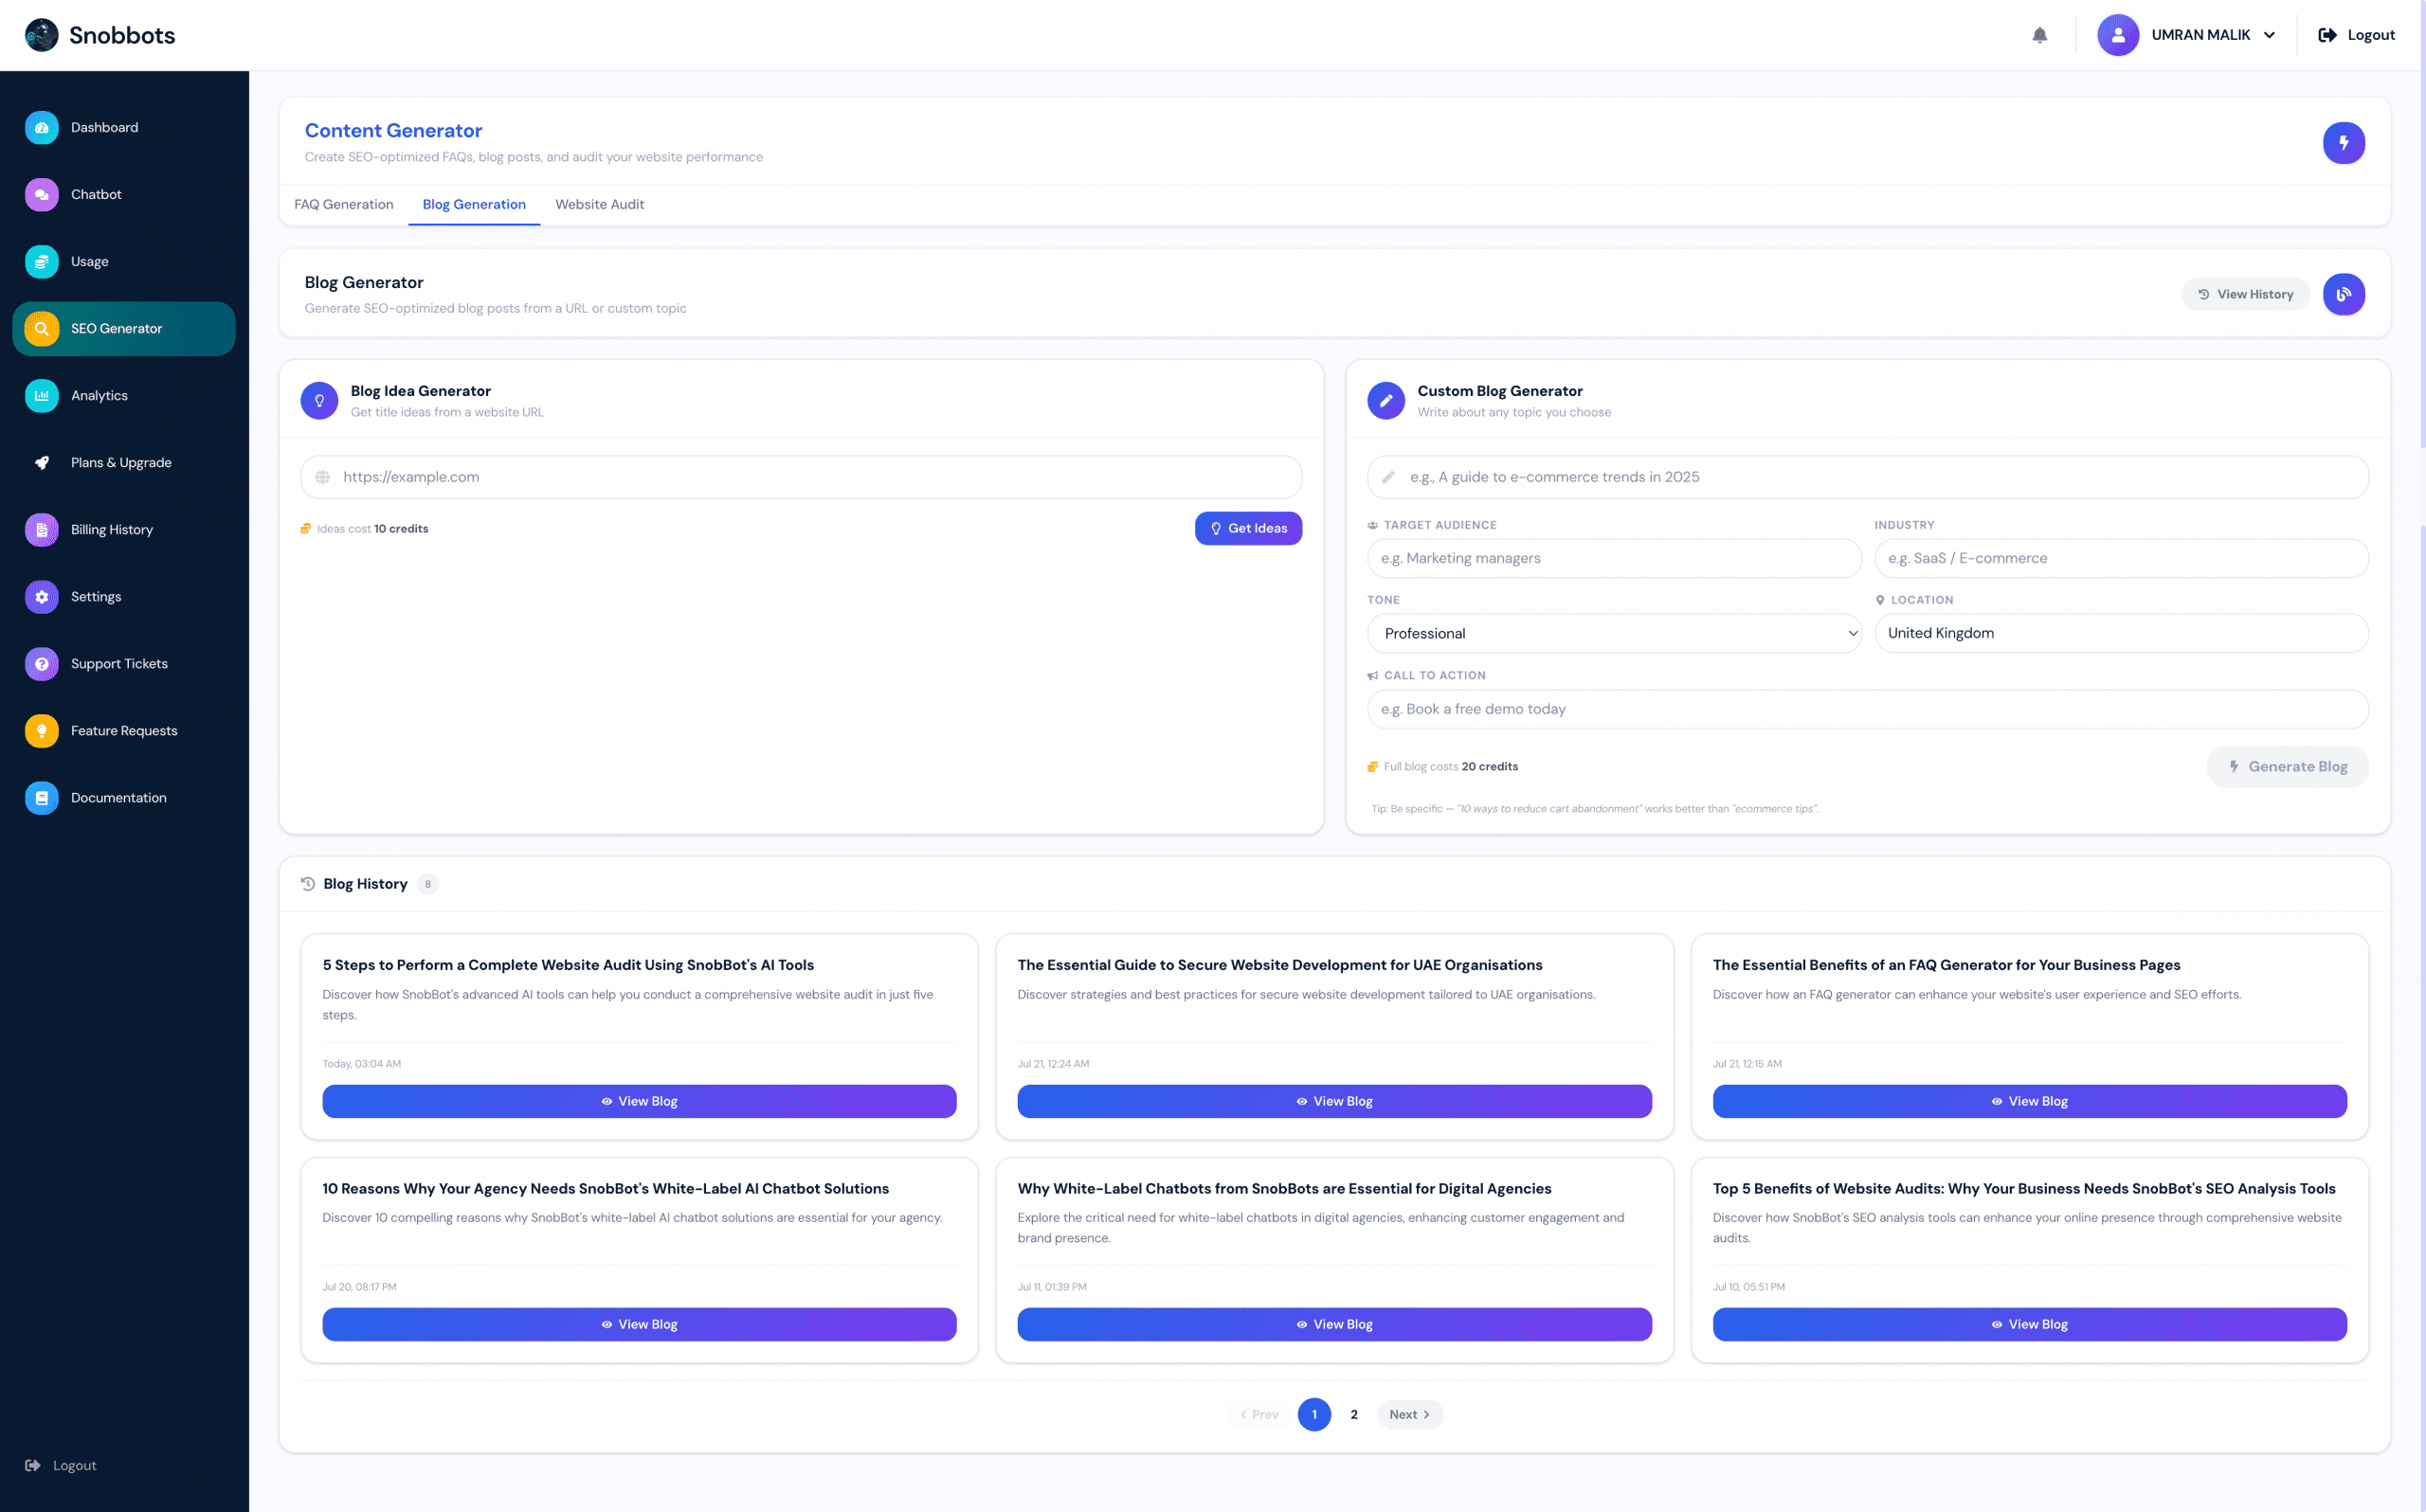
3. Click the Blog Generator tab.
The Blog Generator offers two ways to create SEO-optimised blog content:
• Blog Idea Generator
• Custom Blog Generator
Blog Idea Generator
If you’re unsure what to write about, enter your website URL and click Get Ideas. The system scans your website, understands your business, and generates relevant blog ideas. Click any suggested title to use it in the Custom Blog Generator.
Custom Blog Generator
Enter the following information as required:
• Blog Title
• Target Audience (optional)
• Industry (optional)
• Location (optional)
• Tone
• Call to Action (optional)
Available tones include Professional, Conversational, Authoritative, Friendly and Technical.
Only the blog title is required. The additional fields help tailor the content to your audience and business.
Click Generate Blog when you’re ready.
Note: The required credit cost is displayed before generation begins.
Blog Generation
Blog generation typically takes between 30 and 60 seconds. Every blog is written with SEO best practices in mind and is designed to perform well with popular WordPress SEO plugins such as Yoast SEO and All in One SEO.
Reviewing Your Blog
Once complete, the generated content includes:
• Blog Title
• Subtitle
• Meta Description
• SEO Keywords
• Complete Blog Content
Each section includes a Copy button, allowing you to quickly paste the content into your CMS or website. Selecting Expand displays the full article.
Blog History
Every generated blog is automatically saved to your account.
From the Blog History section you can:
• View previously generated blogs
• Re-open earlier articles
• Reuse or edit existing content
Your previous blogs remain available, making it easy to build a growing library of SEO-ready content.
Website Audit Tool
Overview
The Website Audit Tool provides a comprehensive analysis of your website’s performance, technical SEO, accessibility, best practices, and Core Web Vitals. It enables you to identify issues affecting your website and generate a professional PDF report that can be shared with your web developer for remediation.
The tool supports both mobile and desktop audits, allowing you to compare performance across different device types.
Accessing the Website Audit Tool
- Log in to your SnobBots account.
- From the left-hand navigation menu, select SEO Generator.
- Click Website Audit.
You will now be presented with the Website Audit dashboard.
Running a Website Audit
To analyse a website:
- Enter the full website URL into the Website Address field.
- Select the audit type:
- Mobile Audit
- Desktop Audit
- Mobile & Desktop Audit
- Click Run Audit.
Note: Running both a mobile and desktop audit uses two audit credits instead of one. However, the credit usage remains minimal and provides a much more complete analysis.
Audit Progress
Once the audit begins, the system will:
- Connect to the analysis engine.
- Perform performance testing.
- Analyse technical SEO.
- Check accessibility compliance.
- Evaluate best practices.
- Measure Core Web Vitals.
- Display a live progress indicator showing the completion percentage.
Most audits complete within a short period, depending on the size and complexity of the website.
Understanding the Results
After the scan completes, the dashboard displays an overall website health summary.
The results include:
- Overall Performance Score
- SEO Score
- Accessibility Score
- Best Practices Score
- Core Web Vitals
You can switch between Mobile and Desktop results to compare how your website performs across different devices.
Reviewing Issues
The Website Audit Tool identifies the most important issues affecting your website.
Selecting any issue displays detailed information, including:
- Description of the problem
- Severity level
- Why the issue matters
- Recommended improvements
This enables website owners and developers to prioritise fixes based on their impact.
Audit History
Every completed audit is stored within your account.
You can review previous audits by selecting one of the available date ranges:
- Last Day
- Last 7 Days
- Last 30 Days
- All Time
This allows you to monitor improvements over time and compare historical results after website updates.
Exporting Reports
Each completed audit can be exported as a professional PDF report.
To export:
- Open the required audit from your history.
- Click Export PDF.
The generated report typically contains multiple pages and includes:
- Executive summary
- Performance scores
- Mobile results
- Desktop results
- Core Web Vitals
- Technical issues
- Severity ratings
- Detailed recommendations
The report can be:
- Printed
- Saved for future reference
- Shared with your website developer
- Included in client reports
Re-running Audits
After your developer has implemented the recommended fixes, simply run another Website Audit.
Comparing the new report with previous audits allows you to:
- Verify completed improvements
- Measure performance gains
- Confirm resolved issues
- Identify any remaining optimisation opportunities
This makes it easy to track your website’s progress over time.
Audit Usage
The Website Audit dashboard also displays your current usage information, including:
- Daily audit allowance
- Audits used today
- Remaining audit credits
This helps you monitor your available quota while planning future website analyses.
Credit System Overview
The Usage section allows you to monitor the resources included with your SnobBots subscription.
It shows how many chatbot messages, training characters, content credits and chatbot slots you have used, as well as how much remains available.
Reviewing this section regularly helps you avoid reaching your account limits unexpectedly.
Accessing the Usage Section
To view your resource usage:
-
Log in to your SnobBots account.
-
Select Usage from the left-hand navigation menu.
The Usage dashboard will display your current resource balances and subscription limits.
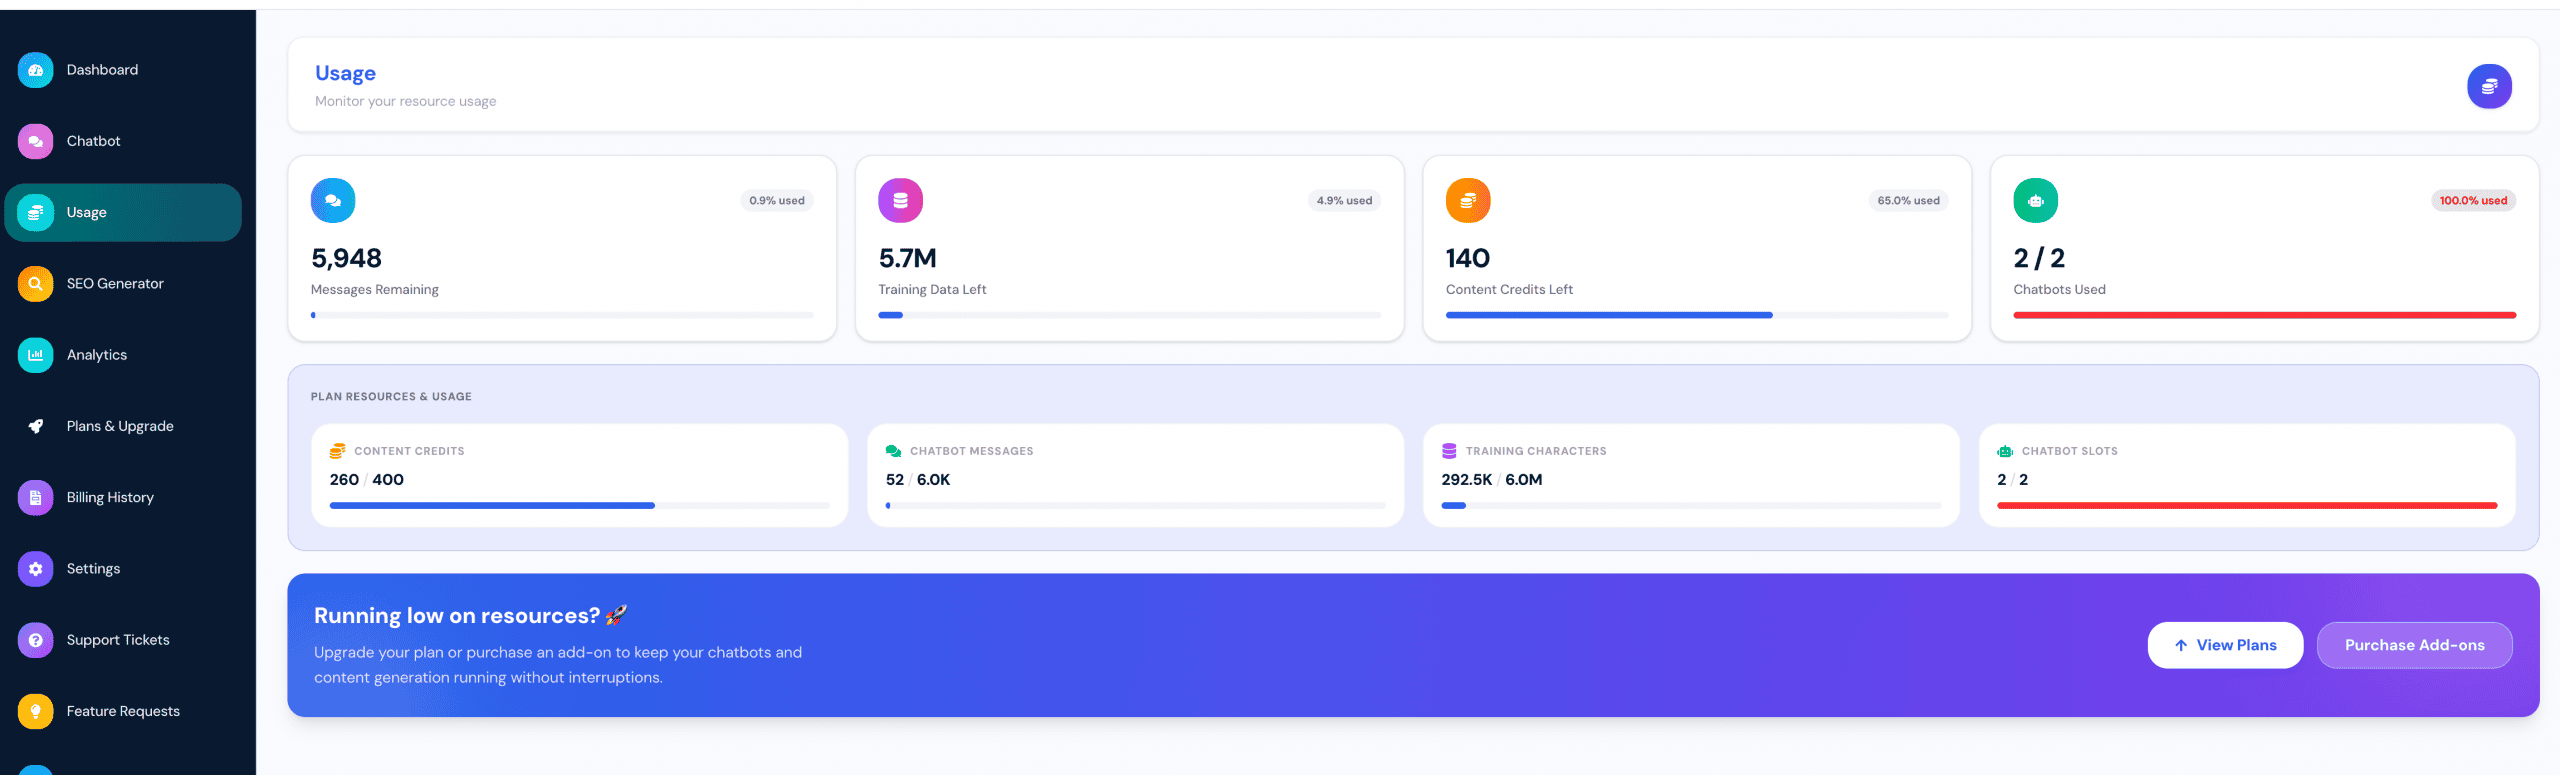
Usage Summary
The summary cards at the top of the page display:
• Messages Remaining.
• Training Data Left.
• Content Credits Left.
• Chatbots Used.
Each card also shows the percentage of the available resource that has been used.
Messages Remaining
Messages Remaining shows how many chatbot messages are still available during the current monthly billing cycle.
The percentage badge shows how much of your total message allowance has already been used.
Each chatbot conversation can use several messages, depending on how long the interaction continues.
Monitor this balance closely if your chatbots receive high visitor activity.
Training Data Left
Training Data Left shows how much additional content can be added to your chatbot training system.
Training data may include:
• Website content.
• Uploaded documents.
• Manually entered information.
• Questions and answers.
• Other business information used by the chatbot.
The figure is measured in characters rather than words or files.
Content Credits Left
Content Credits Left shows how many credits remain available for content-generation tools.
Content credits may be used for:
• Generating FAQs.
• Creating blog ideas.
• Producing full blog content.
The percentage badge shows how much of your content-credit allowance has already been used.
Chatbots Used
Chatbots Used shows how many chatbot slots are currently occupied compared with the total number included with your plan.
For example, 2 / 2 means:
• Two chatbot slots are included.
• Both slots are currently being used.
• No additional chatbot can be created unless an existing chatbot is removed, an add-on is purchased or the subscription is upgraded.
A red progress bar indicates that the available chatbot capacity has been fully used.
Plan Resources and Usage
The Plan Resources & Usage section provides a detailed used-versus-available breakdown.
It displays:
• Content credits used compared with the total allowance.
• Chatbot messages used compared with the total allowance.
• Training characters used compared with the total allowance.
• Chatbot slots used compared with the total number available.
This section shows the same resources from a different perspective by displaying the amount already used rather than only the amount remaining.
Understanding Used and Remaining Figures
The top summary cards generally show what remains available.
The Plan Resources & Usage section shows how much has been used compared with the total allowance.
For example:
• A remaining balance shows what is still available.
• A figure such as 260 / 400 shows that 260 units have been used from a total allowance of 400.
Using both sections together provides a complete view of your resource position.
Understanding the Progress Bars
Each resource includes a progress bar showing how much of the allowance has been used.
• A short progress bar indicates low usage.
• A longer progress bar indicates that more of the resource has been consumed.
• A full or red progress bar indicates that the limit has been reached.
The percentage badge provides a more precise view of current usage.
When a Resource Limit Is Reached
Reaching a resource limit may prevent you from continuing to use the related feature.
For example:
• Reaching the message limit may affect further chatbot conversations.
• Reaching the content-credit limit may prevent additional content generation.
• Reaching the training-data limit may prevent more information from being added.
• Using every chatbot slot prevents another chatbot from being created.
Monitor usage before a resource reaches 100%.
Viewing Available Plans
If your current subscription no longer provides enough resources, select View Plans.
This opens the Plans & Upgrade section, where you can compare the plans currently available.
An upgrade may be more suitable if you regularly use most or all of your included resources.
Purchasing Add-Ons
Select Purchase Add-ons to buy additional resources without changing your subscription plan.
Available add-ons may include:
• Additional messages.
• Additional training capacity.
• Additional content credits.
• Additional chatbot slots.
• Resource bundles.
The available options and prices are displayed in the Add-Ons section.
Add-On Expiry Reminder
Add-ons are one-time purchases and expire at the end of the current monthly billing cycle.
This applies regardless of when they are purchased.
Any unused add-on resources do not roll over into the next billing cycle.
Check your billing-cycle end date before purchasing an add-on.
Choosing Between an Add-On and an Upgrade
An add-on may be suitable when:
• You need additional resources temporarily.
• Your usage increased unexpectedly.
• You only need more capacity for the current billing cycle.
An upgrade may be more suitable when:
• You regularly approach your limits.
• Your chatbot activity is growing.
• You consistently require more content credits or training capacity.
• You need more chatbot slots on an ongoing basis.
Monitoring Usage Regularly
Review the Usage section regularly to:
• Prevent interruptions to chatbot activity.
• Monitor content-credit consumption.
• Check available training capacity.
• Confirm whether chatbot slots are available.
• Decide whether an add-on or plan upgrade is required.
Checking usage before launching a campaign or adding a new chatbot can help prevent avoidable resource limits.
Auto-Purchase Credits
The Auto Recharge feature automatically tops up your account resources whenever they become low, ensuring your AI chatbot continues running without interruption.
When enabled, Snobbots monitors your available resources and purchases your selected bundle automatically whenever any of the trigger thresholds are reached.
Setting Up Auto Recharge
- From the left-hand menu, click Settings.
- Open the Auto Recharge tab.
- Turn the Auto Recharge switch On.
- Select the bundle you would like to purchase automatically:
- Small Bundle – 100 Credits, 500 Messages, 7,500 Characters
- Medium Bundle – 300 Credits, 1,500 Messages, 15,000 Characters
- Large Bundle – 700 Credits, 3,000 Messages, 40,000 Characters
- Choose your Monthly Spending Cap to limit how much can be spent on automatic recharges each month. Available limits include £29, £49, £99, £100, £200, or No Limit.
- Review the Auto Recharge Summary to confirm your selected bundle, resources, and monthly spending cap.
- Click Save Settings to apply your changes.
Auto Recharge Triggers
A recharge will be processed automatically when any one of the following thresholds is reached:
- Content Credits drop below 50
- Messages drop below 100
- Training Characters drop below 5,000
Note: The monthly spending cap prevents automatic recharges from exceeding your selected limit within a calendar month. Once the cap is reached, no further automatic purchases will be made until the next month unless you increase or remove the spending limit.
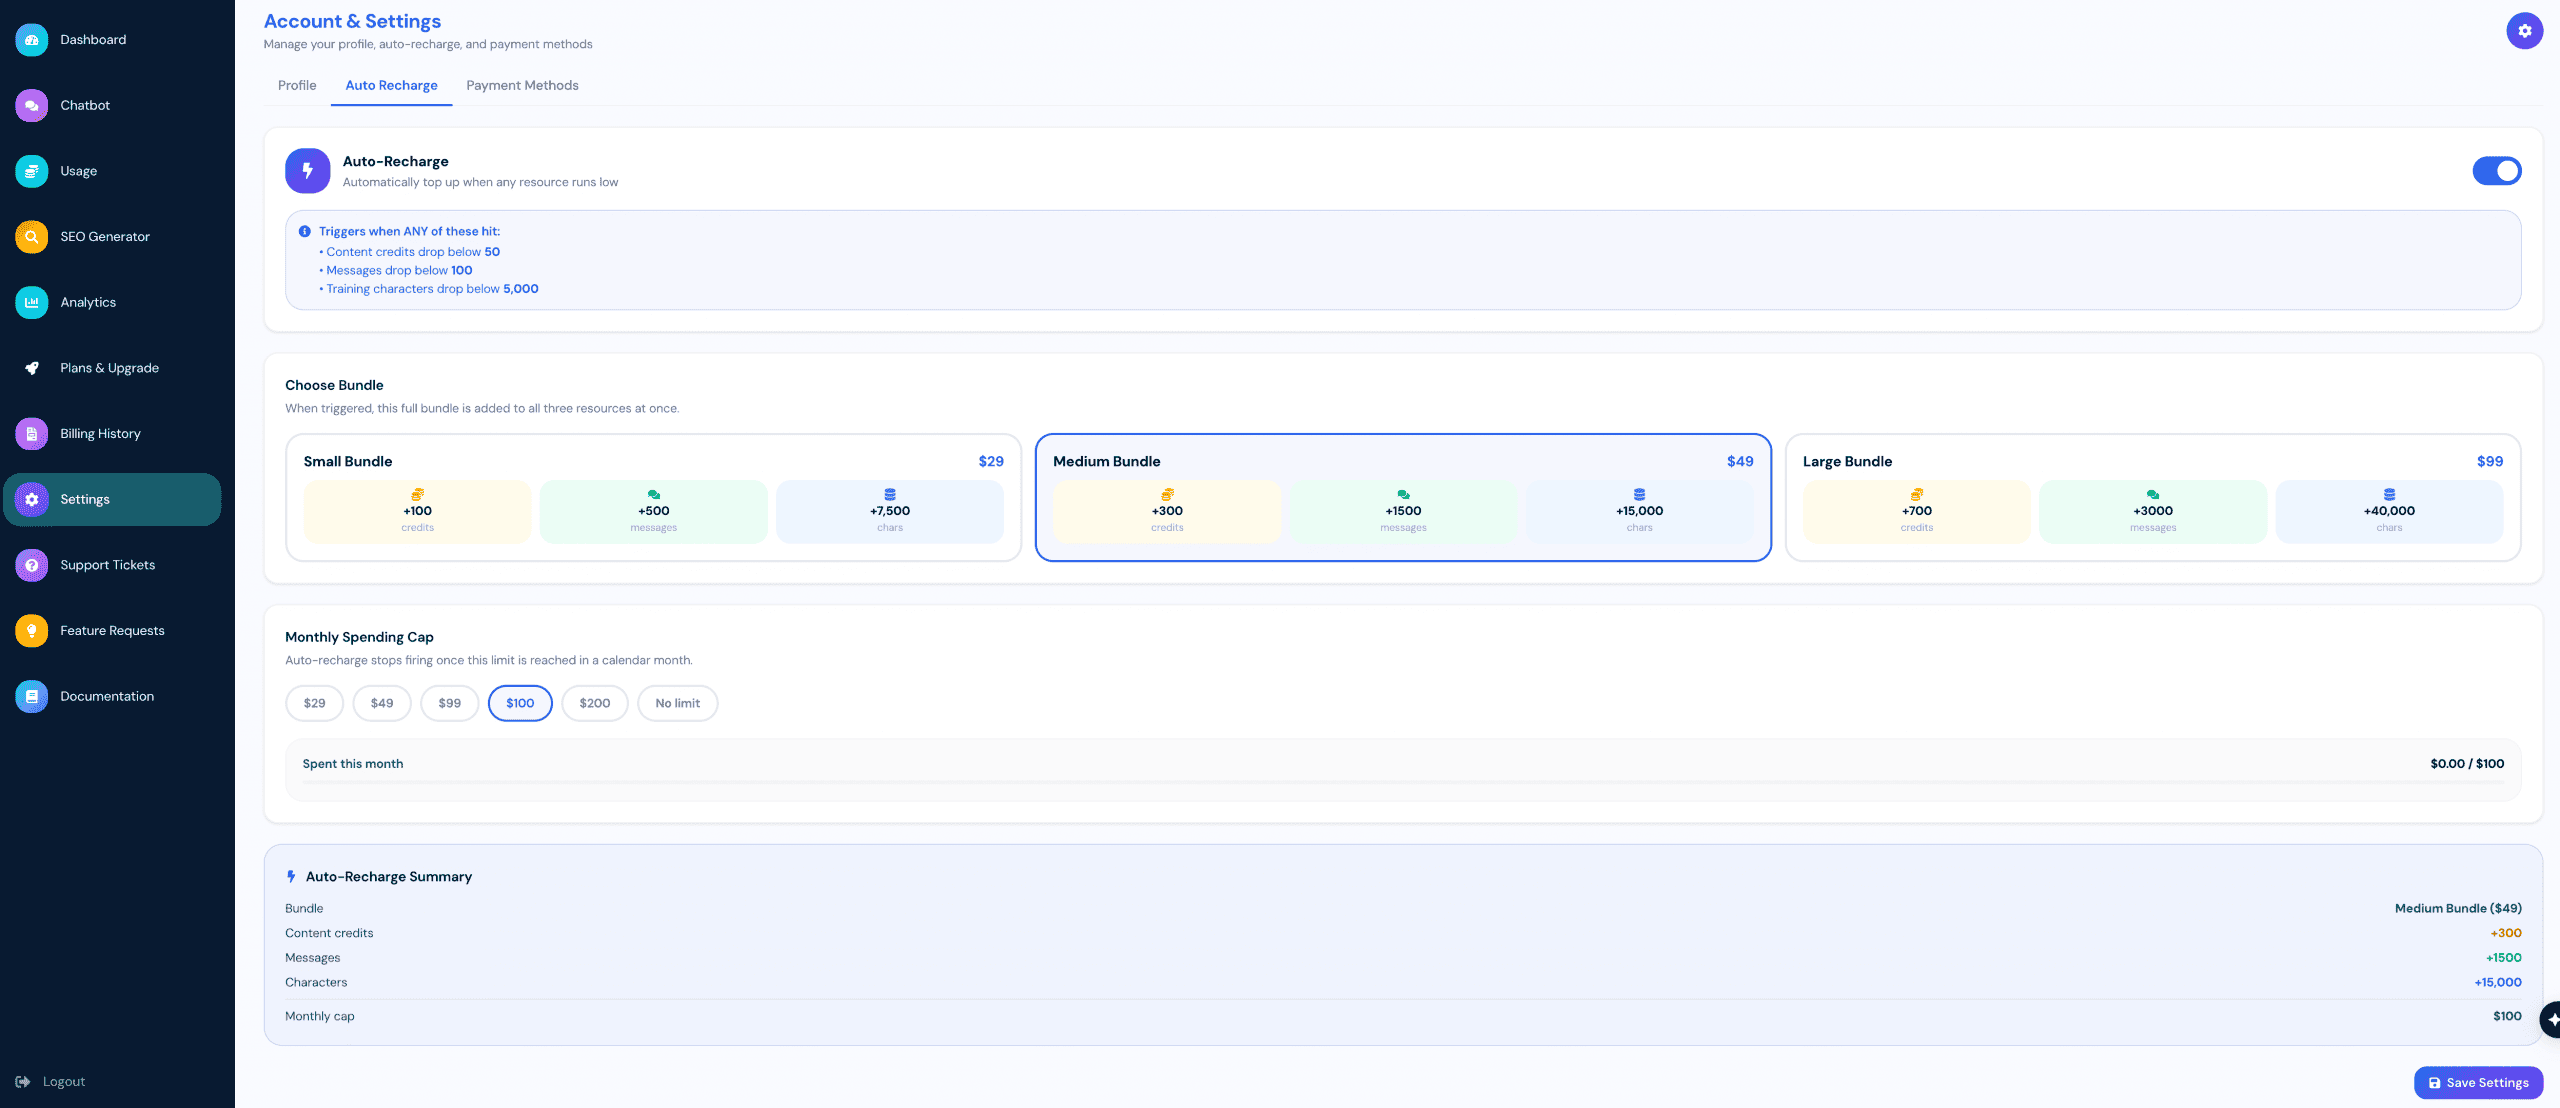
Subscription Plans and Upgrading
The Plans & Upgrade section allows you to compare the available SnobBots subscription plans and manage your current subscription.
You can choose monthly or yearly billing, upgrade to a plan with greater capacity, schedule a downgrade, change your billing cycle or cancel your subscription.
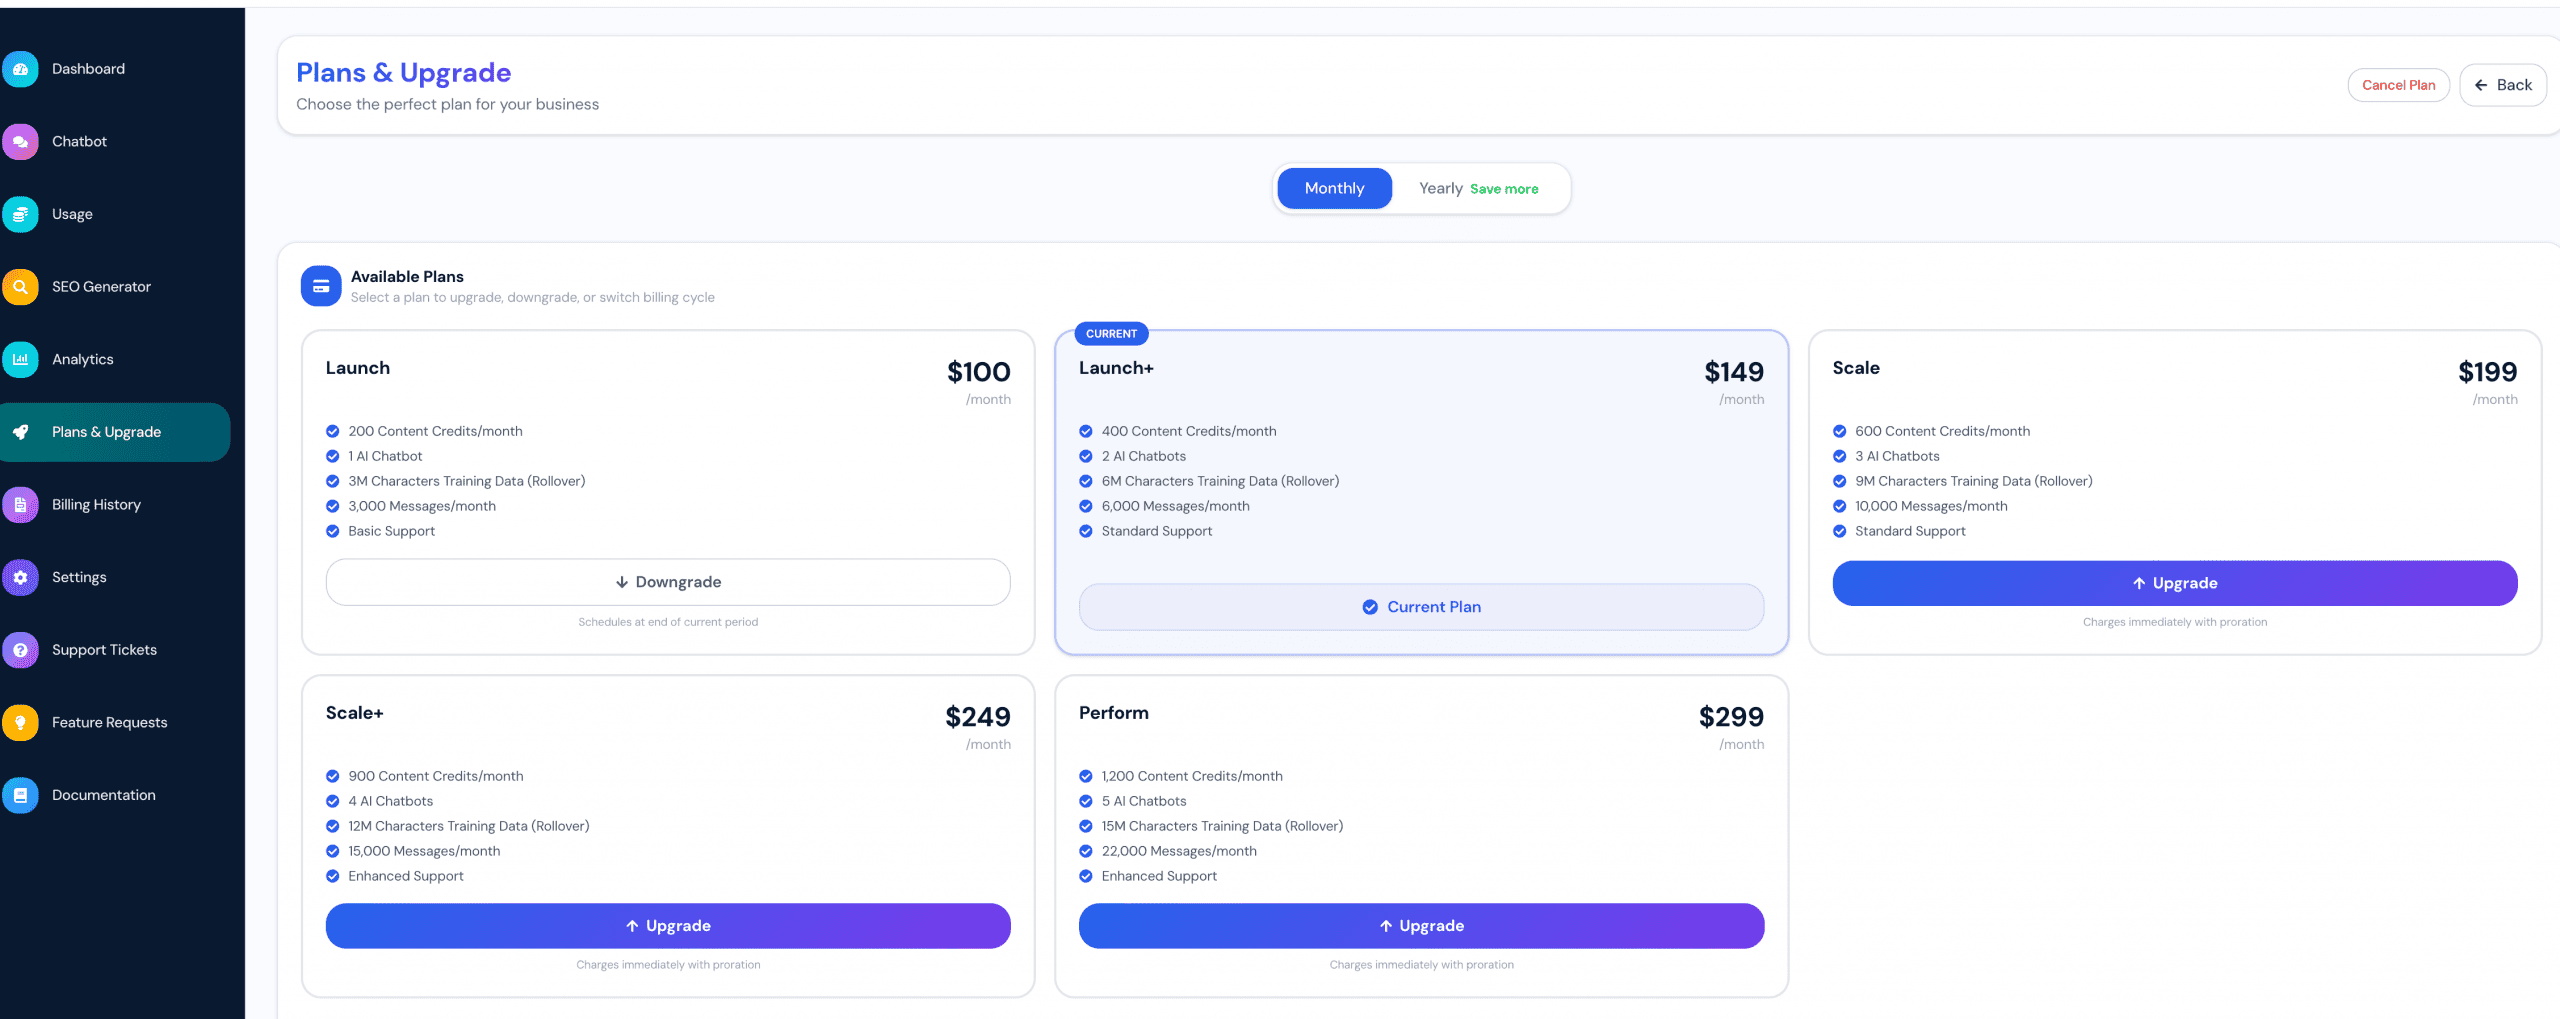
Accessing Plans and Upgrades
To view and manage your subscription:
-
Log in to your SnobBots account.
-
Select Plans & Upgrade from the left-hand navigation menu.
The page will display the plans currently available and identify your active subscription.
Monthly and Yearly Billing
Use the billing-cycle selector near the top of the page to switch between:
• Monthly – Your subscription renews and is charged each month.
• Yearly – Your subscription is charged annually and includes a saving compared with paying monthly for the same period.
Select Monthly or Yearly to view the relevant prices before comparing the available plans.
Monthly Billing
Monthly billing may be suitable if:
• You prefer a shorter billing commitment.
• Your usage requirements may change regularly.
• You want greater flexibility when changing plans.
• You prefer to manage subscription costs monthly.
Yearly Billing
Yearly billing may be suitable if:
• You expect to use SnobBots throughout the year.
• You want to reduce the overall annual subscription cost.
• Your usage requirements are relatively stable.
• You prefer fewer billing transactions.
Select Yearly to see the annual price and saving available for each plan.
Review the total annual charge before confirming a yearly subscription.
Understanding the Plan Cards
Each plan card displays its current price and included resources.
These may include:
• Monthly content credits.
• Number of AI chatbots.
• Training-data allowance.
• Monthly chatbot message allowance.
• Support level.
• Any other features included with the plan.
Plans, prices, discounts and allowances may change. Always use the information displayed on the live Plans & Upgrade page when making a decision.
Identifying Your Current Plan
Your active subscription is marked with a Current label and a Current Plan button.
Plans offering greater limits will display an Upgrade option.
Plans offering lower limits will display a Downgrade option.
This allows you to see how each available plan compares with your current subscription.
Comparing Plans
Before changing your subscription, compare:
• The number of chatbots you need.
• Your current and expected message usage.
• The amount of training data stored.
• Your content-credit requirements.
• The support level required.
• The monthly or yearly cost.
• Any expected business growth.
You can review your current activity through the Usage and Analytics sections before selecting a plan.
Upgrading Your Plan
An upgrade moves your account to a plan with higher limits or additional resources.
To upgrade:
-
Open Plans & Upgrade.
-
Select Monthly or Yearly.
-
Review the available plans.
-
Select the plan that meets your requirements.
-
Select Upgrade.
-
Review the payment summary and any prorated charge.
-
Confirm the upgrade.
The new plan becomes active after the upgrade has been successfully processed.
Upgrade Proration
Plan upgrades are applied immediately with proration.
Proration adjusts the payment to account for:
• The unused portion of your current subscription.
• The cost of the new plan for the remaining billing period.
This prevents you from paying the full price of both plans for the same period.
The exact charge depends on your current plan, billing cycle and the date of the upgrade.
Always review the final amount before confirming the change.
Downgrading Your Plan
A downgrade moves your account to a plan with lower limits or a lower subscription cost.
To schedule a downgrade:
-
Open Plans & Upgrade.
-
Select the required billing cycle.
-
Review the available plans.
-
Select the lower plan you want.
-
Select Downgrade.
-
Review when the change will take effect.
-
Confirm the downgrade.
When a Downgrade Takes Effect
A downgrade is normally scheduled for the end of the current billing period.
Your existing plan and its resources remain active until that period ends. The lower plan will begin from the next renewal date.
Before Downgrading
Before moving to a lower plan, check:
• How many chatbots you currently use.
• Your monthly message usage.
• Your content-credit usage.
• Your stored training data.
• The support level you need.
• Whether your current usage exceeds the limits of the lower plan.
You may need to reduce your usage or remove resources before the downgrade takes effect.
Changing from Monthly to Yearly Billing
To switch from monthly to yearly billing:
-
Select Yearly at the top of the Plans & Upgrade page.
-
Review the annual prices and savings.
-
Select the required plan.
-
Review the billing summary.
-
Confirm the change.
The annual saving will be reflected in the price shown before confirmation.
Changing from Yearly to Monthly Billing
To move from yearly to monthly billing:
-
Select Monthly.
-
Review the monthly price.
-
Select the required plan.
-
Check when the billing-cycle change will take effect.
-
Confirm the change.
Review the confirmation information carefully, as the change may be scheduled for the end of the current yearly billing period.
Cancelling Your Plan
The Cancel Plan button is displayed in the upper-right corner of the Plans & Upgrade page.
To begin cancellation:
-
Select Cancel Plan.
-
Review the cancellation information.
-
Check when the cancellation will take effect.
-
Review any effect on your chatbots, account resources and stored information.
-
Confirm only if you want to proceed.
If you only want a smaller subscription, use the Downgrade option instead of cancelling the plan.
Reviewing a Subscription Change
Before confirming an upgrade, downgrade, billing-cycle change or cancellation, check:
• The selected plan.
• The billing cycle.
• The amount being charged.
• Any discount applied.
• Any prorated credit or charge.
• The date the change takes effect.
• The next renewal date.
• The resources included after the change.
Do not confirm until the information is correct.
Checking Billing History
After changing your subscription, open Billing History to review the transaction.
Billing History may display:
• The subscription change.
• The amount charged.
• Any prorated adjustment.
• Any discount applied.
• The payment status.
• The next billing date.
Important Pricing Information
Subscription plans, prices, allowances, discounts and included features may be updated over time.
The information shown on the live Plans & Upgrade page inside your SnobBots account is always the current information.
Review the live plan details and final billing summary before confirming any subscription change.
Add-On Credits
The Add-Ons section allows you to purchase additional resources without changing your existing subscription plan.
Add-ons are one-time purchases that increase the selected account allowance immediately. They do not automatically renew or permanently change the limits included with your subscription.
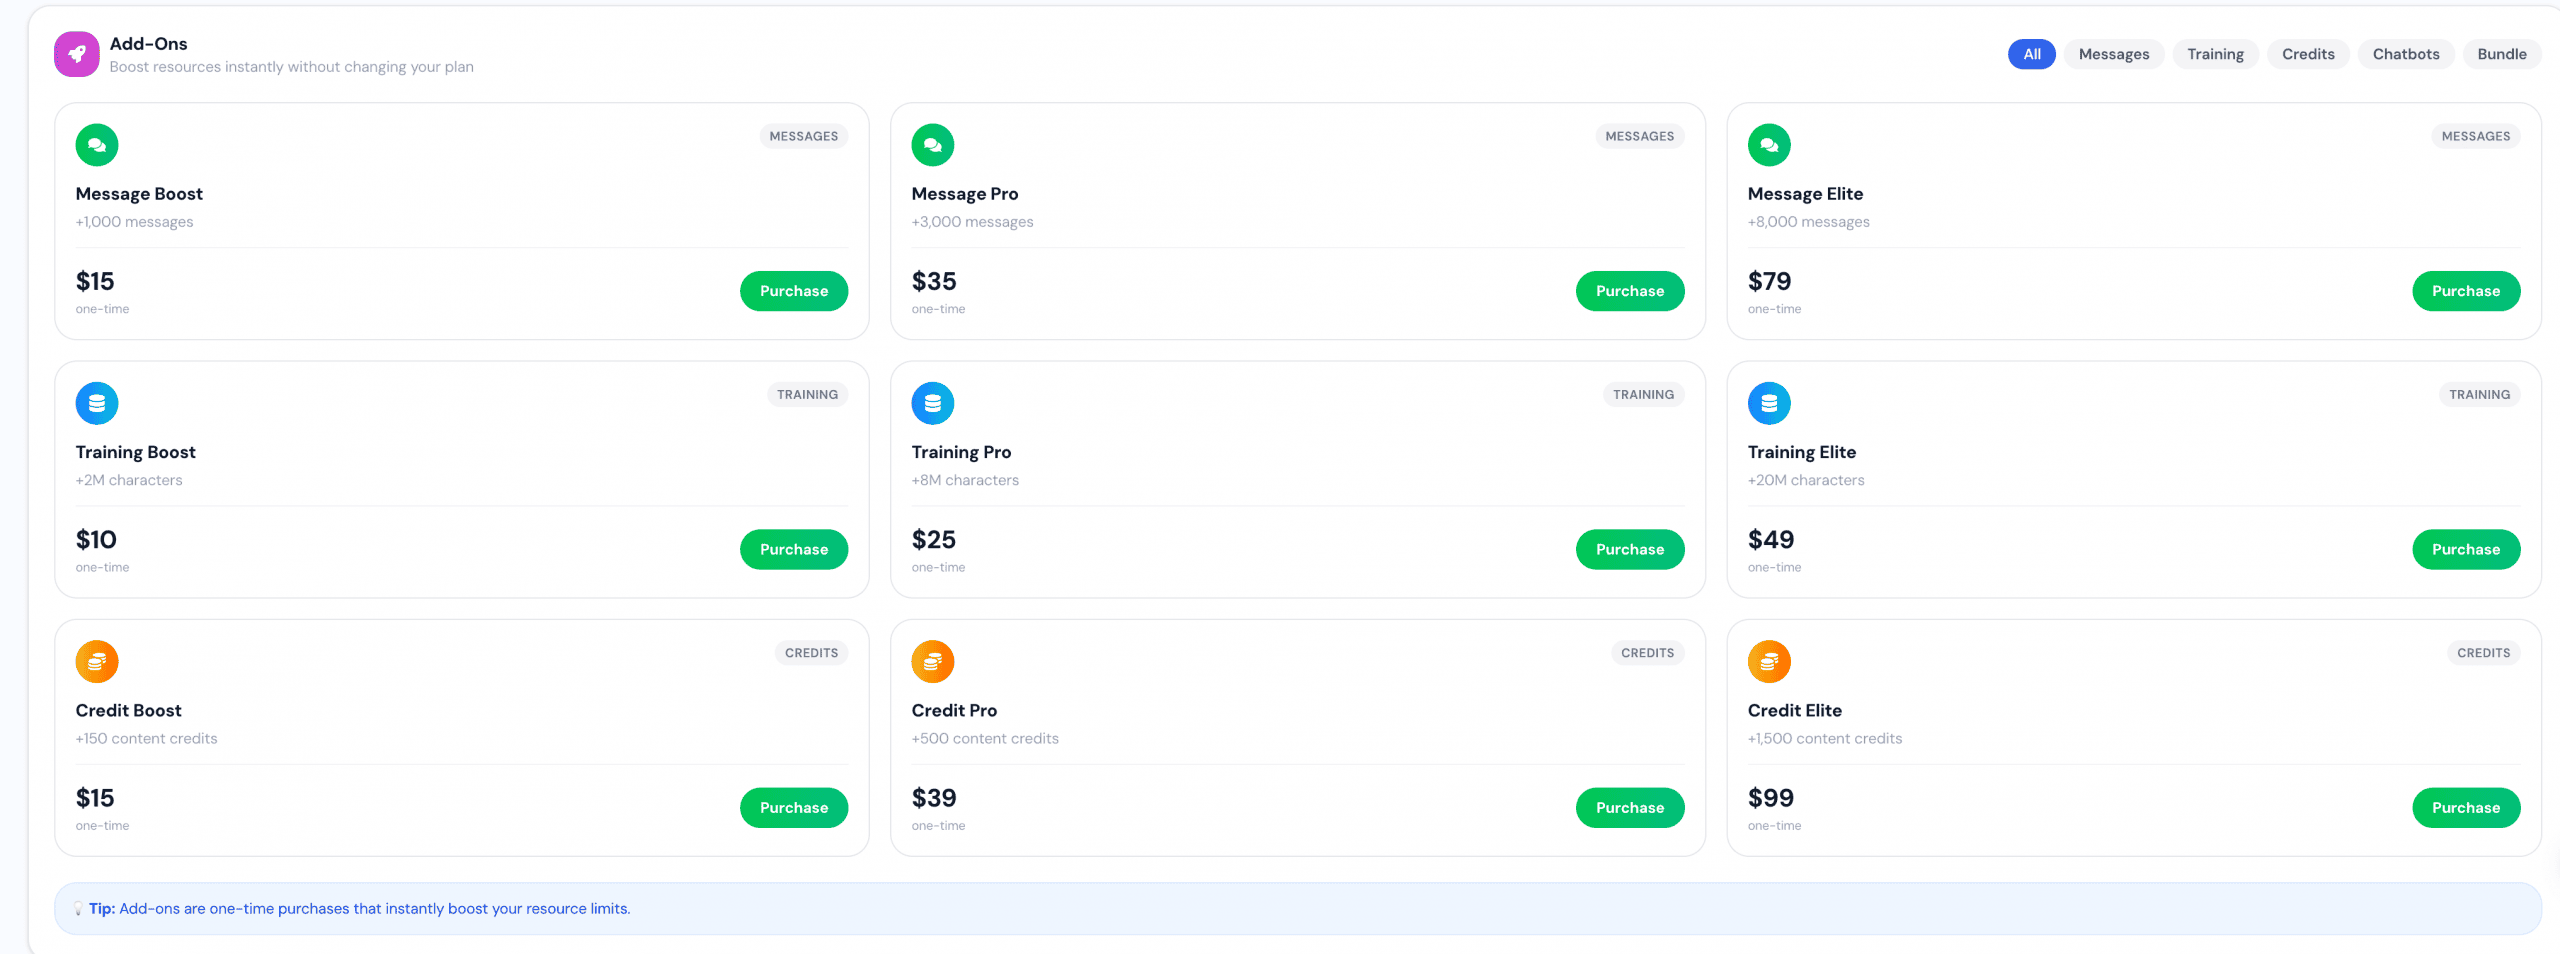
Accessing Add-Ons
To view the available add-ons:
-
Log in to your SnobBots account.
-
Select Plans & Upgrade from the left-hand navigation menu.
-
Scroll to the Add-Ons section.
The available add-ons, resource amounts and current prices will be displayed.
Understanding Add-Ons
Each add-on card displays:
• The type of resource being added.
• The additional allowance included.
• The one-time purchase price.
• A Purchase button.
Add-on options, quantities and prices may change. Always refer to the live Add-Ons section for the current information.
Available Add-On Categories
Use the filters at the top of the section to display different add-on types.
The available categories may include:
• Messages.
• Training.
• Credits.
• Chatbots.
• Bundles.
Select All to view every add-on currently available.
Message Add-Ons
Message add-ons increase the number of chatbot messages available during the current monthly billing cycle.
This may be useful if:
• Your chatbot is receiving more conversations than expected.
• You are approaching your monthly message limit.
• A campaign or busy period has increased visitor activity.
The additional messages are added to your existing allowance after the purchase is completed.
Training Add-Ons
Training add-ons temporarily increase the amount of training data available to your account.
Training data may include:
• Website content.
• Uploaded files.
• Manually entered information.
• Questions and answers.
• Other content used to train your chatbot.
Review your current training usage before selecting an add-on.
Content-Credit Add-Ons
Content-credit add-ons provide additional credits for SnobBots content-generation tools.
These credits may be used for:
• Generating FAQs.
• Creating blog ideas.
• Producing full blog content.
The additional credits are added to your available balance after the purchase has been processed.
Chatbot Add-Ons
Where available, chatbot add-ons provide additional chatbot capacity during the current monthly billing cycle.
Review the number of chatbots included with your subscription before purchasing an additional slot.
Because the additional capacity expires at the end of the billing cycle, make sure your account will remain within its normal plan limits afterwards.
Bundle Add-Ons
Bundle add-ons may combine several resources into one purchase.
A bundle may include a mixture of:
• Messages.
• Training capacity.
• Content credits.
• Chatbot capacity.
Review the complete bundle details before purchasing to make sure the included resources meet your requirements.
Purchasing an Add-On
To purchase an add-on:
-
Open the Add-Ons section.
-
Use the category filters to find the required resource.
-
Review the quantity and one-time price.
-
Select Purchase.
-
Review the payment summary.
-
Confirm the purchase.
Once the payment has been successfully processed, the additional allowance will be added to your account.
One-Time Purchase
All add-ons are one-time purchases.
This means:
• The add-on does not automatically renew.
• The purchase does not permanently increase your subscription allowance.
• The purchase does not change your current subscription plan.
• You must purchase another add-on if you require additional resources in a future billing cycle.
Add-On Expiry
All add-on resources expire at the end of your current monthly billing cycle.
This applies regardless of when the add-on is purchased.
For example, if your monthly billing cycle ends on the 30th and you purchase an add-on on the 25th, the add-on will still expire on the 30th.
The purchase does not start a new 30-day period.
Unused Add-On Resources
Any unused add-on resources will expire when the current monthly billing cycle ends.
Unused add-ons:
• Do not roll over into the next billing cycle.
• Cannot be carried forward for later use.
• Do not extend your normal subscription allowance.
Purchase only the amount you reasonably expect to use before your current monthly billing cycle ends.
Checking Your Billing-Cycle End Date
Before purchasing an add-on, check when your current monthly billing cycle ends.
You can review your next billing date in the Billing History section.
The closer you are to the end of the billing cycle, the less time you will have to use the additional resources.
Before Purchasing
Before confirming an add-on purchase, check:
• Your current resource usage.
• Your remaining subscription allowance.
• The amount included with the add-on.
• The one-time price.
• Your monthly billing-cycle end date.
• Whether upgrading your subscription would provide better value for ongoing usage.
If you regularly need add-ons, moving to a larger subscription plan may be more suitable.
After Purchasing
After the purchase has been completed:
-
Open the Usage section.
-
Confirm that the additional allowance has been added.
-
Monitor the remaining balance.
-
Use the added resources before the billing cycle ends.
You can also open Billing History to review the add-on transaction and payment status.
Important Reminder
Add-ons provide a temporary increase in resources for the current monthly billing cycle only.
They are one-time purchases, do not renew automatically and expire at the end of the current monthly billing cycle, regardless of the date on which they were purchased.
Analytics Overview
The Analytics section provides a complete overview of activity across your SnobBots account.
It brings together chatbot conversations, captured leads, generated content, individual chatbot performance and website-audit results in one central dashboard.
You can use the available date filters to review performance over different periods and export each analytics section as a PDF or CSV file.
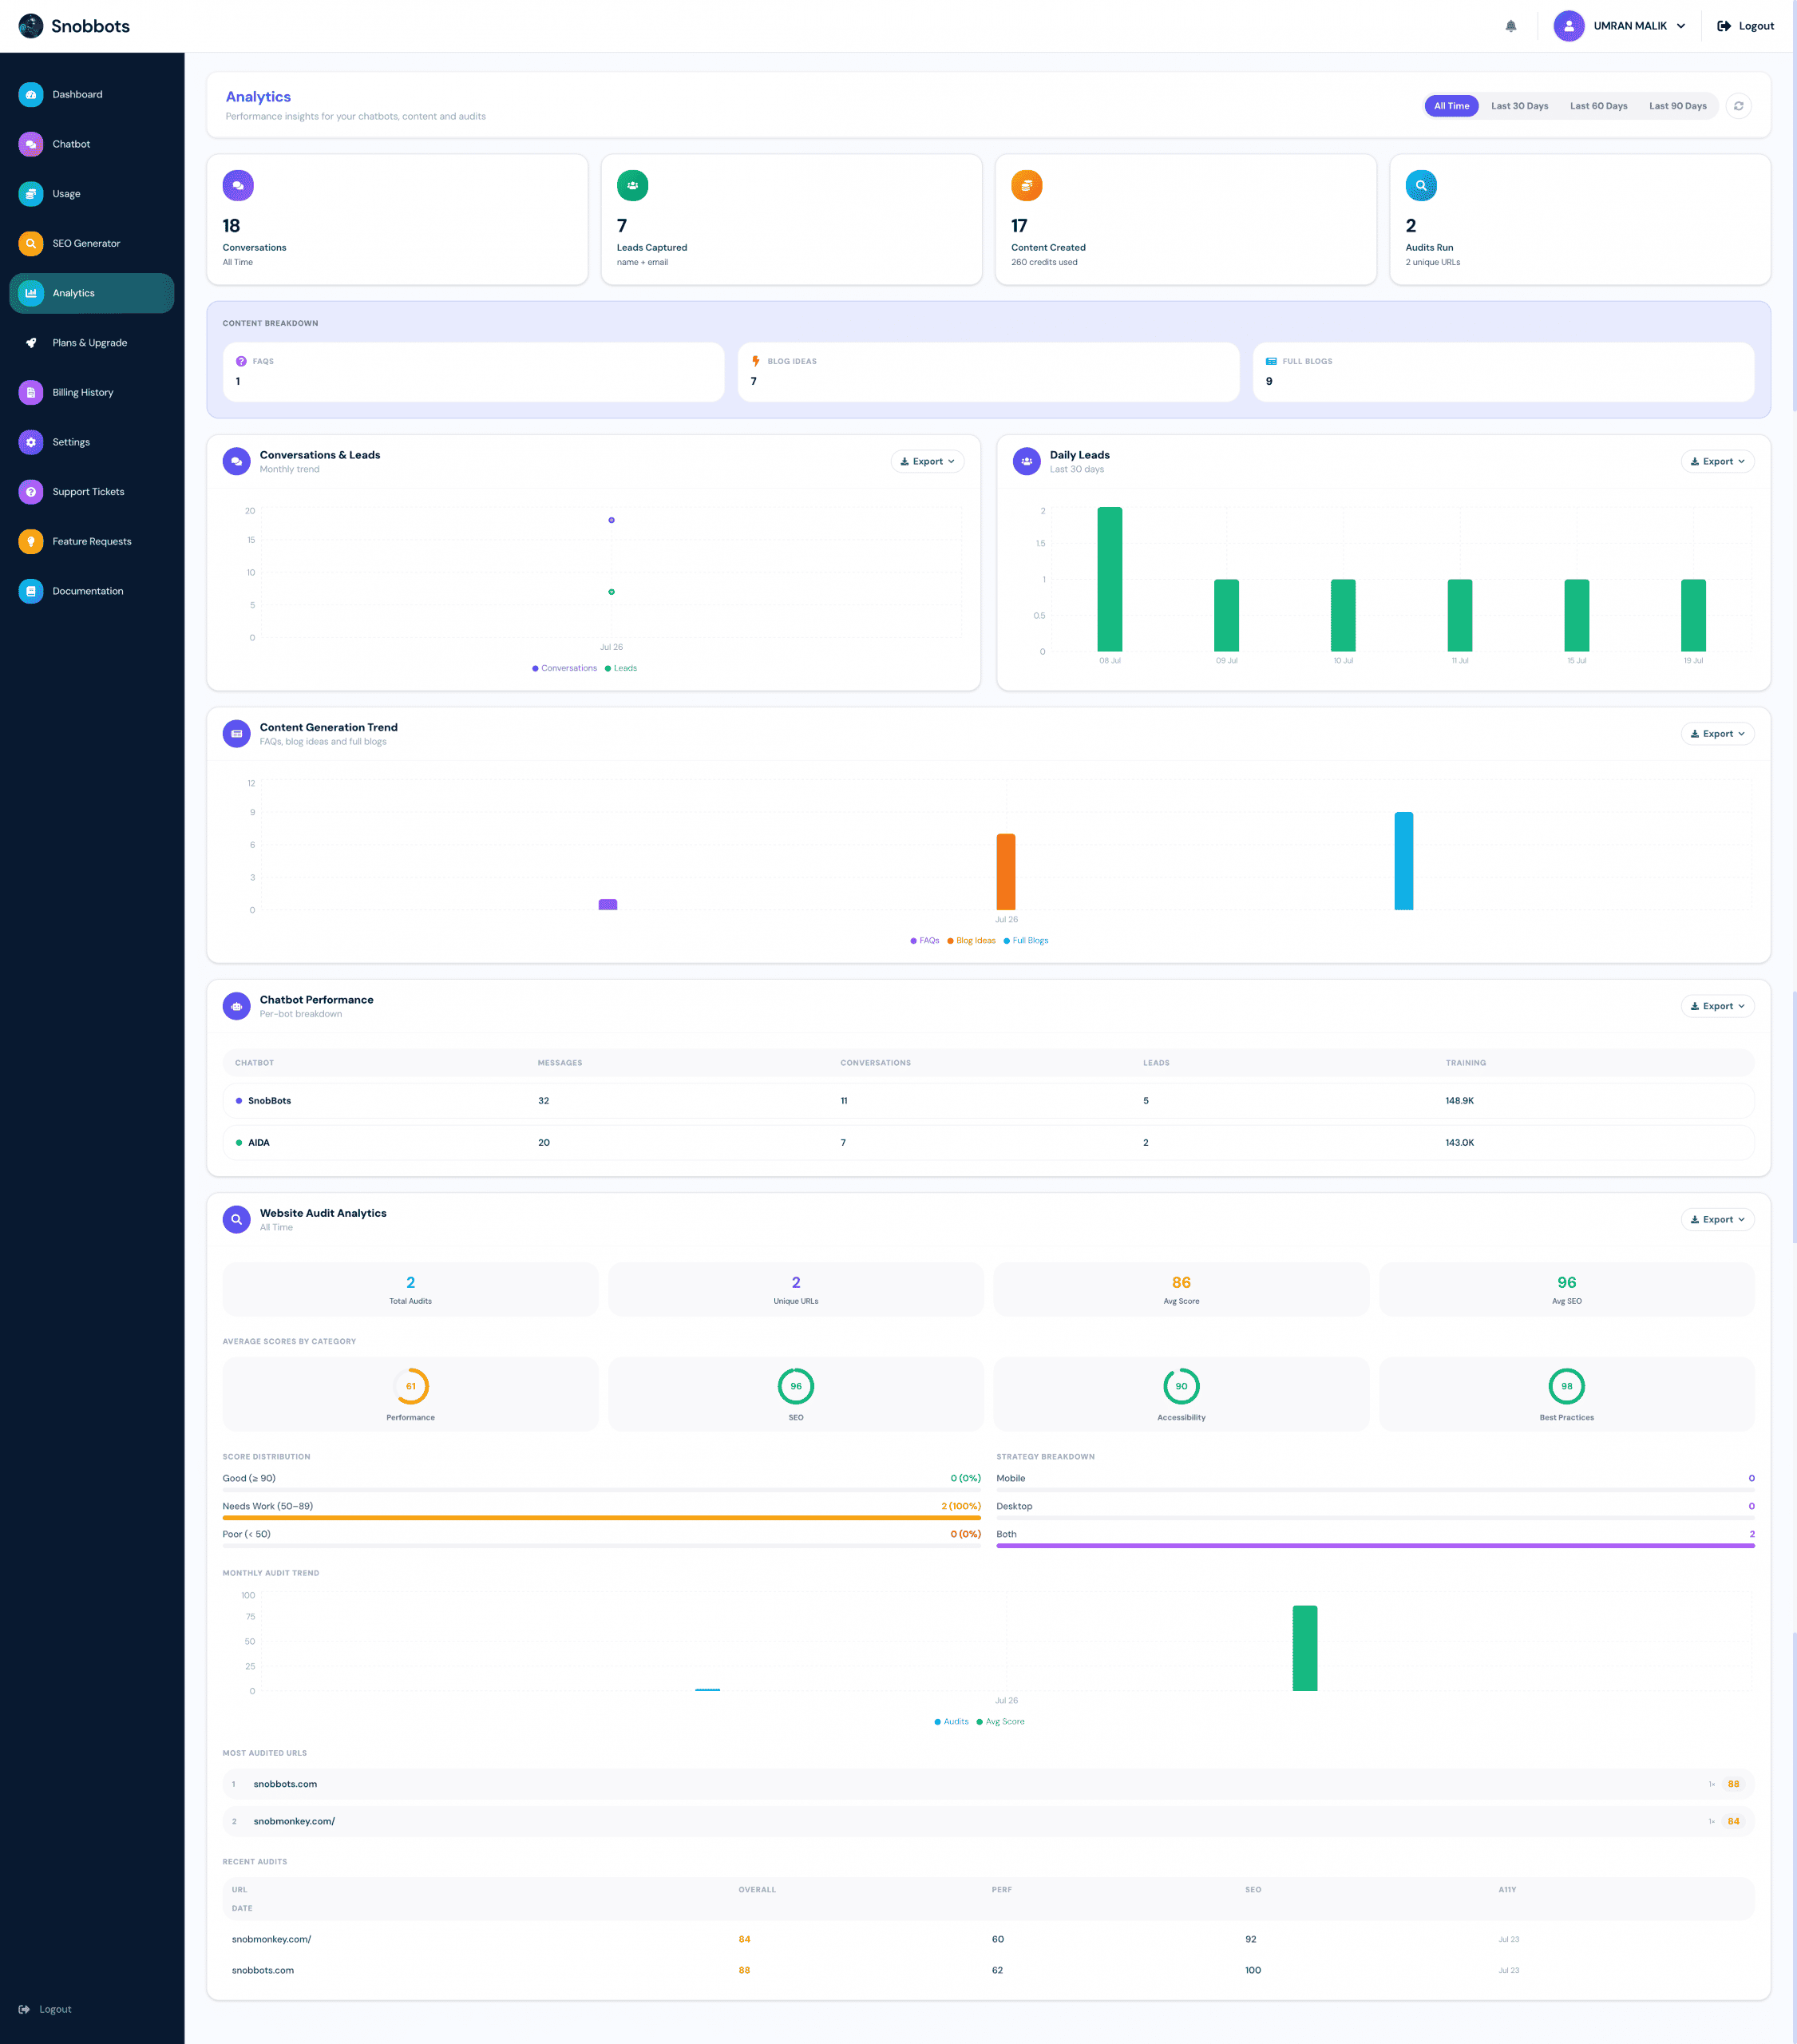
Accessing Analytics
To open the Analytics dashboard:
-
Log in to your SnobBots account.
-
Select Analytics from the left-hand navigation menu.
The dashboard will display analytics from all relevant chatbots, content-generation tools and website audits connected to your account.
Selecting a Reporting Period
Use the date options in the upper-right corner of the Analytics page to choose the period you want to review.
The available options are:
• All Time – Displays all available analytics recorded on your account.
• Last 30 Days – Displays activity from the previous 30 days.
• Last 60 Days – Displays activity from the previous 60 days.
• Last 90 Days – Displays activity from the previous 90 days.
Select a reporting period before reviewing or exporting the data.
Refreshing the Analytics
Select the refresh icon beside the date filters to reload the dashboard with the latest available information.
This is useful after receiving new chatbot conversations, capturing leads, generating content or completing a website audit.
Analytics Summary
The summary cards at the top of the page provide a quick overview of the most important account activity.
The summary includes:
• Conversations – The total number of chatbot conversations recorded during the selected period.
• Leads Captured – The number of visitors who provided lead information through your chatbots.
• Content Created – The total number of content items generated using the SnobBots content tools. The card also displays the number of content credits used.
• Audits Run – The number of website audits completed. It also shows how many unique website addresses were audited.
These totals provide a quick view of how actively the different parts of the SnobBots platform are being used.
Conversations
The Conversations total shows the number of individual chatbot conversations recorded during the selected reporting period.
A conversation begins when a visitor interacts with one of your deployed chatbots.
This figure can help you understand:
• How frequently visitors use your chatbots.
• Whether chatbot engagement is increasing or decreasing.
• Which reporting periods generated the most activity.
• How chatbot activity compares with the number of leads captured.
A high number of conversations with a low number of leads may indicate that the lead-capture message or chatbot journey needs reviewing.
Leads Captured
The Leads Captured total shows how many visitors submitted their contact information through a chatbot.
Depending on the information provided, a lead may include details such as:
• Name.
• Email address.
• Location.
• Conversation history.
• The chatbot used.
• The date on which the lead was captured.
Comparing leads with total conversations can help you understand how effectively your chatbots convert interactions into potential business enquiries.
Content Created
The Content Created total shows how many content items have been generated using the SnobBots content tools.
The summary also displays the number of content credits used during the selected period.
Content activity is divided into:
• FAQs.
• Blog Ideas.
• Full Blogs.
This information helps you monitor content production and understand how your available content credits are being used.
Audits Run
The Audits Run total shows how many website audits have been completed.
The card also displays the number of unique website addresses included in those audits.
For example, running several audits on the same website increases the total number of audits but does not increase the number of unique website addresses.
Content Breakdown
The Content Breakdown section separates generated content into three categories.
• FAQs – The number of FAQ content items generated.
• Blog Ideas – The number of blog topics or content ideas created.
• Full Blogs – The number of complete blog articles generated.
Use this breakdown to see which content tools are being used most frequently.
Conversations and Leads
The Conversations & Leads chart compares chatbot conversations with captured leads over time.
The chart uses separate colours for:
• Conversations.
• Leads.
This comparison helps you identify:
• Periods with the highest chatbot engagement.
• Whether an increase in conversations also resulted in more leads.
• Changes in visitor activity over time.
• Potential gaps between chatbot engagement and lead conversion.
Move across the reporting period to compare the relationship between conversations and captured leads.
Daily Leads
The Daily Leads chart displays the number of leads captured on individual dates.
Each bar represents the number of leads recorded on that day.
Use this chart to identify:
• Days with the highest number of captured leads.
• Periods with little or no lead activity.
• Changes following a marketing campaign or website update.
• Patterns in visitor enquiries.
This information can help you understand when your chatbot produces the strongest lead-generation results.
Content Generation Trend
The Content Generation Trend chart shows when content was created and which type of content was generated.
The chart separates activity into:
• FAQs.
• Blog Ideas.
• Full Blogs.
Each content type is displayed in a different colour.
Use this chart to monitor content production over time and identify periods when your content-generation tools were used most actively.
Chatbot Performance
The Chatbot Performance section provides a separate performance breakdown for each chatbot connected to your account.
The table includes:
• Chatbot – The name of the chatbot.
• Messages – The total number of chatbot messages used.
• Conversations – The number of visitor conversations recorded.
• Leads – The number of leads captured by that chatbot.
• Training – The amount of training data connected to the chatbot.
This table is useful when managing multiple chatbots because it allows you to compare their activity and performance.
Comparing Chatbot Performance
When comparing chatbots, consider:
• Which chatbot receives the most conversations.
• Which chatbot captures the most leads.
• The relationship between messages, conversations and leads.
• Whether each chatbot has sufficient training information.
• Whether one chatbot performs significantly better than another.
If a chatbot receives conversations but captures few leads, review its lead-capture settings, welcome message, training data and conversation flow.
Website Audit Analytics
The Website Audit Analytics section provides a detailed overview of audits completed through the SnobBots Website Audit tool.
It includes:
• Total Audits.
• Unique URLs.
• Average Overall Score.
• Average SEO Score.
• Average scores by category.
• Score distribution.
• Strategy breakdown.
• Monthly audit trends.
• Most-audited website addresses.
• Recent audit results.
Total Audits
Total Audits shows the total number of website audits completed during the selected period.
Running a new audit of a previously checked website will increase this number.
Unique URLs
Unique URLs shows how many different website addresses have been audited.
This allows you to distinguish between:
• Multiple audits performed on the same website.
• Audits performed across several different websites.
This is particularly useful for agencies managing audits for multiple clients.
Average Overall Score
The Average Score shows the combined average result across the website audits included in the selected period.
The score provides a general indication of overall website quality.
Use it to monitor whether audited websites are improving over time.
Average SEO Score
The Average SEO score shows the average search engine optimisation result across the included website audits.
This score can help identify whether audited websites generally follow recognised technical SEO practices.
A lower score may indicate that further SEO improvements are required.
Average Scores by Category
The Average Scores by Category section separates website-audit results into four areas.
• Performance – Measures website loading performance and technical speed.
• SEO – Measures technical search engine optimisation.
• Accessibility – Measures how accessible the website is to different users.
• Best Practices – Measures whether the website follows recommended development and security practices.
Reviewing each category separately makes it easier to identify where improvements are needed.
Score Distribution
The Score Distribution section groups completed audits according to their overall results.
The available categories are:
• Good – Scores of 90 or higher.
• Needs Work – Scores between 50 and 89.
• Poor – Scores below 50.
The number and percentage of audits in each category are displayed.
This provides a quick view of the overall quality of the websites included in your audit history.
Strategy Breakdown
The Strategy Breakdown shows which device strategy was used for the website audits.
The categories are:
• Mobile.
• Desktop.
• Both.
This helps you see whether audits were performed for mobile devices, desktop devices or both strategies.
Testing both mobile and desktop is recommended because website performance can vary significantly between devices.
Monthly Audit Trend
The Monthly Audit Trend chart displays website-audit activity over time.
It compares:
• The number of audits completed.
• The average audit score.
Use this chart to track whether audit activity is increasing and whether website scores are improving.
Most-Audited URLs
The Most Audited URLs section lists the website addresses that have been audited most frequently.
Each entry shows:
• The website address.
• The number of times it has been audited.
• Its recorded score.
Repeated audits can be useful for monitoring changes after website improvements have been made.
Recent Audits
The Recent Audits table displays the latest website-audit results.
The information may include:
• URL – The website address that was audited.
• Date – The date on which the audit was completed.
• Overall – The website’s overall audit score.
• Performance – The website’s performance score.
• SEO – The website’s SEO score.
• Accessibility – The website’s accessibility score.
Use this table to review and compare the latest audit results without opening each report individually.
Exporting Analytics
Each main analytics panel includes an Export menu.
Both export formats are available:
• Export as CSV.
• Export as PDF.
You can export the Conversations & Leads data, Daily Leads, Content Generation Trend, Chatbot Performance and Website Audit Analytics separately.
Exporting as CSV
CSV exports provide the analytics data in a spreadsheet-compatible format.
To export a section as CSV:
-
Select the required reporting period.
-
Locate the analytics section you want to export.
-
Select Export.
-
Choose CSV.
-
Save the downloaded file to your device.
CSV files can be opened using applications such as Microsoft Excel, Google Sheets or other spreadsheet software.
CSV is useful when you want to:
• Sort or filter the data.
• Perform additional calculations.
• Create your own charts.
• Combine the results with other business data.
• Import information into another reporting system.
Exporting as PDF
PDF exports provide a formatted report that can be viewed, stored, printed or shared.
To export a section as PDF:
-
Select the required reporting period.
-
Locate the analytics section you want to export.
-
Select Export.
-
Choose PDF.
-
Save the downloaded report to your device.
PDF is useful when you want to:
• Share a report with a client or colleague.
• Keep a fixed record of the analytics.
• Print the report.
• Attach the report to an email.
• Include the information in business or client reporting.
Choosing the Correct Export Format
Choose CSV when you need editable data for analysis or spreadsheet work.
Choose PDF when you need a formatted report that is ready to read, print or share.
The exported information will relate to the analytics section and reporting period selected at the time of export.
Reviewing Analytics Regularly
Reviewing your analytics regularly can help you:
• Monitor chatbot engagement.
• Measure lead-generation performance.
• Compare individual chatbots.
• Track content production and credit usage.
• Identify website performance issues.
• Monitor improvements across repeated website audits.
• Produce reports for internal teams or clients.
For consistent reporting, select the same reporting period and export format each time you prepare a comparison.
Billing Overview
The Billing History page provides a complete overview of your SnobBots subscription and payment activity. From this page, you can review your current plan, monitor spending, check your next billing date, search previous transactions and export your billing records.
To access this page, log in to your SnobBots account and select Billing History from the left-hand navigation menu.
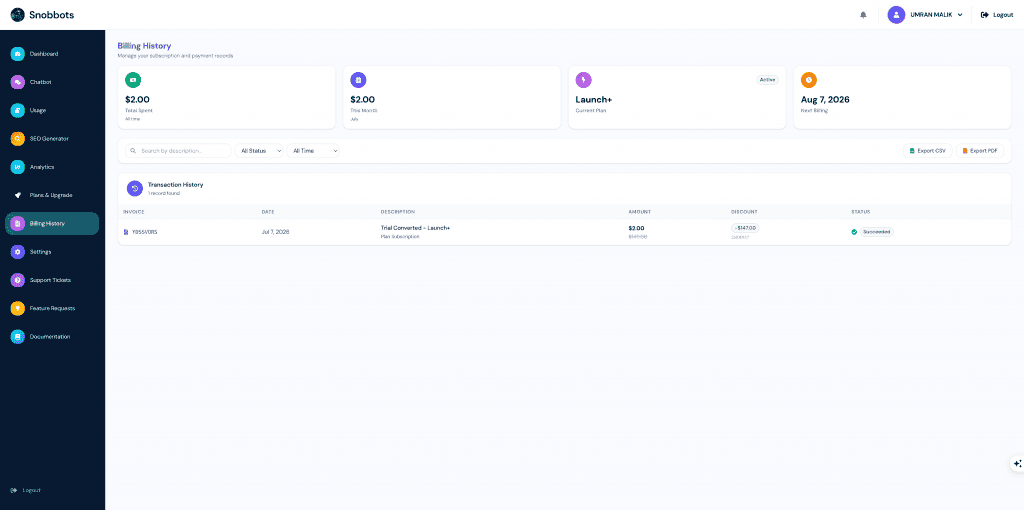
Billing Summary
At the top of the page, four summary cards display important billing information:
• Total Spent – Shows the total amount charged to your account since it was created.
• This Month – Shows the amount charged during the current calendar month.
• Current Plan – Displays the name and status of your active SnobBots subscription plan.
• Next Billing – Shows the date on which your next subscription payment is scheduled.
The amounts, plan name and billing date displayed will depend on your subscription and account activity.
Searching and Filtering Transactions
Use the controls above the Transaction History section to locate specific billing records.
You can:
• Enter a keyword in the Search by Description field.
• Filter transactions according to their payment status.
• Select a time period to view transactions from a particular date range.
The transaction list will update according to the filters you select.
Transaction History
The Transaction History section displays a detailed record of payments and subscription charges associated with your account.
Each transaction may include:
• Invoice – The unique invoice or transaction reference.
• Date – The date on which the payment was processed.
• Description – Details of the charge, such as a subscription purchase, trial conversion, renewal or plan change.
• Amount – The final amount charged. Where applicable, the original price may also be displayed.
• Discount – Any promotional discount applied to the transaction, including the discount code where available.
• Status – The current payment status, such as Succeeded.
Select the invoice reference or invoice icon to open the available invoice details.
Exporting Billing Records
Billing records can be downloaded for accounting, reporting or internal record-keeping.
The following export options are available:
• Export CSV – Downloads the transaction history as a spreadsheet-compatible CSV file.
• Export PDF – Downloads the transaction history as a PDF document.
Active search terms or filters may affect which transactions are included in the exported report. Clear the filters first if you want to export your complete billing history.
Payment Methods
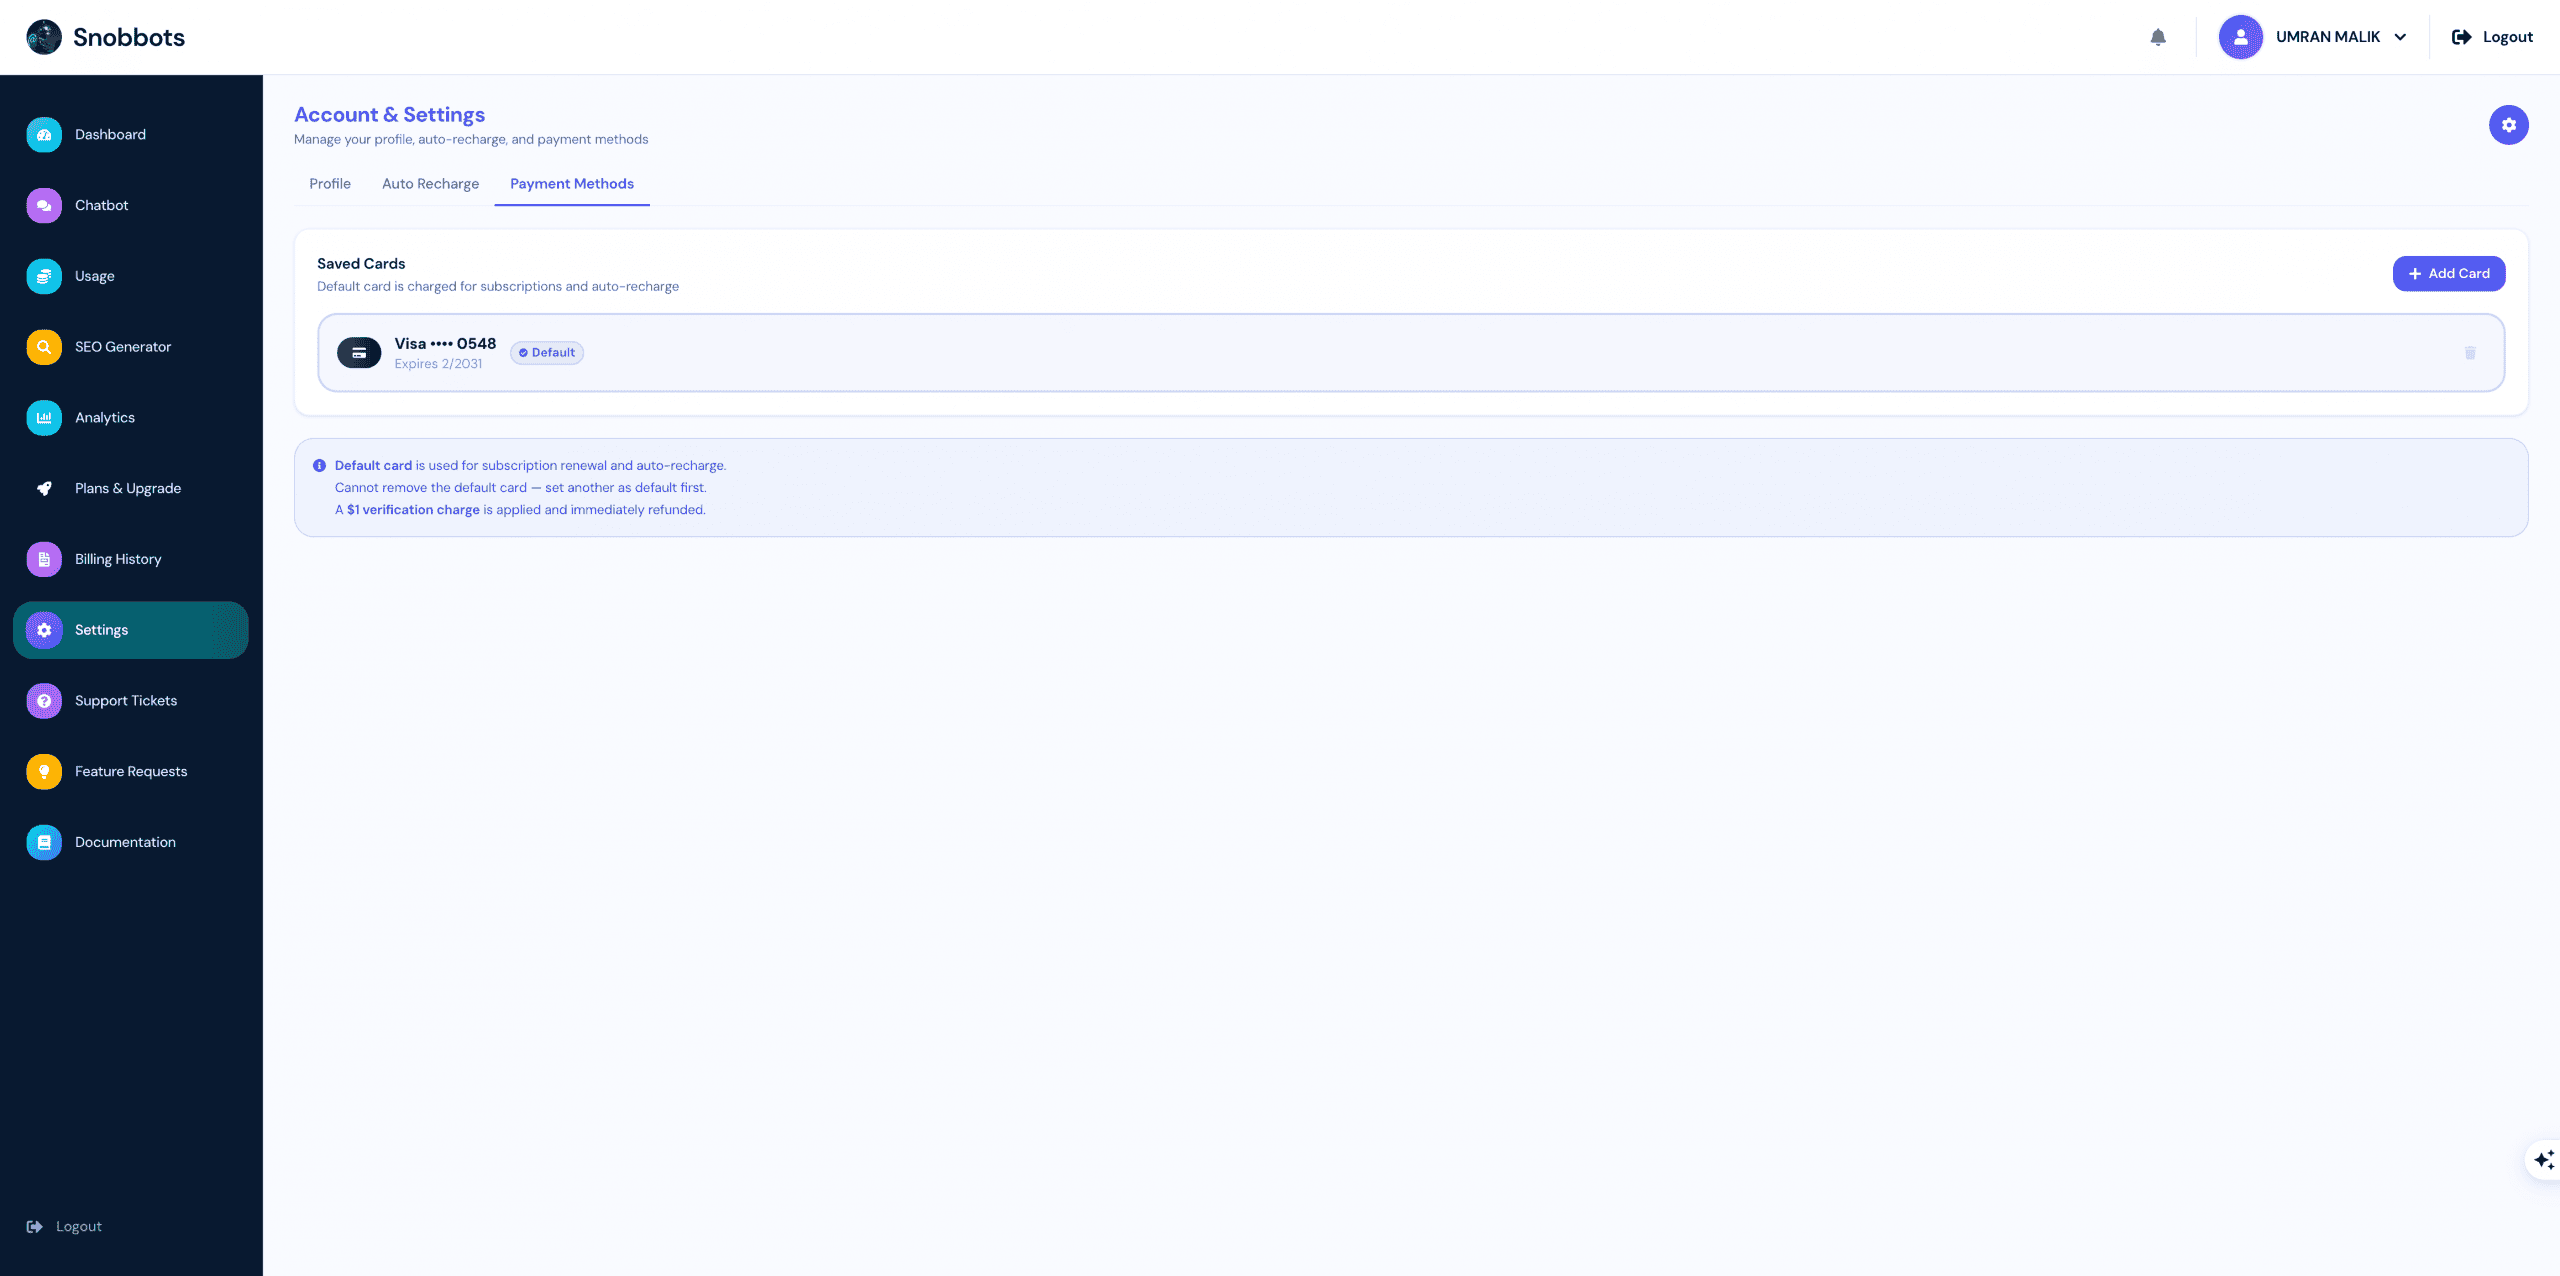
The Payment Methods section allows you to add, review and manage the payment cards connected to your SnobBots account.
Your default payment card is used for subscription renewals and automatic credit recharges. Keeping your payment details up to date helps prevent failed payments or interruptions to your account.
Accessing Payment Methods
To access your saved payment methods:
-
Log in to your SnobBots account.
-
Select Settings from the left-hand navigation menu.
-
Select the Payment Methods tab at the top of the Account & Settings page.
Saved Cards
The Saved Cards section displays every payment card connected to your account.
For security, only limited card information is shown, including:
• The card provider, such as Visa or Mastercard.
• The final four digits of the card number.
• The card’s expiry date.
• Whether the card is currently set as the default payment method.
Your full card number is not displayed on this page.
Adding a New Card
To add another payment card:
-
Select the Add Card button in the upper-right corner of the Saved Cards section.
-
Enter the requested card and billing information.
-
Review the information carefully to make sure it is correct.
-
Complete any security verification required by your card provider.
-
Confirm the card to add it to your account.
Once the card has been successfully added, it will appear in the Saved Cards section.
Card Verification Charge
When you add a new payment card, a temporary $1 verification charge is applied.
This charge is used to confirm that the card is valid and can accept payments. The verification amount is immediately refunded.
Depending on your bank or card provider, the verification charge or refund may take a short time to appear on your statement.
Default Payment Method
The card marked Default is the primary payment method connected to your SnobBots account.
The default card is used for:
• Subscription renewals.
• Automatic credit recharges.
• Other recurring payments associated with your account.
If you have more than one saved card, make sure the correct card is set as the default payment method.
Changing the Default Card
To use a different card for future payments:
-
Add the new card if it is not already saved to your account.
-
Locate the card you want to use.
-
Select the option to make it your default payment method.
-
Confirm that the Default label now appears beside the new card.
Future subscription renewals and automatic recharges will be charged to the newly selected default card.
Removing a Saved Card
To remove a payment card, select the delete icon displayed beside the card.
The current default card cannot be removed. Before deleting it, you must add or select another card and set that card as the default payment method.
After another card has been made the default, you can return to the previous card and remove it from your account.
Keeping Your Payment Details Updated
To avoid failed payments or service interruptions:
• Make sure your default card has not expired.
• Update your payment method if your card is replaced, cancelled or lost.
• Check that sufficient funds are available before your next billing date.
• Confirm that your bank allows online and recurring payments.
• Keep at least one valid payment card connected to your account.
If a payment continues to fail after updating your card, contact your bank or submit a support ticket through your SnobBots account.
Profile Settings
The Profile section allows you to manage your basic account information. Here you can update your name, email address, profile picture, and password to keep your account details up to date.
Updating Your Profile
- From the left-hand menu, click Settings.
- Ensure the Profile tab is selected.
- Under Profile Information, you can:
- Upload or change your profile picture.
- Edit your Full Name.
- Update your Email Address.
- Click Save Profile to apply your changes.
Note: After making any changes to your profile information, remember to click Save Profile before leaving the page, otherwise your changes will not be saved.
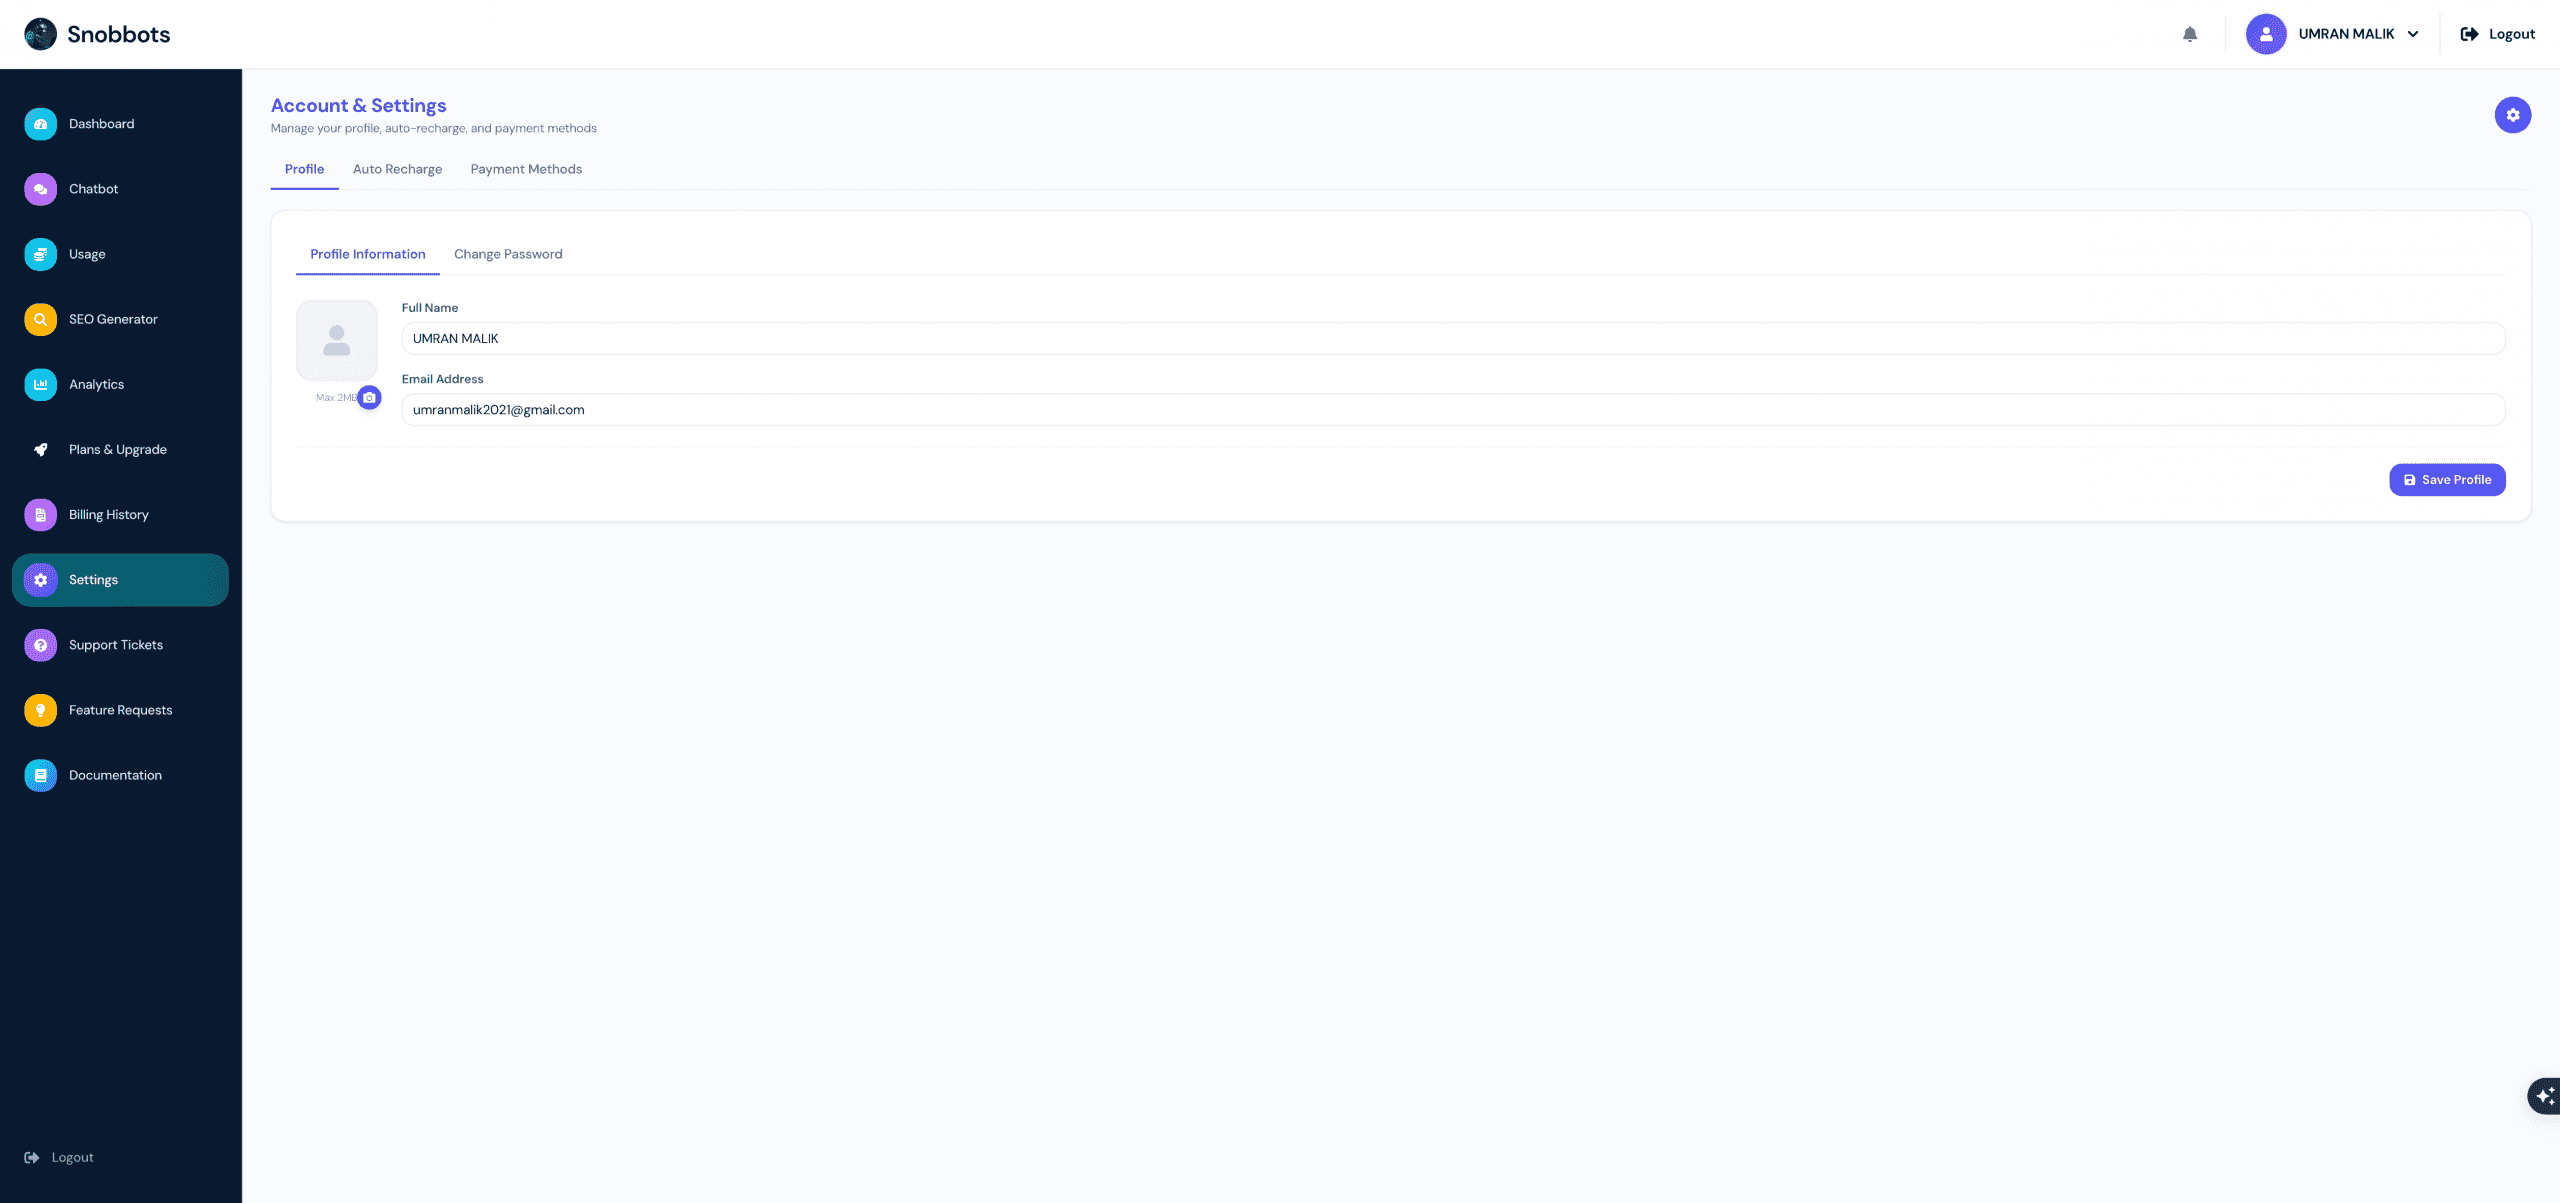
Password Management
The Change Password section allows you to update your account password at any time, helping to keep your Snobbots account secure.
Changing Your Password
- From the left-hand menu, click Settings.
- Select the Change Password tab.
- Enter your Current Password.
- Enter your New Password (minimum 6 characters).
- Re-enter your new password in the Confirm New Password field.
- Click Change Password to save your new password.
Important: After successfully changing your password, you will be automatically signed out of your account. Simply log in again using your new password.
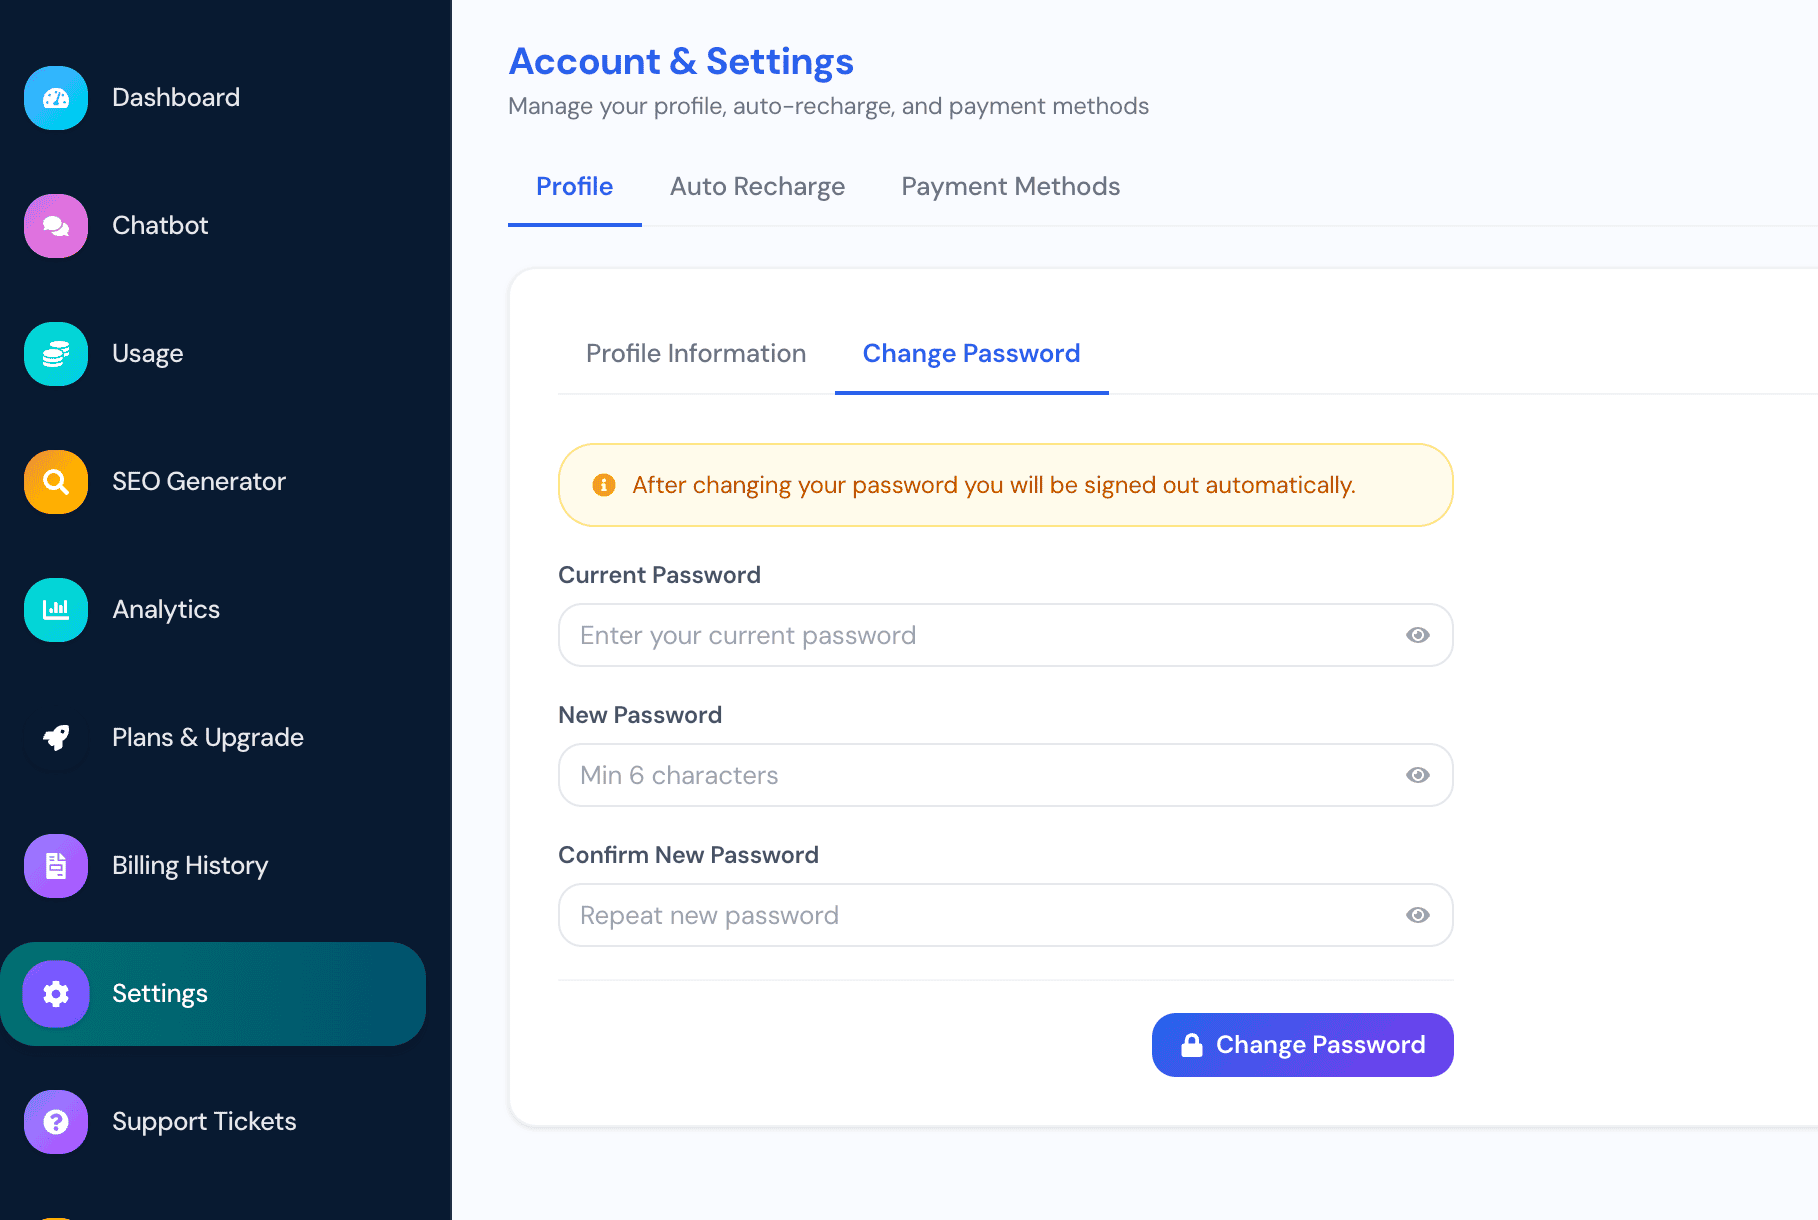
Auto Recharge
The Auto Recharge feature automatically tops up your account resources whenever they become low, ensuring your AI chatbot continues running without interruption.
When enabled, Snobbots monitors your available resources and purchases your selected bundle automatically whenever any of the trigger thresholds are reached.
Setting Up Auto Recharge
- From the left-hand menu, click Settings.
- Open the Auto Recharge tab.
- Turn the Auto Recharge switch On.
- Select the bundle you would like to purchase automatically:
- Small Bundle – 100 Credits, 500 Messages, 7,500 Characters
- Medium Bundle – 300 Credits, 1,500 Messages, 15,000 Characters
- Large Bundle – 700 Credits, 3,000 Messages, 40,000 Characters
- Choose your Monthly Spending Cap to limit how much can be spent on automatic recharges each month. Available limits include £29, £49, £99, £100, £200, or No Limit.
- Review the Auto Recharge Summary to confirm your selected bundle, resources, and monthly spending cap.
- Click Save Settings to apply your changes.
Auto Recharge Triggers
A recharge will be processed automatically when any one of the following thresholds is reached:
- Content Credits drop below 50
- Messages drop below 100
- Training Characters drop below 5,000
Note: The monthly spending cap prevents automatic recharges from exceeding your selected limit within a calendar month. Once the cap is reached, no further automatic purchases will be made until the next month unless you increase or remove the spending limit.
Payment Methods
The Payment Methods section allows you to securely manage the payment cards linked to your Snobbots account. Your default payment method is used for subscription renewals and any automatic recharges.
Adding a Payment Method
- From the left-hand menu, click Settings.
- Select the Payment Methods tab.
- Click Add Card.
- Enter your card details and complete the verification process.
- Once added, your card will appear in the list of saved payment methods.
Managing Your Cards
- View all saved payment cards linked to your account.
- Your Default card is automatically used for:
- Subscription renewals.
- Auto Recharge purchases.
- You can add additional payment methods at any time.
- To remove a card, click the Delete (bin) icon next to the card. A default card must be changed before it can be removed.
Note: A £1 verification charge may temporarily appear when adding a new card. This charge is used to verify your payment method and is automatically refunded.
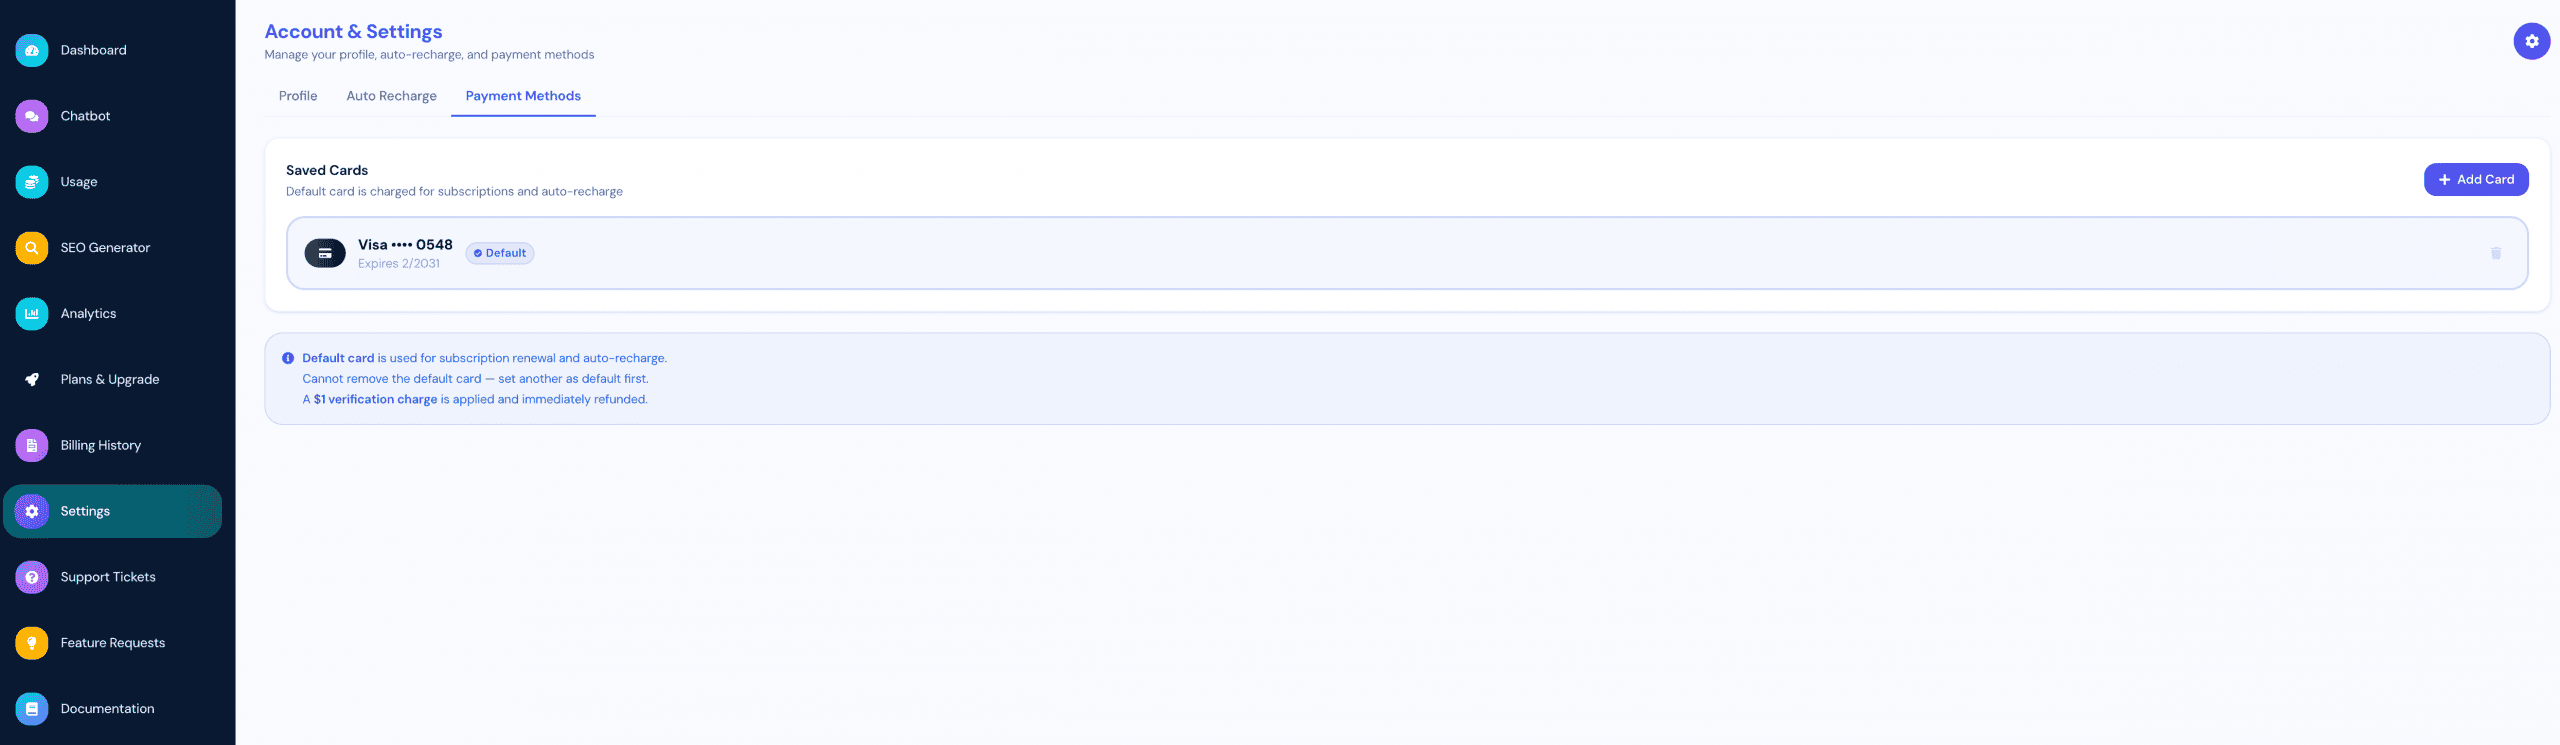
Contact Support
The Support Ticket system is the primary method for requesting help from the SnobBots support team.
You must create a support ticket before contacting SnobBots by email. Email support should only be used to follow up on an existing ticket when you have not received a response or the resolution is taking longer than expected.
Create a Support Ticket First
Before sending an email, you must:
-
Log in to your SnobBots account.
-
Select Support Tickets from the left-hand navigation menu.
-
Create a new support ticket.
-
Provide complete details about the problem.
-
Submit the ticket and keep a copy of its reference number.
-
Allow the support team time to review and respond.
Creating a support ticket first is mandatory. Do not use email as an alternative to the ticket system.
When to Contact Support by Email
You should only contact support by email when:
• You have already created a support ticket.
• You have not received a response to the ticket.
• The ticket is taking longer than expected to resolve.
• You need to follow up on an existing support request.
If you have not created a support ticket, return to the Support Tickets section and complete that process before sending an email.
Support Email Address
You can email the SnobBots support team at:
This email address should only be used to follow up on an existing support ticket.
Required Email Subject Line
Your ticket reference number must be included in the email subject line.
Use the following format:
Support Ticket [TICKET REFERENCE] – Follow-up
Example:
Support Ticket SNB-12345 – Follow-up
Including the reference number allows the support team to locate the original ticket and review its history.
If the ticket reference number is missing from the subject line, it may delay the support process because the team will need additional time to identify and match your email with the correct ticket.
Information to Include in the Email
Your email should include:
• Your full name.
• The email address connected to your SnobBots account.
• The support ticket reference number.
• The date the ticket was submitted.
• A brief summary of the original issue.
• A clear explanation of why you are following up.
• Any relevant updates since the ticket was created.
• Screenshots or supporting information, where helpful.
Do not include passwords, complete payment card details or other sensitive security information.
Example Follow-up Email
Subject: Support Ticket SNB-12345 – Follow-up
Hello SnobBots Support,
I am following up on support ticket SNB-12345, which I submitted on 30 July 2026.
The ticket relates to an issue with my chatbot not appearing on my website after deployment. I have not yet received a response, and the issue is still affecting the live website.
Please could you provide an update on the ticket?
Account email: your@email.com
Thank you.
Avoid Creating Duplicate Requests
Do not create multiple support tickets or send repeated emails about the same issue.
Duplicate requests can make it more difficult to track the problem and may delay the support process.
If you need to provide additional information, update the existing ticket or continue using the same email conversation.
Important Reminder
The correct support process is:
-
Create a support ticket.
-
Keep the ticket reference number.
-
Wait for the ticket to be reviewed.
-
Email support only if you have not received a response or the process is taking too long.
-
Include the ticket reference number in the email subject line.
Following this process helps the support team locate your request quickly and respond more efficiently.
Support Tickets
The Support Tickets section allows you to report account, billing and technical problems directly to the SnobBots support team.
You can provide a detailed description of the issue, select its priority, attach supporting files and track the ticket’s progress until it has been resolved or closed.
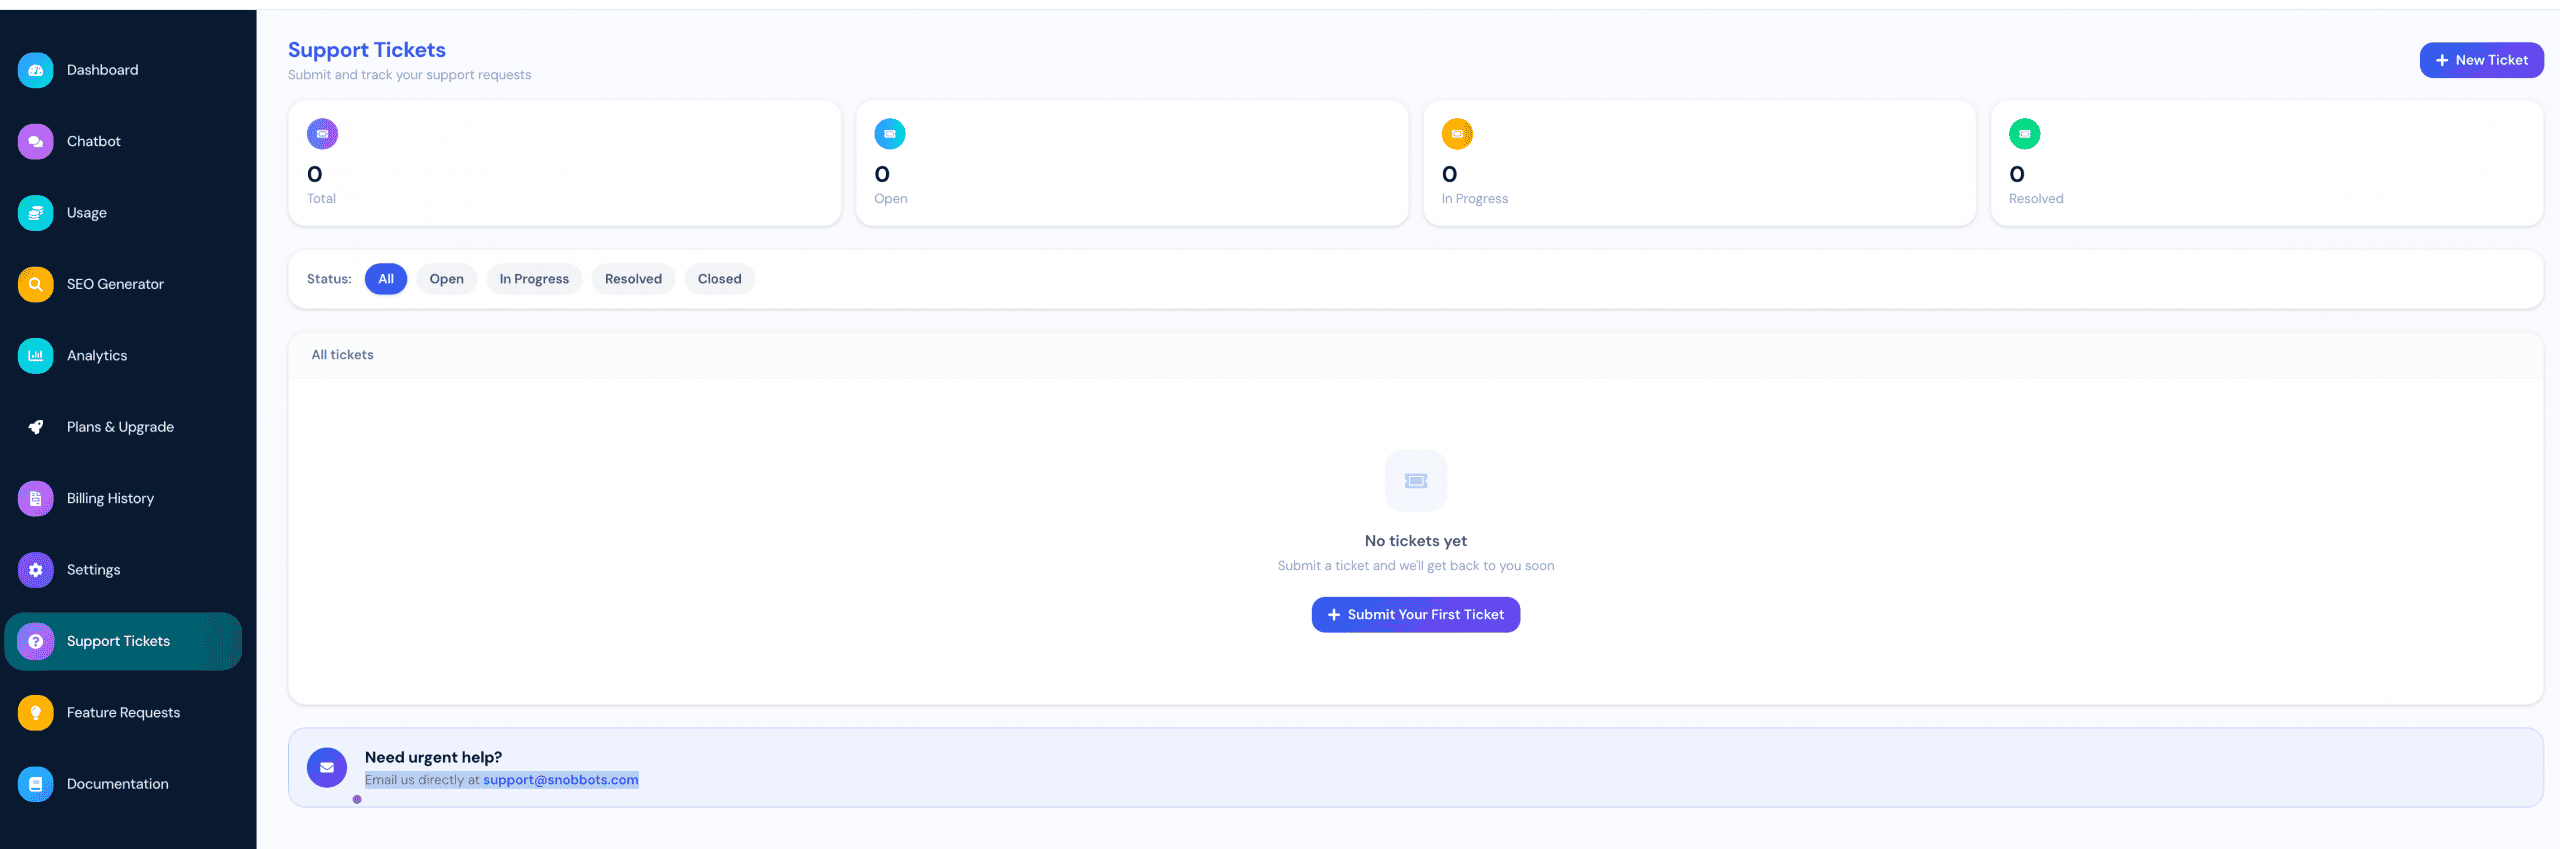
Accessing Support Tickets
To access the Support Tickets section:
-
Log in to your SnobBots account.
-
Select Support Tickets from the left-hand navigation menu.
The Support Tickets dashboard will display your submitted tickets and their current statuses.
Understanding the Support Ticket Dashboard
The summary cards at the top of the page provide an overview of your support activity.
• Total – The total number of support tickets submitted.
• Open – Tickets that have been received but have not yet been resolved.
• In Progress – Tickets currently being investigated or worked on.
• Resolved – Tickets where the reported issue has been resolved.
You can use the status filters to display:
• All tickets.
• Open tickets.
• Tickets currently in progress.
• Resolved tickets.
• Closed tickets.
If you have not submitted any tickets, the page will display “No tickets yet”.
Creating a New Support Ticket
To create a support ticket:
-
Select New Ticket in the upper-right corner of the page.
-
Enter a clear title for the issue.
-
Provide a detailed description.
-
Select the appropriate category.
-
Select the correct priority.
-
Attach any supporting files, if required.
-
Review the information.
-
Select Submit Ticket.
If this is your first ticket, you can also select Submit Your First Ticket from the centre of the page.
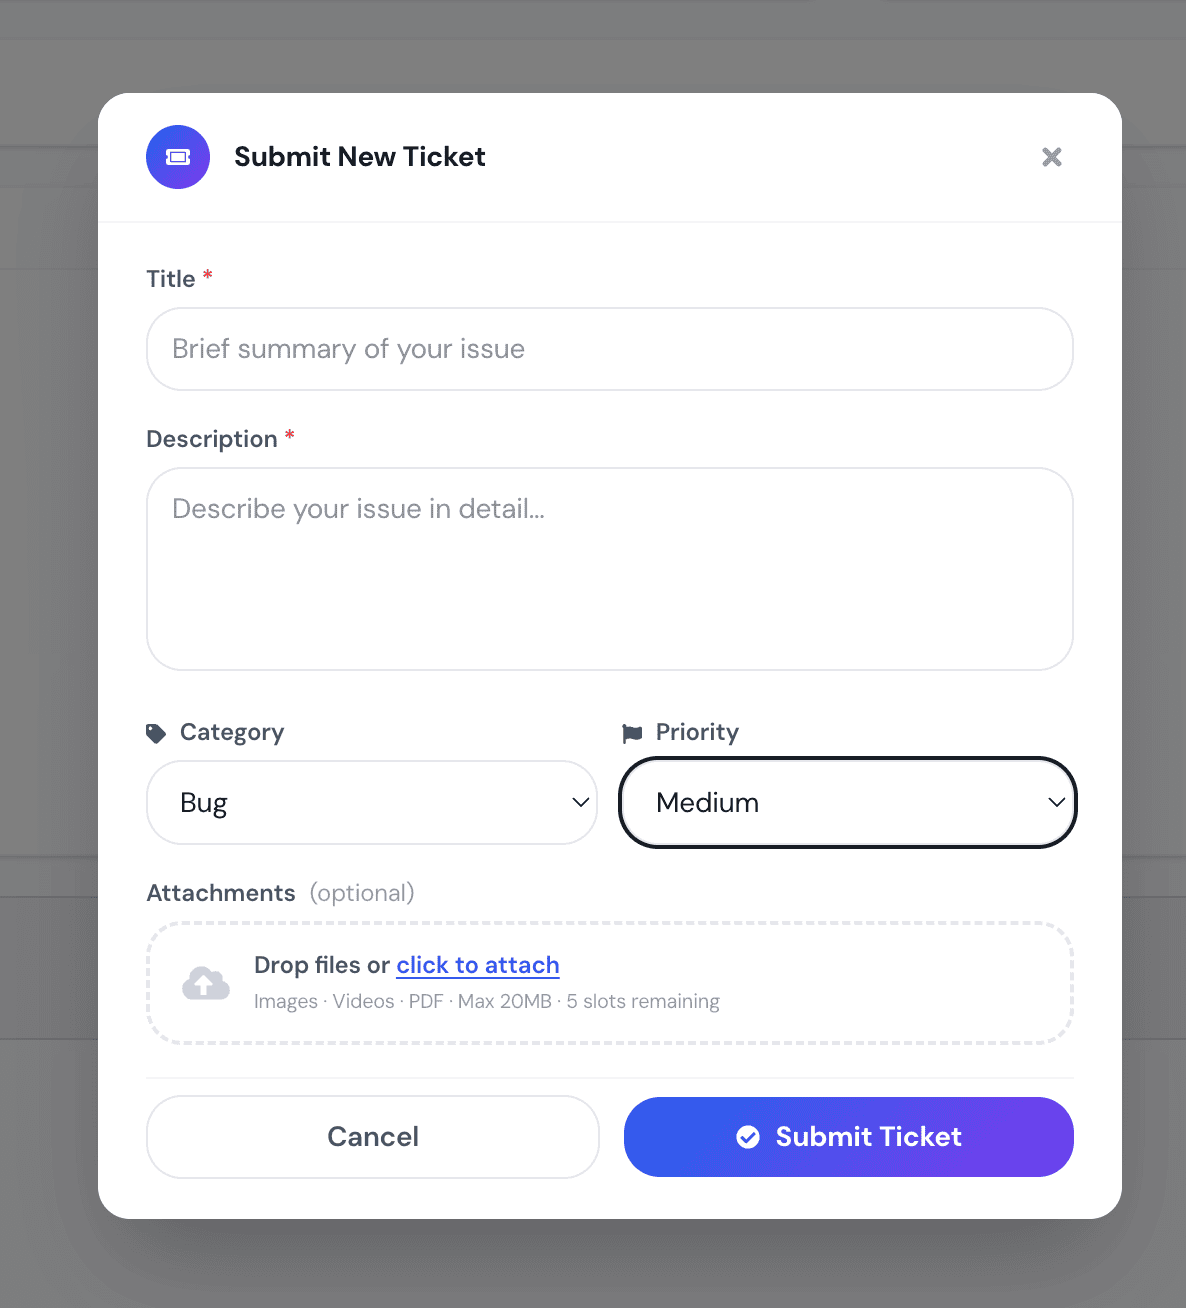
Writing the Ticket Title
The Title field is required.
Enter a short and specific summary of the problem.
Good examples include:
• Chatbot not appearing on WordPress website.
• Subscription payment failed after updating card.
• Website audit stops before completing.
• Unable to upload chatbot training document.
Avoid vague titles such as “Help”, “Problem” or “Not working”.
A clear title helps the support team understand the issue before opening the full ticket.
Writing the Description
The Description field is required.
Explain the issue in as much detail as possible.
Include:
• What you were trying to do.
• Where the problem occurred.
• What you expected to happen.
• What actually happened.
• Any error message displayed.
• When the problem started.
• Whether the issue happens every time or only occasionally.
• The chatbot, website or feature affected.
• Any troubleshooting steps you have already attempted.
The more useful information you provide, the easier it will be for the support team to investigate the problem.
Selecting a Category
The Category field identifies the type of issue you are reporting.
The available categories are:
• Bug – Use this when a feature is not behaving or working as expected.
• Billing – Use this for subscription, payment, invoice, discount or account-charging issues.
• Technical – Use this for deployment, available categories are:
• Bug – Use this when a feature is not behaving or working as expected.
• Billing – Use this for subscription, payment, invoice, discount or account-charging issues.
• Technical – Use this for deployment integration, chatbot loading, training or other technical problems.
• Feature Request – Use this to request a new feature or suggest an improvement.
• Other – Use this when the issue does not fit one of the available categories.
Selecting the correct category helps direct the ticket to the appropriate area for review.
Selecting a Priority
The Priority field indicates how seriously the issue affects your use of SnobBots.
The available priority levels are:
• Low – A minor issue or general question that does not prevent you from using the platform.
• Medium – An issue that affects part of your workflow, but you can still continue using the platform.
• High – A major issue that significantly affects an important feature or business process.
• Urgent – A critical issue that prevents essential use of the platform or seriously affects live business operations, with no practical workaround available.
Choose the priority accurately. Urgent should only be used for genuinely critical issues requiring immediate attention.
Adding Attachments
Attachments are optional, but they can help the support team understand and investigate the issue.
You can attach:
• Images and screenshots.
• PDF documents.
• Video recordings.
Attachments must remain within the displayed maximum file-size limit of 20MB.
The ticket form provides up to five attachment slots.
You can add files by:
• Dragging and dropping them into the attachment area.
• Selecting Click to Attach and choosing files from your device.
Using Screenshots
Screenshots are helpful when reporting:
• Error messages.
• Incorrect information displayed on screen.
• Missing buttons or features.
• Layout or appearance problems.
• Billing or account discrepancies.
Where possible, capture the complete relevant area rather than only a small part of the screen.
Using Video Recordings
A short video can be useful when the problem involves several steps or is difficult to explain in writing.
The recording should clearly show:
• The page or feature being used.
• The steps that cause the problem.
• The unexpected result.
• Any error messages displayed.
Keep the video focused on the issue and avoid recording unrelated or sensitive information.
Attachment Security
Before uploading a file, make sure it does not contain:
• Passwords.
• Complete payment card details.
• Private security credentials.
• API keys.
• Confidential customer information that is unrelated to the issue.
Only provide information required to investigate the support request.
Submitting the Ticket
Once all the required information has been entered:
-
Review the title and description.
-
Confirm that the correct category is selected.
-
Check that the priority accurately represents the issue.
-
Confirm that any relevant attachments have been added.
-
Select Submit Ticket.
Select Cancel or use the close icon if you do not want to submit the ticket.
Keeping the Ticket Reference Number
After submitting the ticket, keep a copy of its reference number.
The ticket reference number identifies your support request and should be used whenever you need to follow up on it.
Do not create another ticket for the same issue unless instructed to do so.
Tracking Your Ticket
After a ticket has been created, it will appear on the Support Tickets dashboard.
Use the dashboard and status filters to monitor its progress.
The ticket may move through the following statuses:
• Open – The ticket has been submitted and is not yet resolved.
• In Progress – The support team is reviewing or working on the issue.
• Resolved – The support team has completed the work required to resolve the reported issue.
• Closed – The support process has ended and the ticket is no longer active.
The summary cards and ticket list will update as the status changes.
Filtering Support Tickets
Use the status filters above the ticket list to find particular tickets.
The available filters are:
• All.
• Open.
• In Progress.
• Resolved.
• Closed.
For example, select In Progress to view only tickets currently being handled by the support team.
Providing Clear Information
A good support ticket should answer the following questions:
• What is the problem?
• Which feature is affected?
• When did the problem begin?
• What steps cause the problem?
• What should have happened?
• What happened instead?
• Is an error message displayed?
• Does the problem affect one chatbot or the entire account?
• Have any screenshots, PDFs or videos been attached?
Clear information can reduce delays and help the support team investigate the issue more efficiently.
Avoiding Duplicate Tickets
Do not submit several tickets for the same problem.
Duplicate tickets can separate important information across different requests and may delay the support process.
Keep all relevant updates connected to the original ticket.
Contacting Support by Email
Creating a support ticket is mandatory before contacting the SnobBots support team by email.
Only email support if:
• You have already submitted a ticket.
• You have not received a response.
• The ticket is taking longer than expected.
The support email address is:
Your ticket reference number must be included in the email subject line.
Use the following format:
Support Ticket [TICKET REFERENCE] – Follow-up
If the ticket reference number is missing, it may delay the support process because the team will need additional time to identify and match the email with the correct ticket.
Support Ticket Process
The correct support process is:
-
Create a support ticket.
-
Include complete details and supporting files.
-
Keep the ticket reference number.
-
Monitor the ticket status.
-
Allow the support team time to investigate.
-
Email support only if no response has been received or the process is taking too long.
-
Include the ticket reference number in the email subject line.
Best Practices
Check Resource Usage Regularly
Monitor:
- messages remaining
- training data limits
- chatbot slots
This helps avoid interruptions to your chatbot services.
Review Conversations Regularly
Checking recent conversations helps you:
- identify sales opportunities
- monitor chatbot quality
- improve customer responses
Use Quick Actions
Quick Actions save time and simplify common tasks like:
- creating content
- generating FAQs
- launching chatbots
Monitor Leads Frequently
Review captured leads regularly to ensure fast follow-up with potential customers.
Training Data Optimisation
Tips for improving chatbot responses through better training data.
Information coming soon.
Getting Started with Your White Label Agency Account
The SnobBots White Label platform allows you to create your own branded AI platform, manage customers and offer AI services under your own business name.
When you first sign up, you will begin with a 14-day Agency Trial, giving you time to configure and explore the platform before your paid subscription begins.
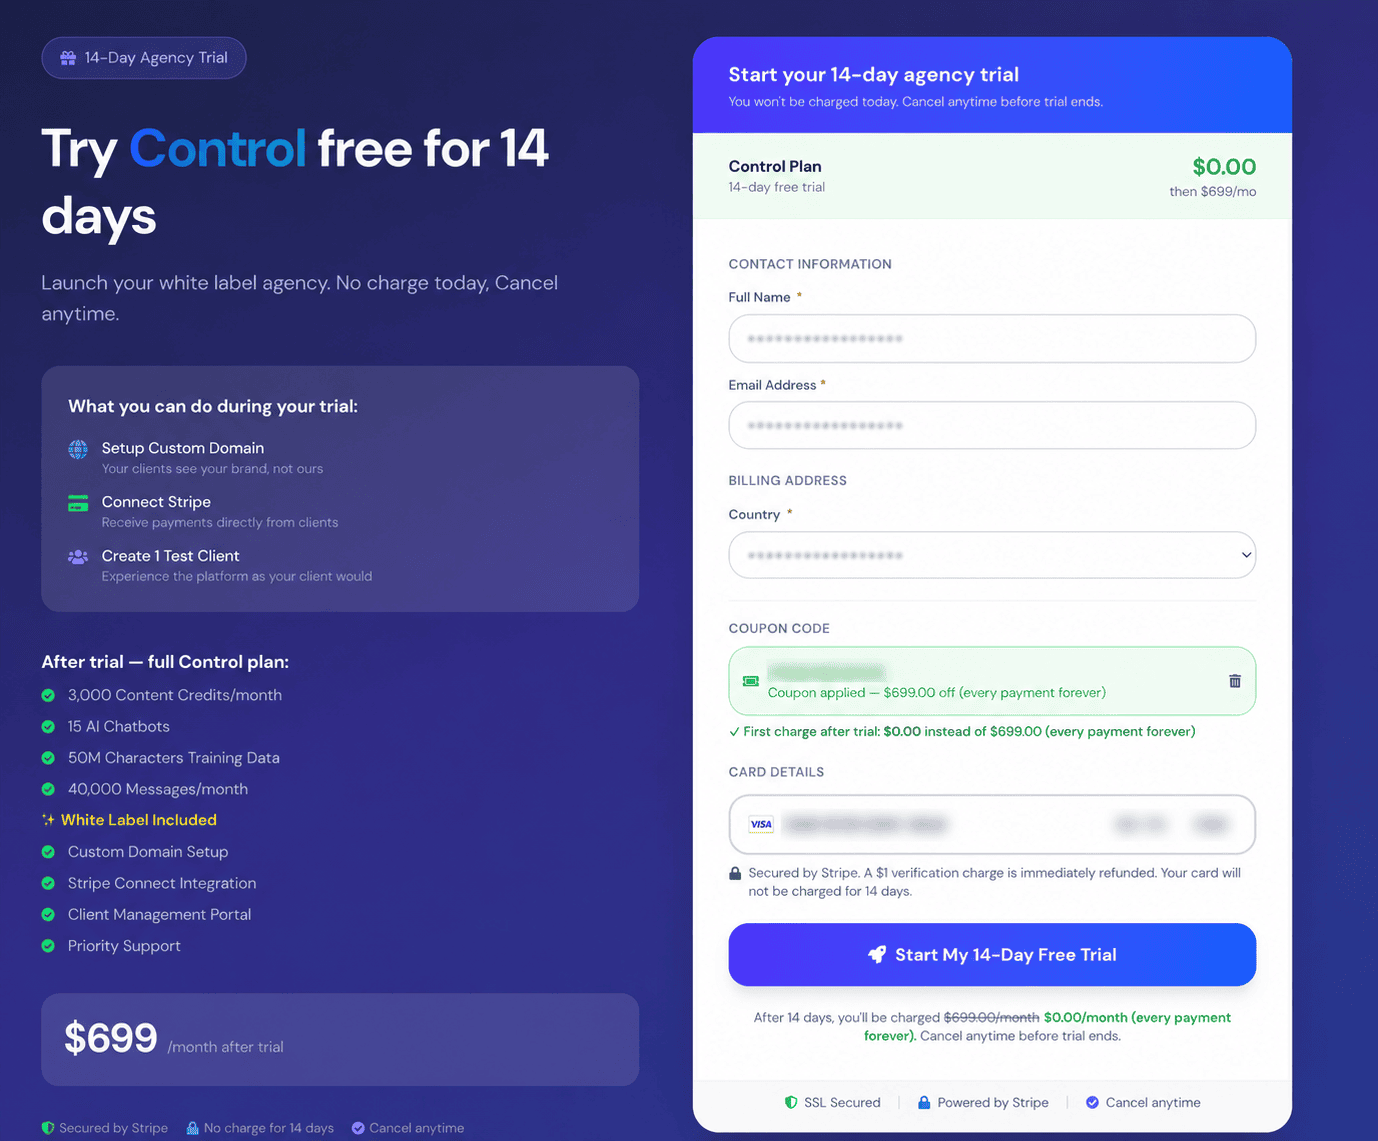
Starting Your 14-Day Agency Trial
Select the White Label Agency plan you want to trial and proceed to the registration page.
The trial registration screen clearly displays the plan you are selecting, the length of your trial and the monthly subscription price that will apply after the trial period.
Complete the required account information, including:
-
Full Name
-
Email Address
-
Country
-
Coupon Code, if applicable
-
Card Details
Your payment details are securely processed through Stripe.
If you have entered a valid coupon code, the applicable discount will be displayed before you start your trial. Where a coupon applies to future subscription payments, the discount will automatically be applied when the relevant payment becomes due.
Review the information carefully and click Start My 14-Day Free Trial.
You will not be charged the normal subscription fee when starting your free trial. Your subscription will begin automatically at the end of the trial unless you cancel beforehand.
Confirm Your Email Address
After registering, SnobBots will send a confirmation email to the email address you provided.
You must confirm your email address before you can access your Agency account.
Open the email and follow the verification link to confirm your account.
If you cannot find the confirmation email in your inbox, check your Spam or Junk folder, as automated verification emails can occasionally be filtered by your email provider.
It is also worth adding SnobBots to your safe senders list to help ensure that future account, billing and platform notifications reach your inbox.
Your Trial Is Activated
Once your registration and email verification have been completed, your 14-day Agency Trial will be activated.
The confirmation screen displays important information about your trial, including:
-
Your selected Agency plan
-
The date your trial ends
-
The number of test clients available during the trial
-
Any coupon or promotional discount applied to your subscription
If a coupon has been applied, you do not need to apply it again when the trial finishes. The applicable discount will automatically be used when your first subscription payment is processed.
From the confirmation screen, click Go to Agency Dashboard to continue.
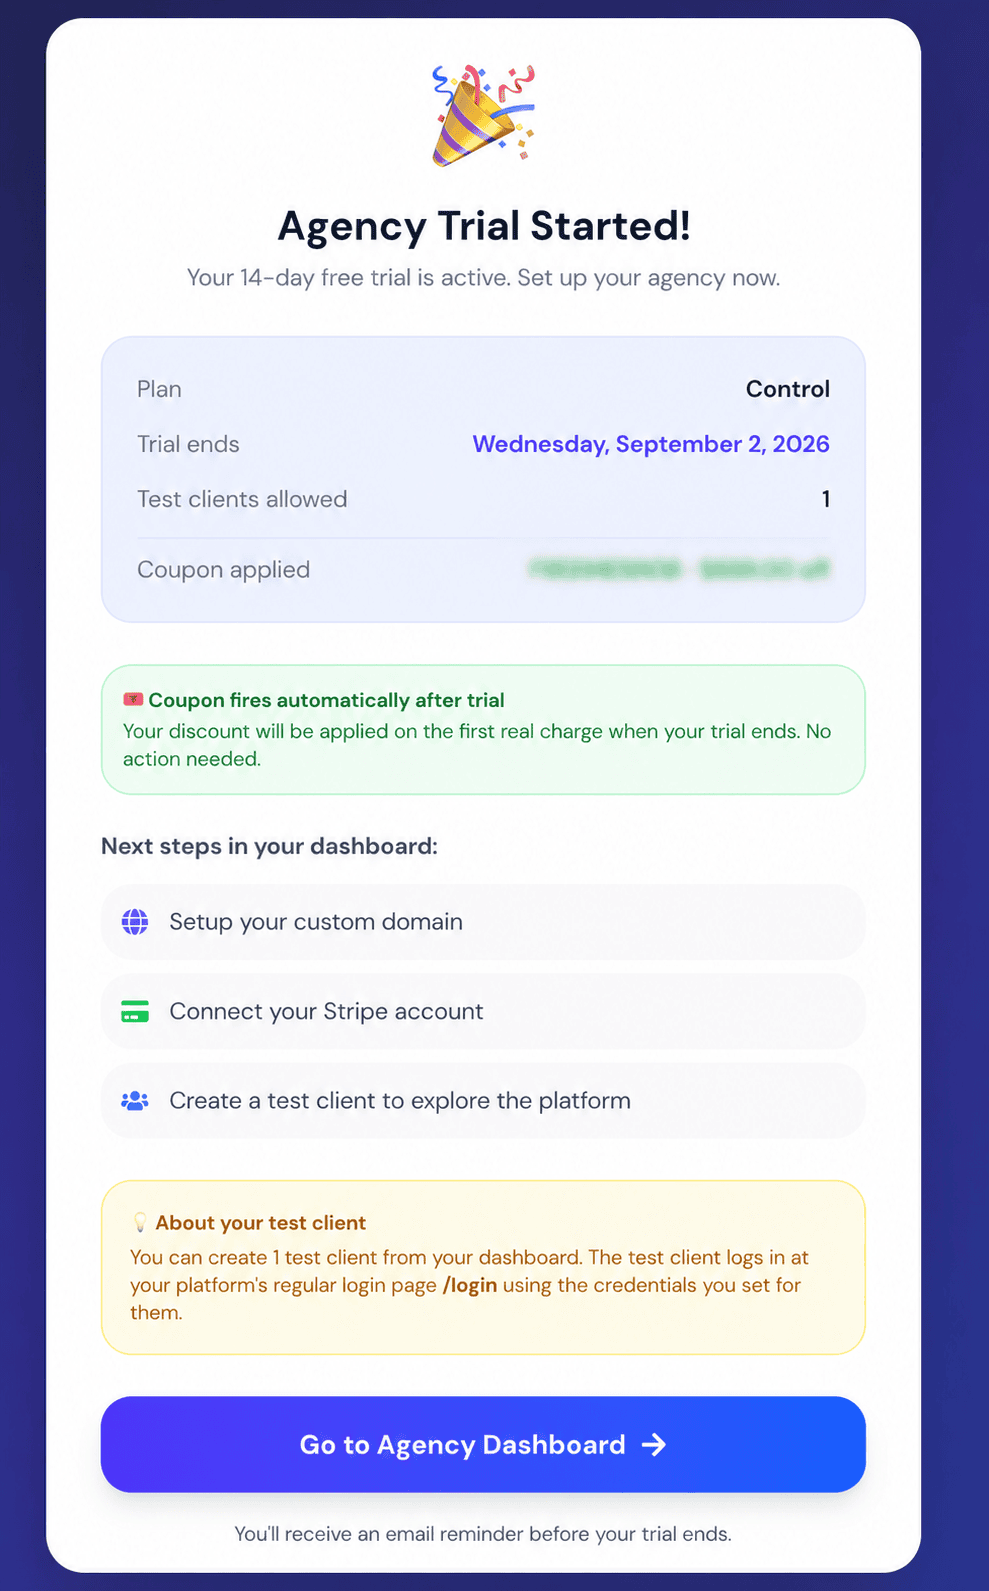
Accessing Your Agency Dashboard
Your Agency Dashboard is the main control centre for your White Label platform.
When you first access the dashboard during your trial, you will see your account marked as Trial Active.
The dashboard provides an overview of your Agency account, including customer activity, chatbot usage, messages, training characters, content credits, subscription information and Stripe Connect status.
You will also see the main setup tasks required to prepare your White Label platform.
These include:
-
Set up your Custom Domain – Configure the domain your customers will use to access your branded platform.
-
Connect Stripe – Connect your Stripe account so that you can receive payments directly from your customers.
-
Create Plans – Create the subscription plans and pricing that you want to offer to your customers.
These setup stages are covered individually in the following sections of the White Label documentation.
Creating a Test Client During Your Trial
Your Agency Trial allows you to create a test client so that you can explore the platform from a customer’s point of view before launching it publicly.
Use the Create Test Client option from your Agency Dashboard and create login credentials for the test account.
The test client can then sign in through your platform’s normal /login page using the credentials you created for them.
This gives you an opportunity to test the customer experience, explore the available features and make sure your White Label platform is configured correctly before adding real customers.
What Happens When the Trial Ends?
Your Agency Dashboard displays the date on which your next payment is due.
Unless you cancel before the end of your 14-day trial, your selected White Label subscription will automatically continue as a paid subscription using the payment method provided during registration.
Any eligible coupon or promotional discount already attached to your subscription will be applied automatically according to the terms of that promotion.
SnobBots will also send you an email reminder before your trial ends.
Tip: Use the 14-day trial to configure your custom domain, connect Stripe, create your customer plans and test the platform using your test client. Completing these steps before the trial ends means your White Label platform can be ready for customers as soon as you decide to launch.
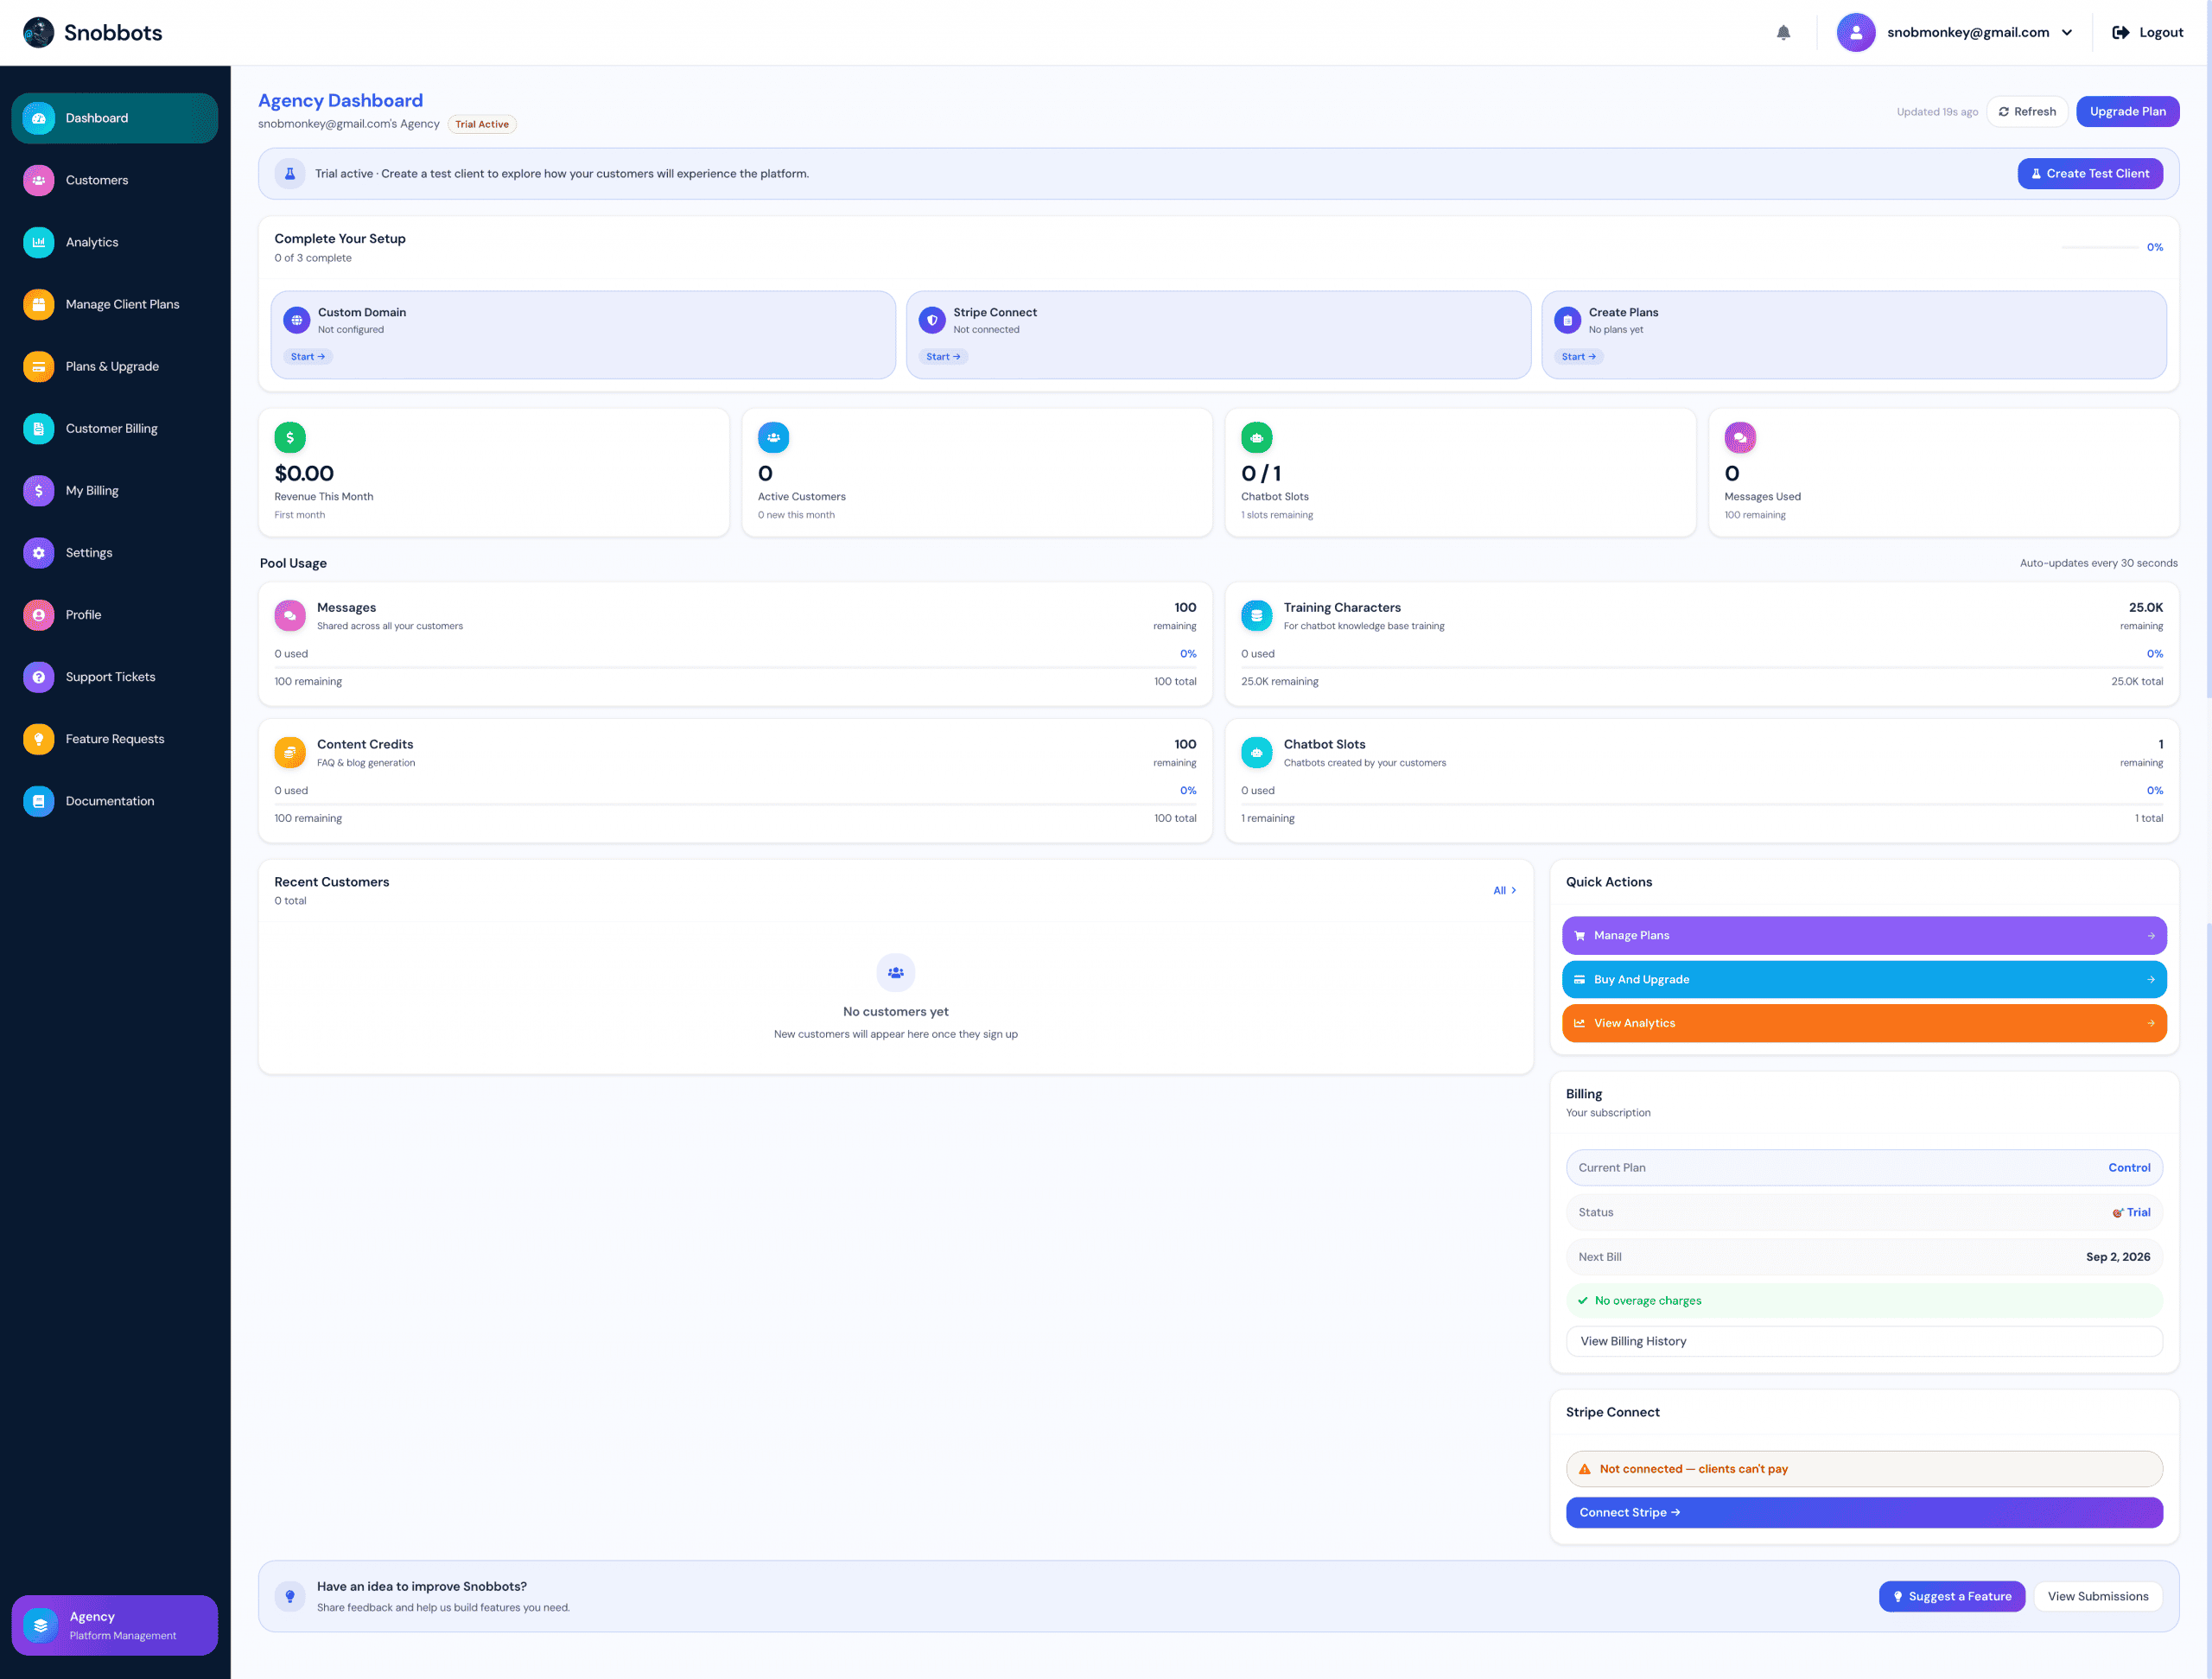
Dashboard
Understanding Your Agency Dashboard
The Agency Dashboard is the main overview of your SnobBots White Label account. It gives you a quick view of your platform setup, customers, resource usage, revenue and subscription status.
From here, you can also access the key areas required to set up and manage your White Label platform.
Complete Your Setup
At the top of the dashboard, the Complete Your Setup section shows the main steps required to prepare your Agency platform for customers.
The setup progress indicator allows you to see how many of these steps have been completed.
Custom Domain
The Custom Domain section allows you to connect your own domain or subdomain to your White Label platform.
This means your customers can access the platform through your own branded web address rather than a SnobBots address.
Click Start to begin configuring your custom domain.
Stripe Connect
Stripe Connect allows you to connect your own Stripe account to the Agency platform.
Once connected, your customers can purchase the plans you create, with customer payments being processed through your connected Stripe account.
The dashboard will show whether Stripe is currently connected. If it has not yet been configured, you can click Start or Connect Stripe to begin the setup process.
Create Plans
Before customers can subscribe, you need to create the plans you want to offer through your White Label platform.
Click Start under Create Plans to begin creating your customer subscription plans, including the resources and pricing you want to offer.
Plan creation and management are covered in more detail in the relevant section of this documentation.
Dashboard Overview
The dashboard provides several key statistics to help you monitor your Agency account.
Revenue This Month
Revenue This Month shows the revenue generated through your customers during the current month.
This gives you a quick overview of the commercial activity taking place through your White Label platform.
Active Customers
Active Customers displays the number of customers currently active on your platform.
The dashboard also shows how many new customers have been added during the current month.
Chatbot Slots
Chatbot Slots shows how many chatbot slots are currently being used compared with the total available within your Agency account.
These slots are shared across the customers using your platform.
Messages Used
Messages Used provides a quick overview of the number of AI chatbot messages consumed across your customer accounts.
This allows you to monitor overall usage without having to check each customer individually.
Pool Usage
The Pool Usage section provides a more detailed view of the resources available within your Agency account.
Your Agency resources are shared across your customers. As customers use the platform, their usage is deducted from your available Agency pool.
The dashboard displays both the amount used and the amount remaining.
Messages
Shows the total number of chatbot messages used across all of your customers and the number remaining within your current allowance.
Training Characters
Shows the amount of training data being used for chatbot knowledge-base training across your customer accounts.
Training characters can be consumed when customers train their chatbots using website content, documents, Q&A information and other training data.
Content Credits
Shows the number of content credits used and remaining.
Content credits are used by eligible AI content-generation features available through the platform.
Chatbot Slots
Shows how many chatbot slots are currently being used by your customers and how many remain available.
The Pool Usage information automatically updates, allowing you to keep track of your available resources as your customer base grows.
Recent Customers
The Recent Customers section provides a quick view of customers who have recently joined your platform.
As new customers are added, they will appear here, allowing you to monitor new account activity directly from the dashboard.
Select All to access the wider customer management area when you need to view or manage your complete customer list.
Quick Actions
The Quick Actions panel provides shortcuts to commonly used areas of the Agency platform.
From here, you can quickly access:
-
Manage Plans – Create and manage the plans offered to your customers.
-
Buy and Upgrade – Upgrade your Agency subscription or purchase additional resources where available.
-
View Analytics – Access more detailed information about the performance and usage of your White Label platform.
These shortcuts are designed to make frequently used Agency functions accessible directly from the dashboard.
Billing
The Billing panel provides an overview of your own SnobBots Agency subscription.
It displays information including:
-
Your Current Plan
-
Your subscription Status
-
Your Next Bill date
-
Relevant billing or overage information
During your free trial, your subscription status will be displayed as Trial.
You can also select View Billing History to access information about previous subscription payments and billing activity.
This section relates to your Agency subscription with SnobBots, rather than payments made by your customers.
Stripe Connect Status
The Stripe Connect panel shows the current status of your Stripe connection.
If Stripe has not yet been connected, the dashboard will display a warning indicating that customers cannot make payments through your platform.
Select Connect Stripe to begin the connection process.
Once your Stripe account has been successfully connected, your White Label platform can use it to process eligible customer subscription payments.
Create Test Client
During your Agency trial, the Create Test Client button allows you to create a test customer account.
This is useful for experiencing the platform exactly as one of your customers would see it.
You can use the test account to check your branding, customer login experience, available features and general platform configuration before you begin adding real customers.
Main Agency Navigation
The navigation menu on the left-hand side gives you access to the main areas of your White Label Agency account:
-
Dashboard – Overview of your Agency platform.
-
Customers – View and manage your customer accounts.
-
Analytics – Monitor platform and customer activity.
-
Manage Client Plans – Create and manage the subscription plans offered to your customers.
-
Plans & Upgrade – View or change your own Agency plan and available resources.
-
Customer Billing – Manage and review customer-related billing information.
-
My Billing – View billing information relating to your own SnobBots Agency subscription.
-
Settings – Configure your White Label platform and Agency settings.
-
Profile – Manage your account and profile information.
-
Support Tickets – Contact SnobBots support and manage existing support requests.
-
Feature Requests – Suggest new platform features and review your submissions.
-
Documentation – Access the SnobBots help and documentation centre.
Keeping an Eye on Your Dashboard
As your White Label business grows, the Agency Dashboard becomes a useful way to monitor the overall health of your platform.
Regularly check your customer numbers, resource pool, chatbot usage, revenue and billing information. This helps you identify when additional resources or a plan upgrade may be required before your available allowances become exhausted.
The dashboard is designed to give you the important information at a glance, while the individual sections of the Agency platform provide more detailed controls when you need them.
Customers
Managing Your Customers
The Customers section provides a central place to view and manage all customers who have registered with your White Label platform.
As customers join and subscribe to your plans, their accounts will appear here, allowing you to monitor your customer base and manage individual accounts.
To access this area, select Customers from the Agency navigation menu.
Viewing Your Customers
At the top of the page, you can see the total number of customers currently registered with your platform.
The customer list allows you to view important information about each account, including their account details, subscription status, selected plan and payment information.
When your platform is new and no customers have registered yet, the page will display No customers yet. Customers will begin appearing here as they create accounts through your White Label platform.
Search for a Customer
As your customer base grows, you can use the search field to quickly locate a particular customer.
You can search using information such as the customer’s:
-
Name
-
Email address
This makes it easier to manage individual accounts without searching manually through your complete customer list.
Filter Customers by Status
The Status filter allows you to narrow the customer list according to their current account status.
This is particularly useful when managing a larger number of customers and you only want to see accounts with a particular status.
Viewing Customer Details
Select View for an individual customer to open their account information.
From the customer details, you can review information such as:
-
Customer account details
-
Current subscription plan
-
Subscription status
-
Amount the customer is paying
-
Relevant account and billing information
This provides a quick way to understand the customer’s current relationship with your White Label platform without having to check multiple sections.
Customer Plans and Payments
When a customer subscribes to one of the plans you have created, their selected plan will be associated with their customer account.
You can therefore use the Customers section to see which plan each customer is subscribed to and how much they are paying.
This makes it easier to manage customers across different subscription levels as your White Label business grows.
Suspending a Customer
If you need to temporarily prevent a customer from accessing your platform, you can Suspend their account.
Suspension may be useful where there is an account, subscription, payment or administrative issue that needs to be resolved.
A suspended customer remains within your customer records, allowing you to manage the account rather than permanently removing its history.
Activating a Customer
A suspended customer can be Activated again when you are ready to restore their access.
Once activated, the customer’s account returns to active status and they can continue using the platform according to their account and subscription.
Refreshing Customer Information
Select Refresh in the top-right corner to update the customer list with the latest available information.
This can be useful after a new customer has registered or when you have recently made changes to an existing customer’s account.
Managing Your Customer Base
As your White Label platform grows, the Customers section becomes your main overview of who is using your service.
Use it regularly to monitor:
-
How many customers you have
-
Which customers are active or suspended
-
Which plans customers are subscribed to
-
How much individual customers are paying
-
Individual customer account details
Together with Customer Billing and Analytics, this gives you a clearer picture of your White Label customer base and how your platform is being used.
Tip: Use the search and status filters as your customer base grows. They provide a much faster way to locate and manage individual accounts without working through your entire customer list.
Agency Analytics
The Analytics section gives you a detailed overview of the performance, growth, revenue and resource usage of your White Label platform.
As customers begin subscribing and using your platform, this area allows you to monitor how your Agency business is performing from one central dashboard.
To access it, select Analytics from the Agency navigation menu.
Analytics Overview
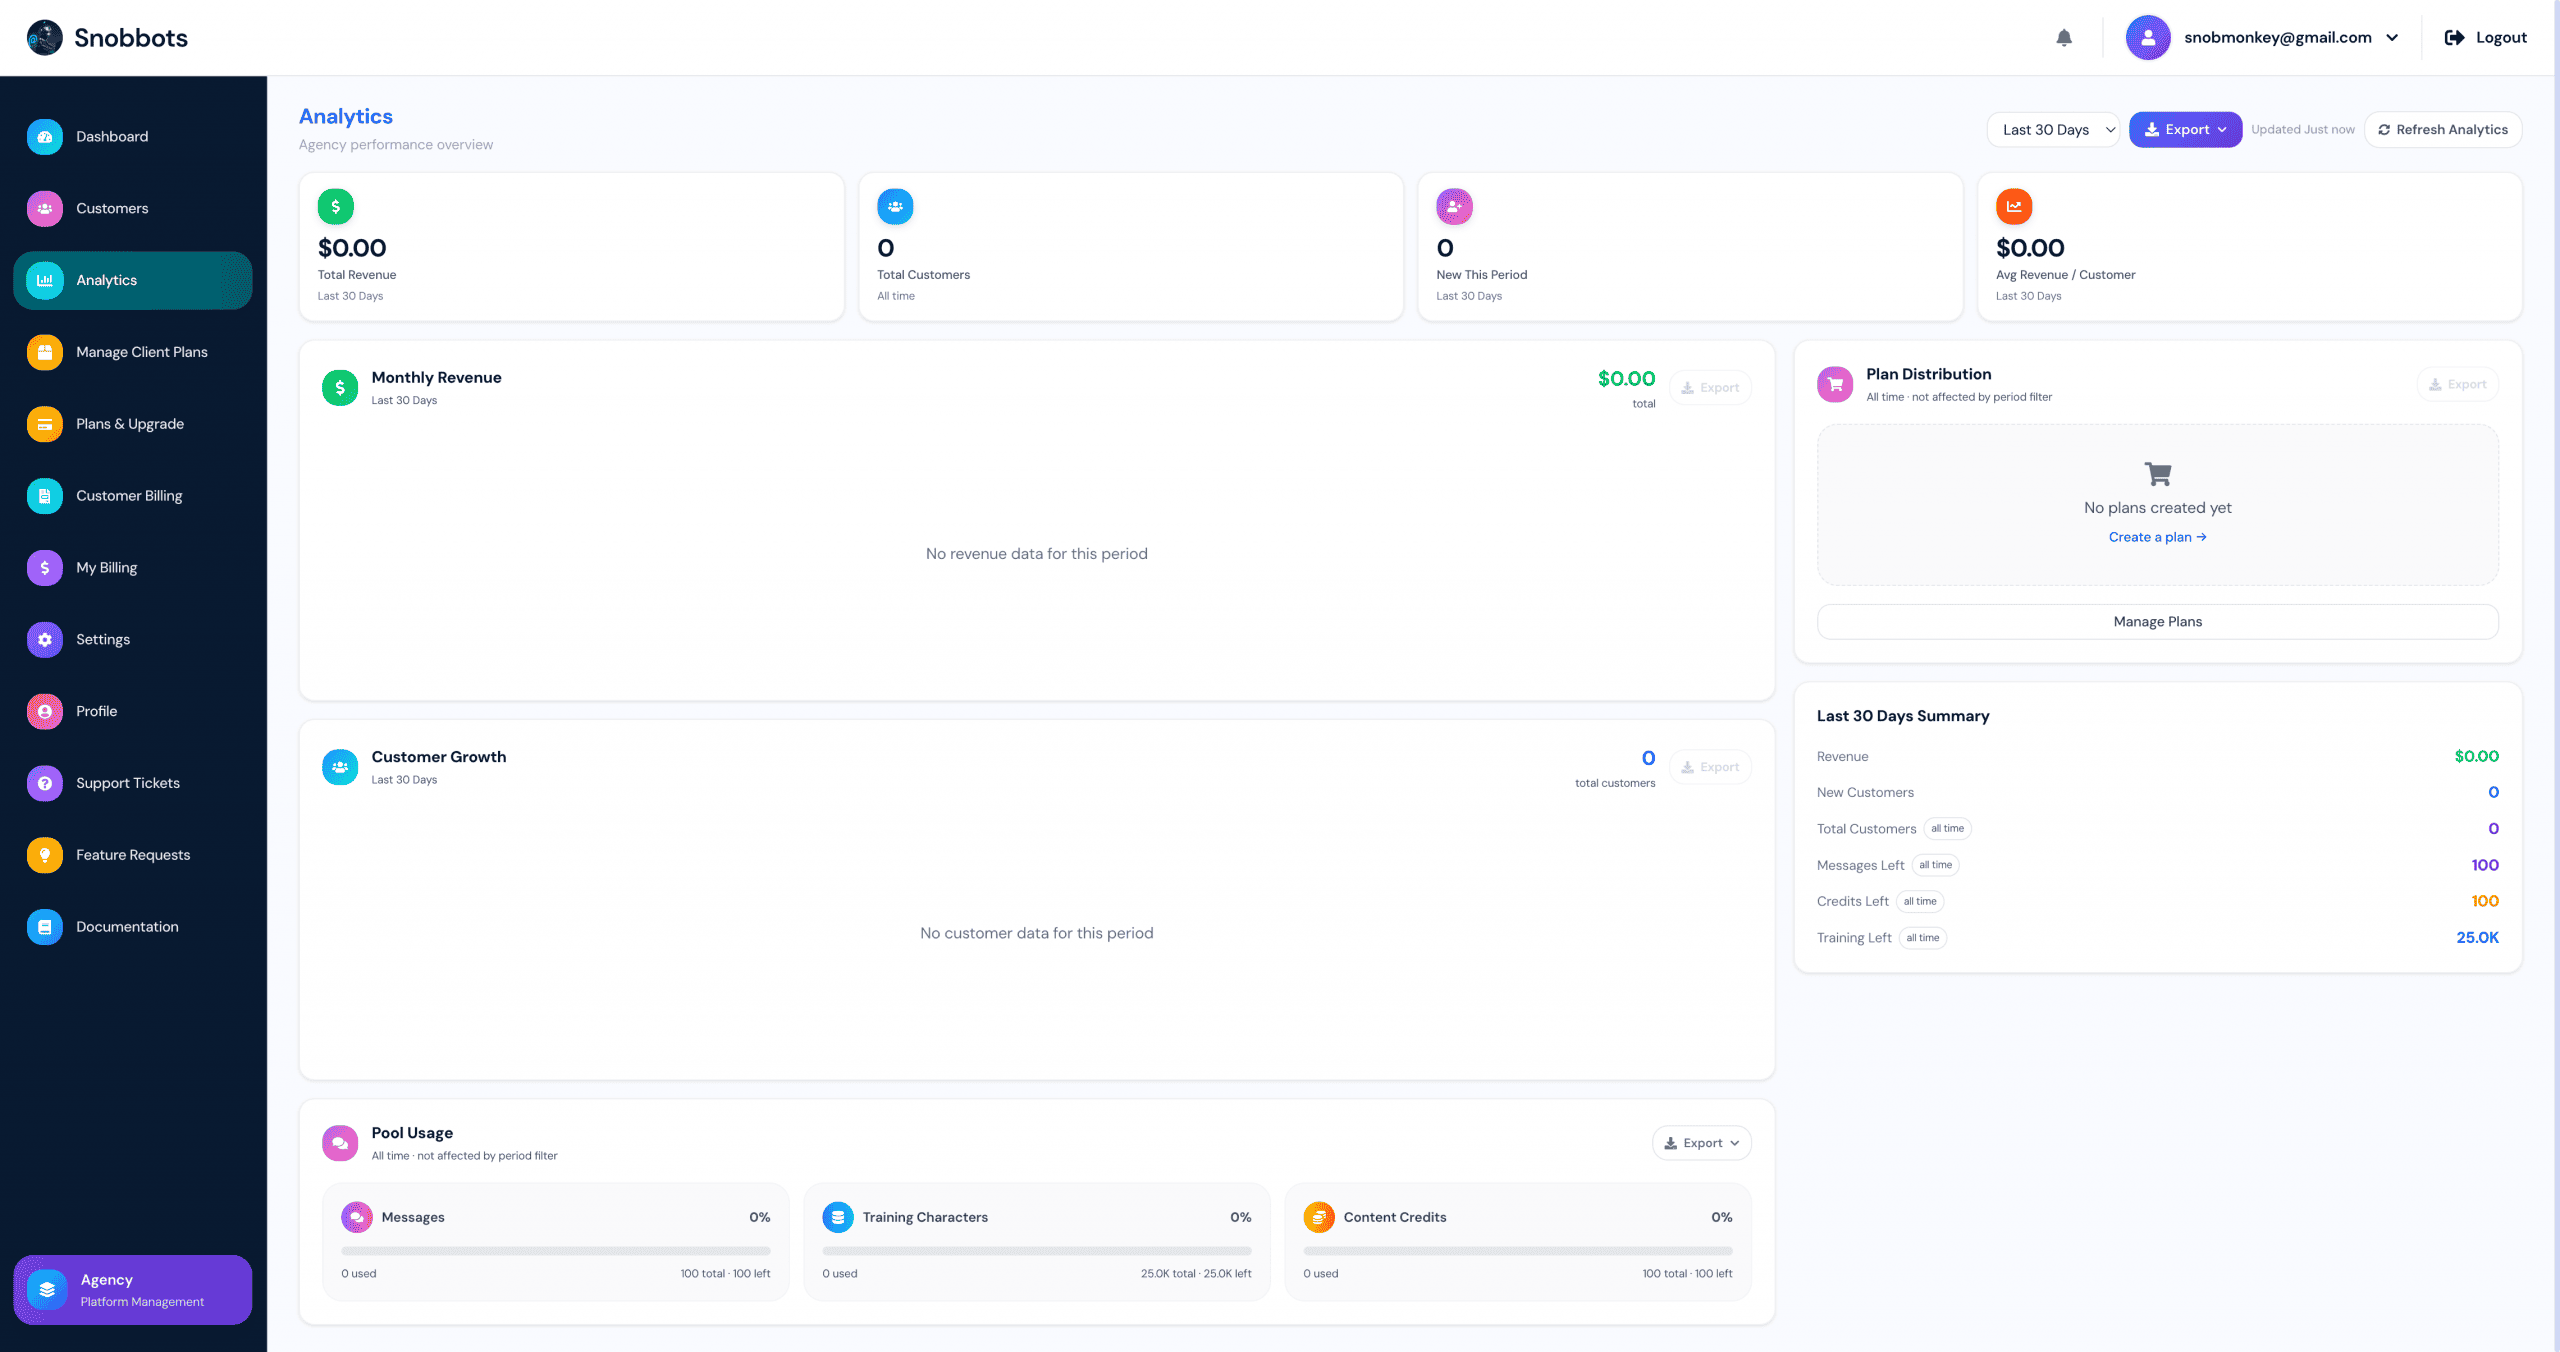
At the top of the Analytics page, you will see key performance figures for your Agency.
These include:
Total Revenue
Shows the total revenue generated during the selected reporting period.
Total Customers
Shows the total number of customers registered with your White Label platform.
New This Period
Shows how many new customers joined during the selected reporting period.
Average Revenue per Customer
Shows the average amount of revenue generated per customer during the selected period.
Together, these figures provide a quick snapshot of the commercial performance and growth of your Agency platform.
Select a Reporting Period
Use the date-range selector at the top of the Analytics page to change the period you want to analyse.
For example, you can review performance for the Last 30 Days and other available reporting periods.
The relevant analytics will automatically update to reflect the selected period.
Monthly Revenue
The Monthly Revenue section provides a visual overview of revenue generated through your White Label customers.
As your platform begins generating sales, this allows you to monitor revenue performance and identify changes or trends over time.
The total revenue for the selected period is also displayed alongside the chart.
Customer Growth
The Customer Growth section shows how your customer base has changed during the selected reporting period.
This allows you to monitor new customer acquisition and see whether your White Label platform is growing over time.
Used alongside your revenue analytics, this can help you understand the relationship between customer growth and overall revenue.
Plan Distribution
The Plan Distribution section shows how your customers are distributed across the subscription plans you have created.
As customers begin subscribing, you can use this information to understand which plans are proving most popular.
This can help you evaluate your pricing and plan structure and identify which packages are attracting the most customers.
You can also access Manage Plans directly from this area when you need to review or update your customer plans.
Pool Usage
The Pool Usage section shows how the resources included within your Agency account are being consumed across your customers.
You can monitor:
-
Messages
-
Training Characters
-
Content Credits
For each resource, you can see the amount used, the total allowance and the amount remaining.
This is particularly important as your customer base grows, as it allows you to monitor whether your available Agency resources are approaching their limits.
Reporting Summary
The summary panel provides an at-a-glance view of important Agency information, including:
-
Revenue
-
New Customers
-
Total Customers
-
Messages Left
-
Content Credits Left
-
Training Characters Left
Some figures relate to the selected reporting period, while resource balances and other indicators may represent your current or all-time account position.
Refresh Analytics
Select Refresh Analytics to retrieve the latest available information.
The page also displays when the analytics were last updated, making it easier to confirm that you are viewing current data.
Exporting Analytics
Analytics can be exported when you need to keep your own records, perform further analysis or share reports with colleagues.
Export options include:
-
PDF
-
Excel
-
CSV
Export controls are available for relevant analytics sections, allowing you to download specific information where required. You can also use the main Export option at the top of the Analytics page for the available overall reporting options.
This can be useful for financial reviews, internal reporting, business planning or analysing your Agency data outside the SnobBots platform.
Using Analytics to Manage Your Agency
As your White Label business grows, Analytics provides more than just a record of activity.
Regularly reviewing your revenue, customer growth, plan distribution and resource usage can help you identify which plans are performing well, how quickly your customer base is growing and whether your Agency resources need to be increased.
Tip: Pay particular attention to Pool Usage as your customer numbers increase. Monitoring your remaining Messages, Training Characters and Content Credits can help you anticipate when you may need additional resources or a higher Agency plan rather than discovering it after your allowance has been heavily used.
Managing Client Plans & Top-Ups
The Manage Client Plans section allows you to create and manage the subscription plans and optional top-up packages that you offer to customers through your White Label platform.
You control the pricing, resources and chatbot allowances included with each plan. These plans can then be displayed on your branded pricing page for customers to purchase.
The platform also includes built-in profit calculators and resource recommendations, helping you price your plans sustainably while understanding your estimated costs and profit margins before publishing them.
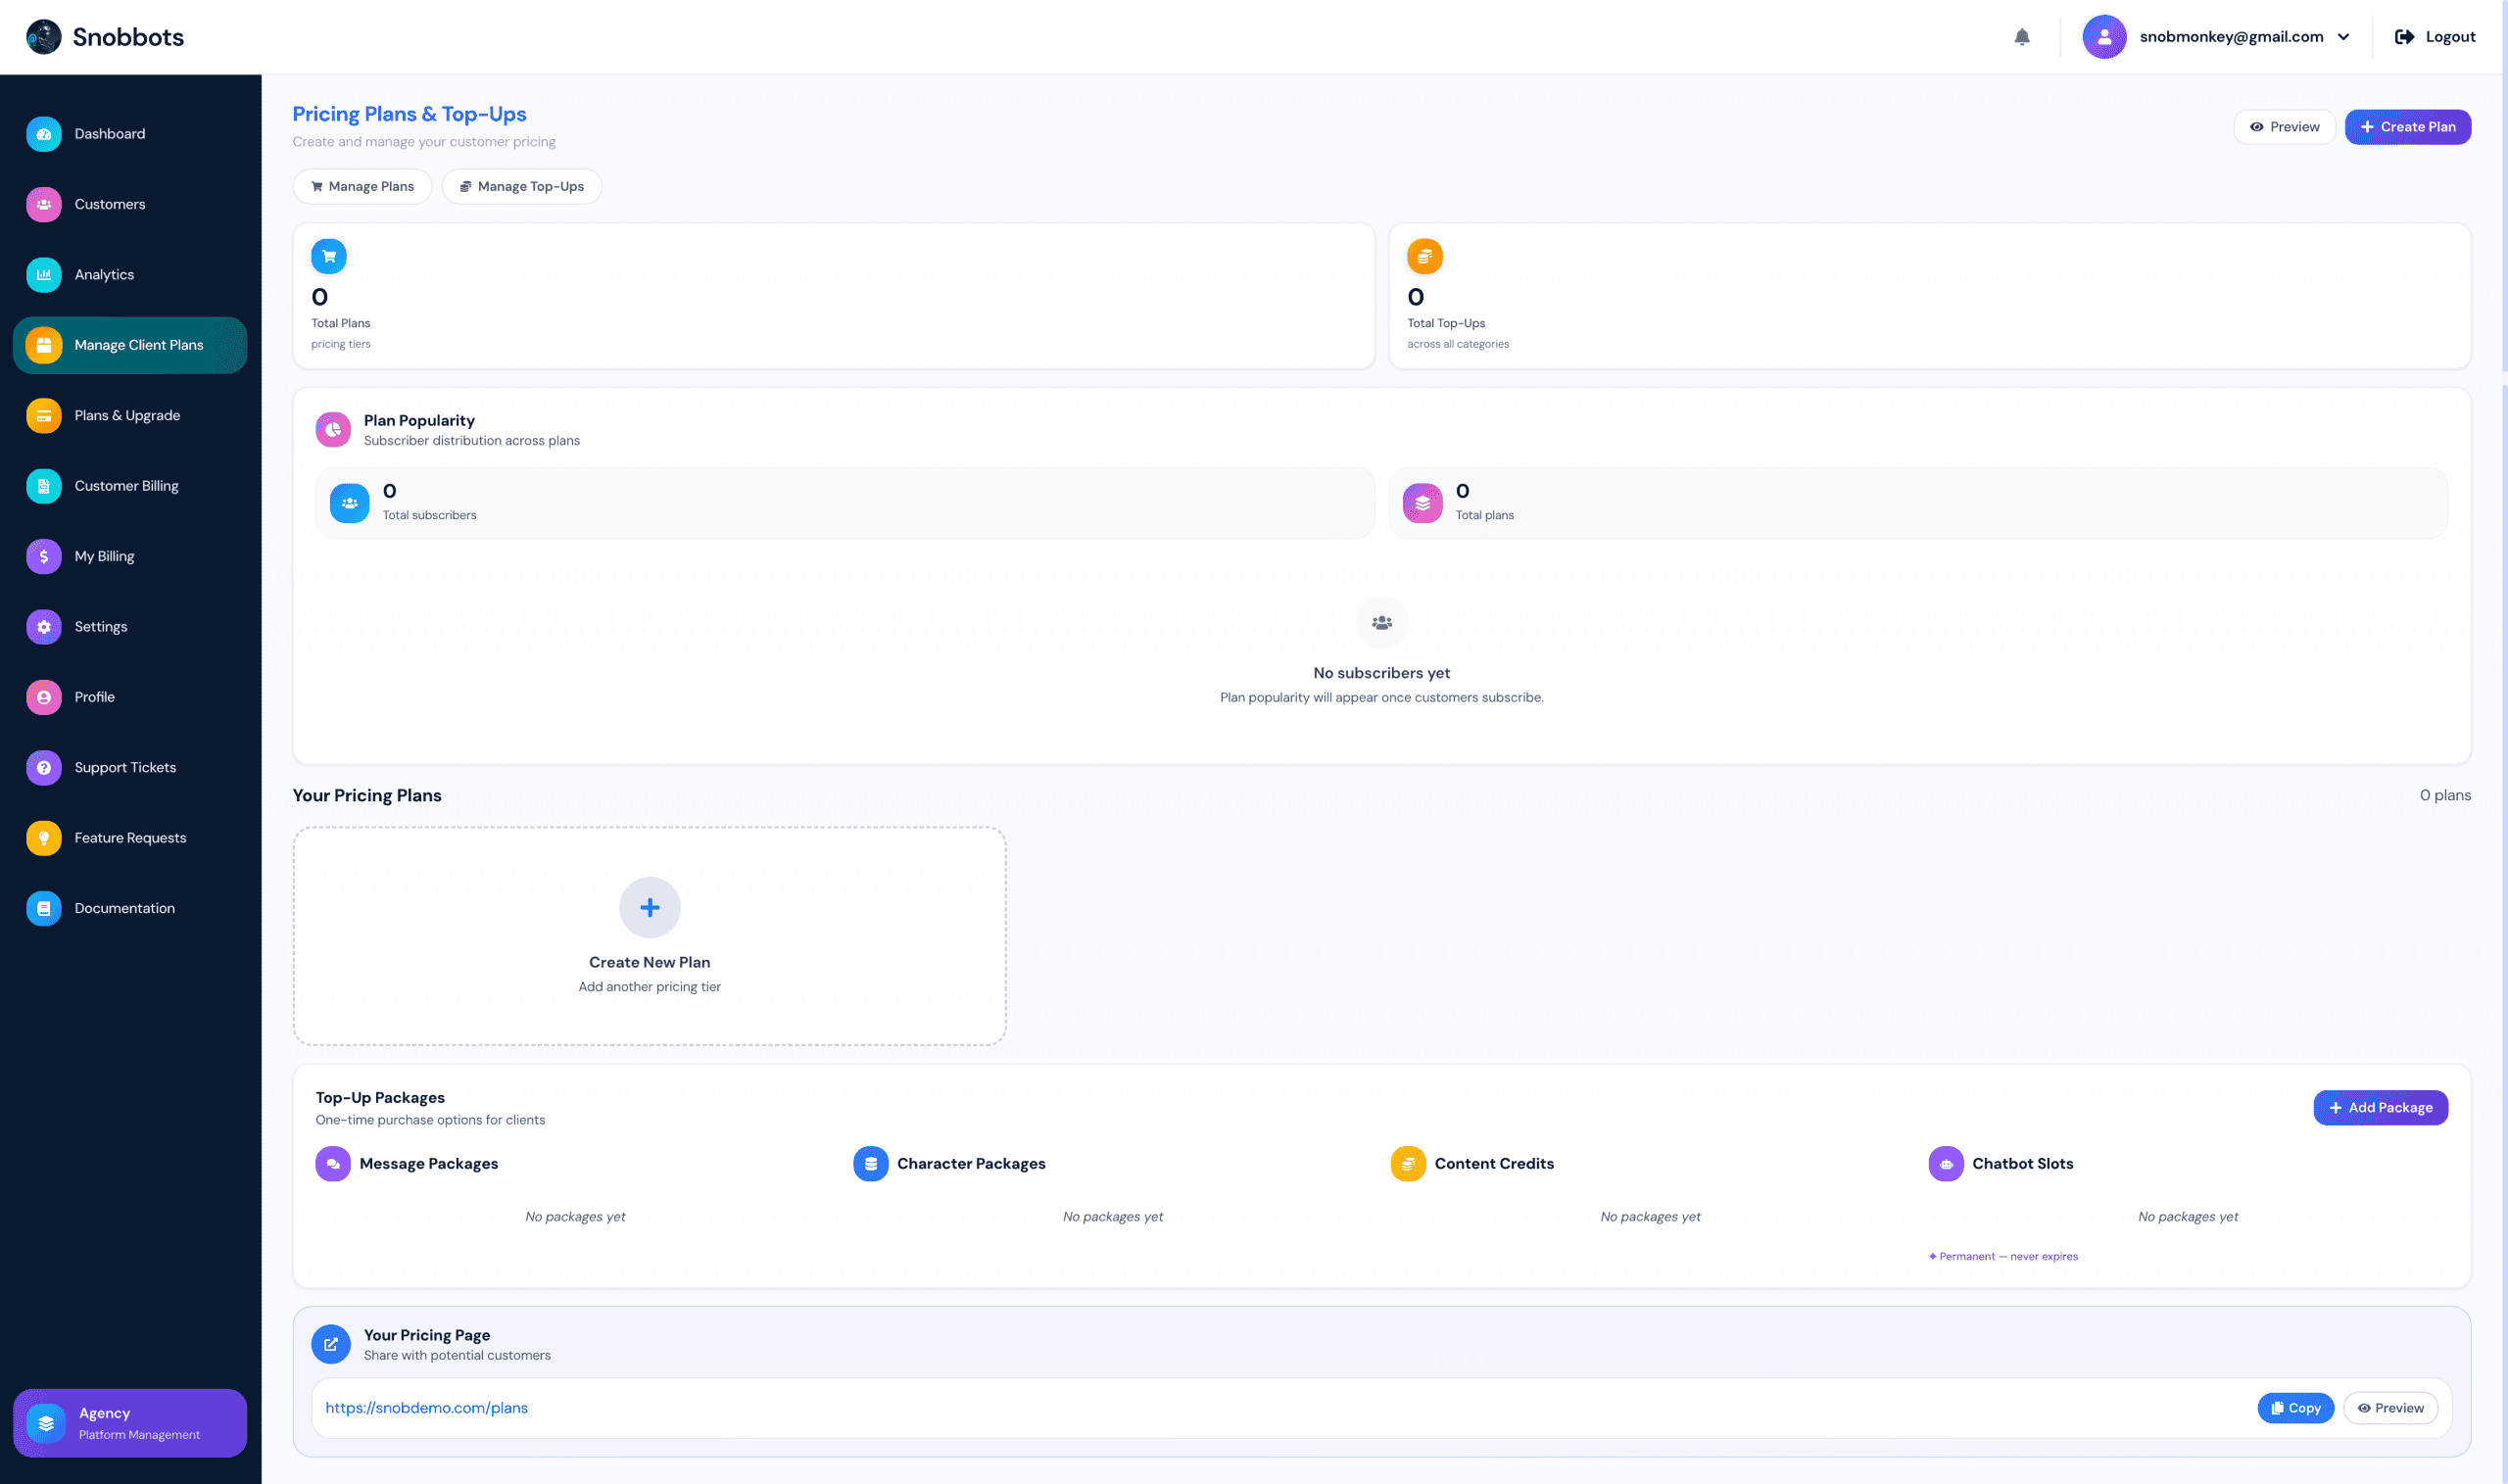
Creating a Client Plan
From Manage Client Plans, select Create Plan or Create New Plan.
When creating a plan, enter the following information:
-
Plan Name – the name customers will see for the plan.
-
Description – a short description of the plan or the type of customer it is designed for.
-
Price – the amount you want to charge the customer.
-
Billing Interval – the recurring billing period for the plan.
-
Chatbots – the number of AI chatbots included.
-
Messages – the monthly message allowance.
-
Training Characters – the amount of training data available to the customer.
-
Content Credits – credits available for supported content-generation features, including FAQ and blog generation.
Resource Recommendations
As you configure the plan, the platform provides recommended resource limits based on the number of chatbots you are including.
For example, when creating a plan with one chatbot, the system can recommend an appropriate allowance for messages, training characters and content credits, together with a suggested minimum selling price.
If you increase the number of chatbots included in the plan, the recommendations adjust accordingly.
These recommendations are designed to help you provide customers with sufficient resources for practical use while protecting the available resource pool within your White Label Agency account.
You are still in control of the plan and can choose the allowances and selling price that suit your business model.
Built-In Profit Calculator
While creating a plan, the Profit Calculator provides an estimate of the commercial performance of the plan before you publish it.
The calculator takes into account your White Label Agency subscription and the resources allocated to the customer. It can then show information such as:
Your estimated wholesale cost per client – the calculated cost of providing the selected resources.
You charge client – the subscription price you have entered.
Profit per client – the estimated difference between the selling price and calculated wholesale cost.
Profit margin – the estimated percentage margin for the plan.
You can also adjust the estimated number of customers on the plan to see how the plan could contribute towards your overall monthly costs and profitability.
This makes it much easier to experiment with different prices and resource allowances before committing to a plan.
Important: Review the plan carefully before creating it. The plan name and price cannot be edited after creation. If either is incorrect, you will need to delete the plan and create a new one.
Once you are satisfied with the configuration, select Create Plan.
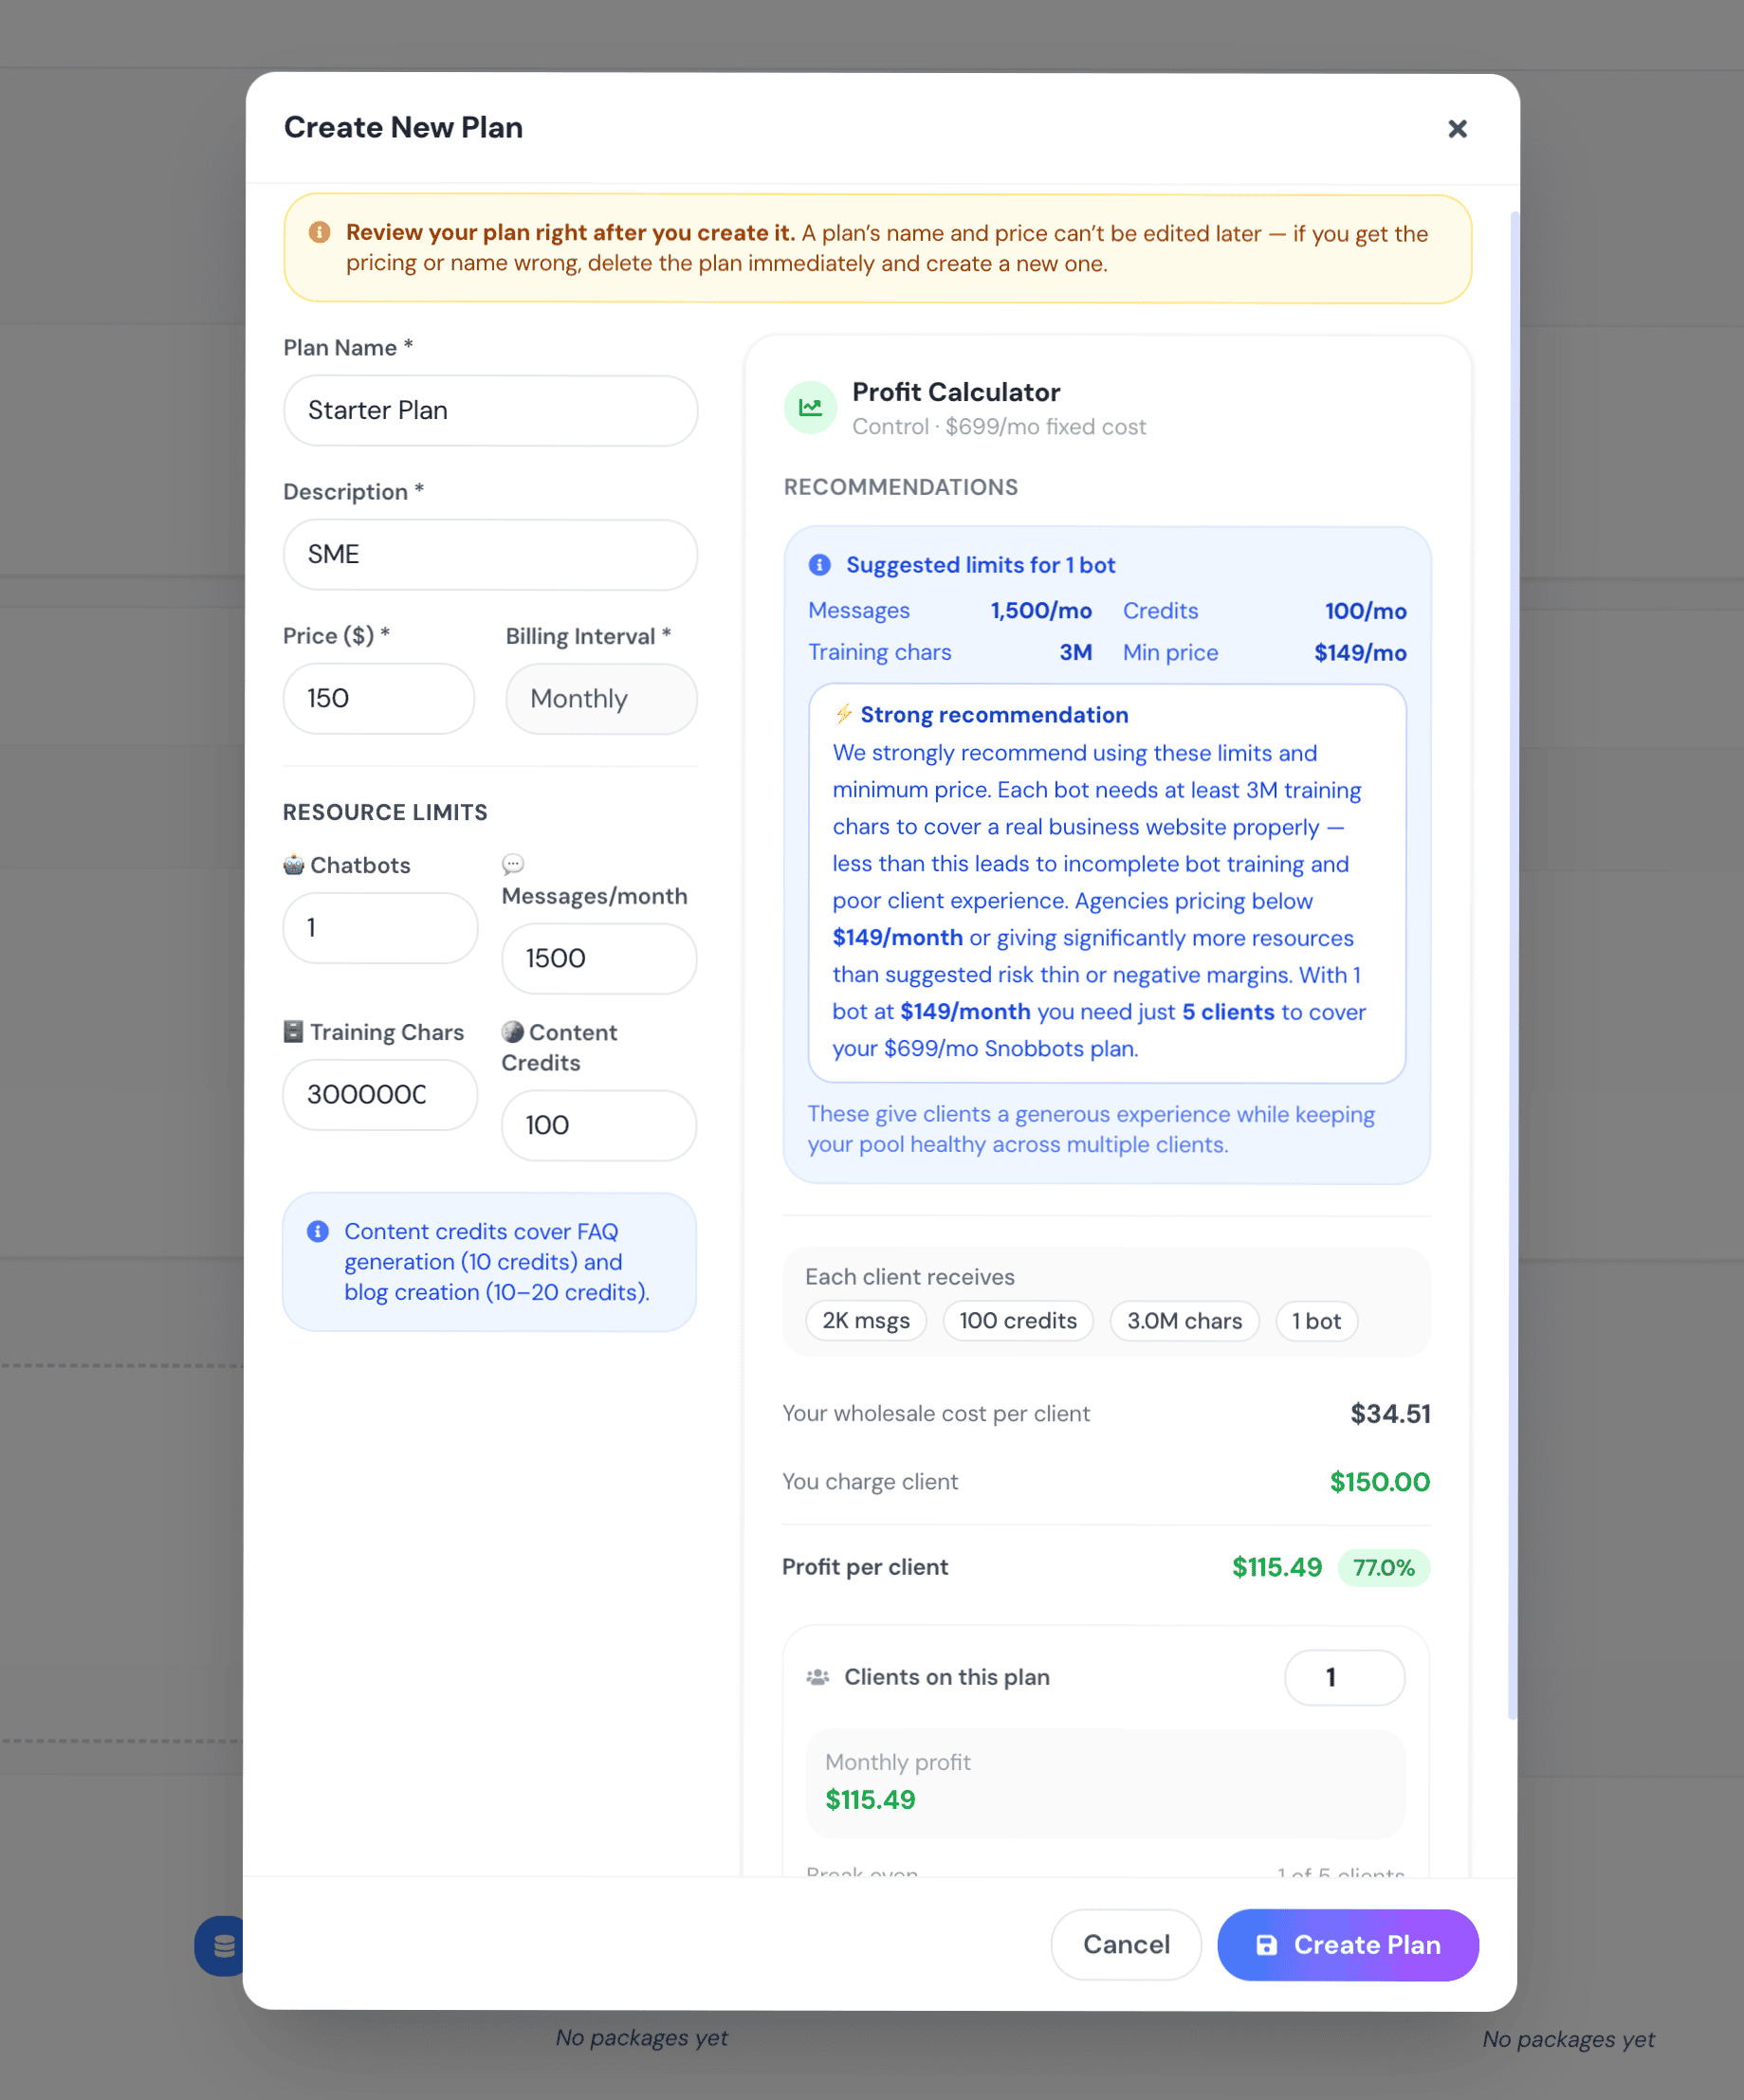
Plan Popularity
Once customers begin subscribing, the Plan Popularity area provides an overview of how subscribers are distributed across your different plans.
This helps you identify which packages are attracting the most customers and can assist when reviewing your future pricing and plan structure.
Creating Top-Up Packages
In addition to recurring subscription plans, you can create Top-Up Packages that customers can purchase when they need additional resources.
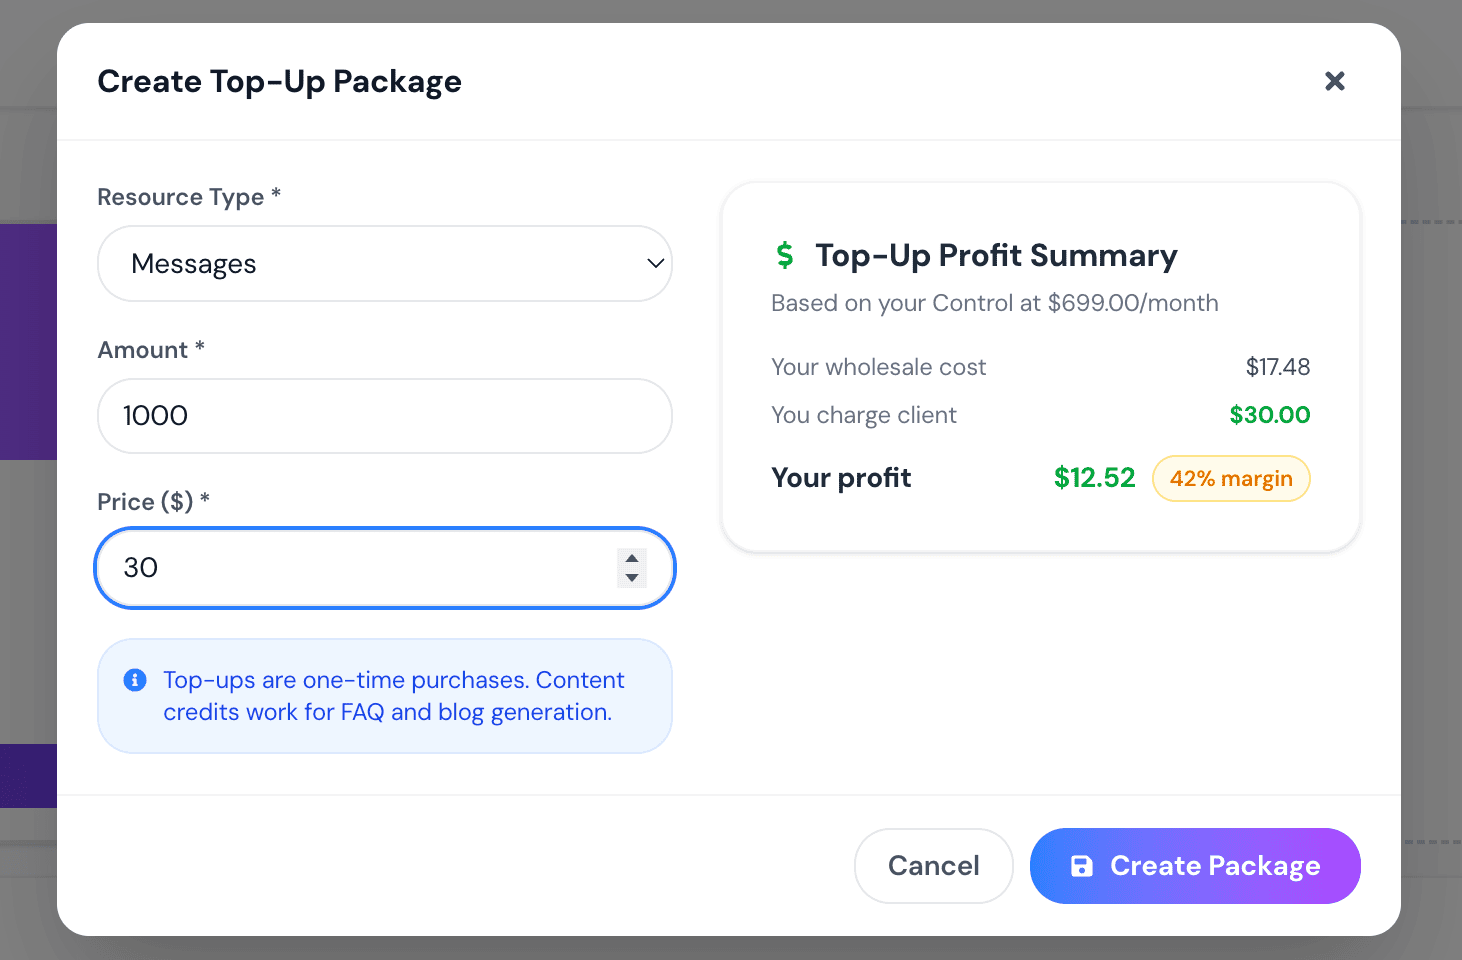
Select Add Package or open Manage Top-Ups to create a new package.
Available resource categories can include:
-
Messages
-
Training Characters
-
Content Credits
-
Chatbot Slots
Choose the Resource Type, specify the Amount the customer will receive and enter the Price you want to charge.
Top-ups are one-time purchases rather than recurring subscriptions. The platform will indicate where particular resources have different usage or expiry rules.
Top-Up Profit Calculator
Top-Up Packages also include a built-in Profit Summary.
As you enter the quantity and selling price, the platform calculates the estimated:
Wholesale cost – the calculated cost of supplying the selected resources.
Customer price – the amount you have chosen to charge.
Profit – the estimated amount remaining after the calculated resource cost.
Profit margin – the estimated percentage margin on the top-up sale.
This allows you to see the financial impact of your pricing before making the package available to customers.
Once you are satisfied with the package, select Create Package.
Your Branded Pricing Page
Your Client Plans and Top-Up Packages form part of the commercial offering of your White Label platform.
The Your Pricing Page section provides the address of your branded pricing page. You can Preview the page to see how your plans will appear to customers or Copy the link to use it on your website, marketing material or customer communications.
As you build your plans, the aim is to balance three things: competitive customer pricing, sufficient resources for customers to use the platform effectively, and a sustainable profit margin for your Agency. The built-in recommendations and profit calculators are designed to help you achieve that balance.
Plans & Upgrade
The Plans & Upgrade section is where you manage your own White Label Agency subscription with SnobBots. This is separate from the client plans you create and sell to your customers.
From this page, you can view your current Agency plan, compare the available plans, upgrade or downgrade your subscription, purchase additional resources and access your billing history.
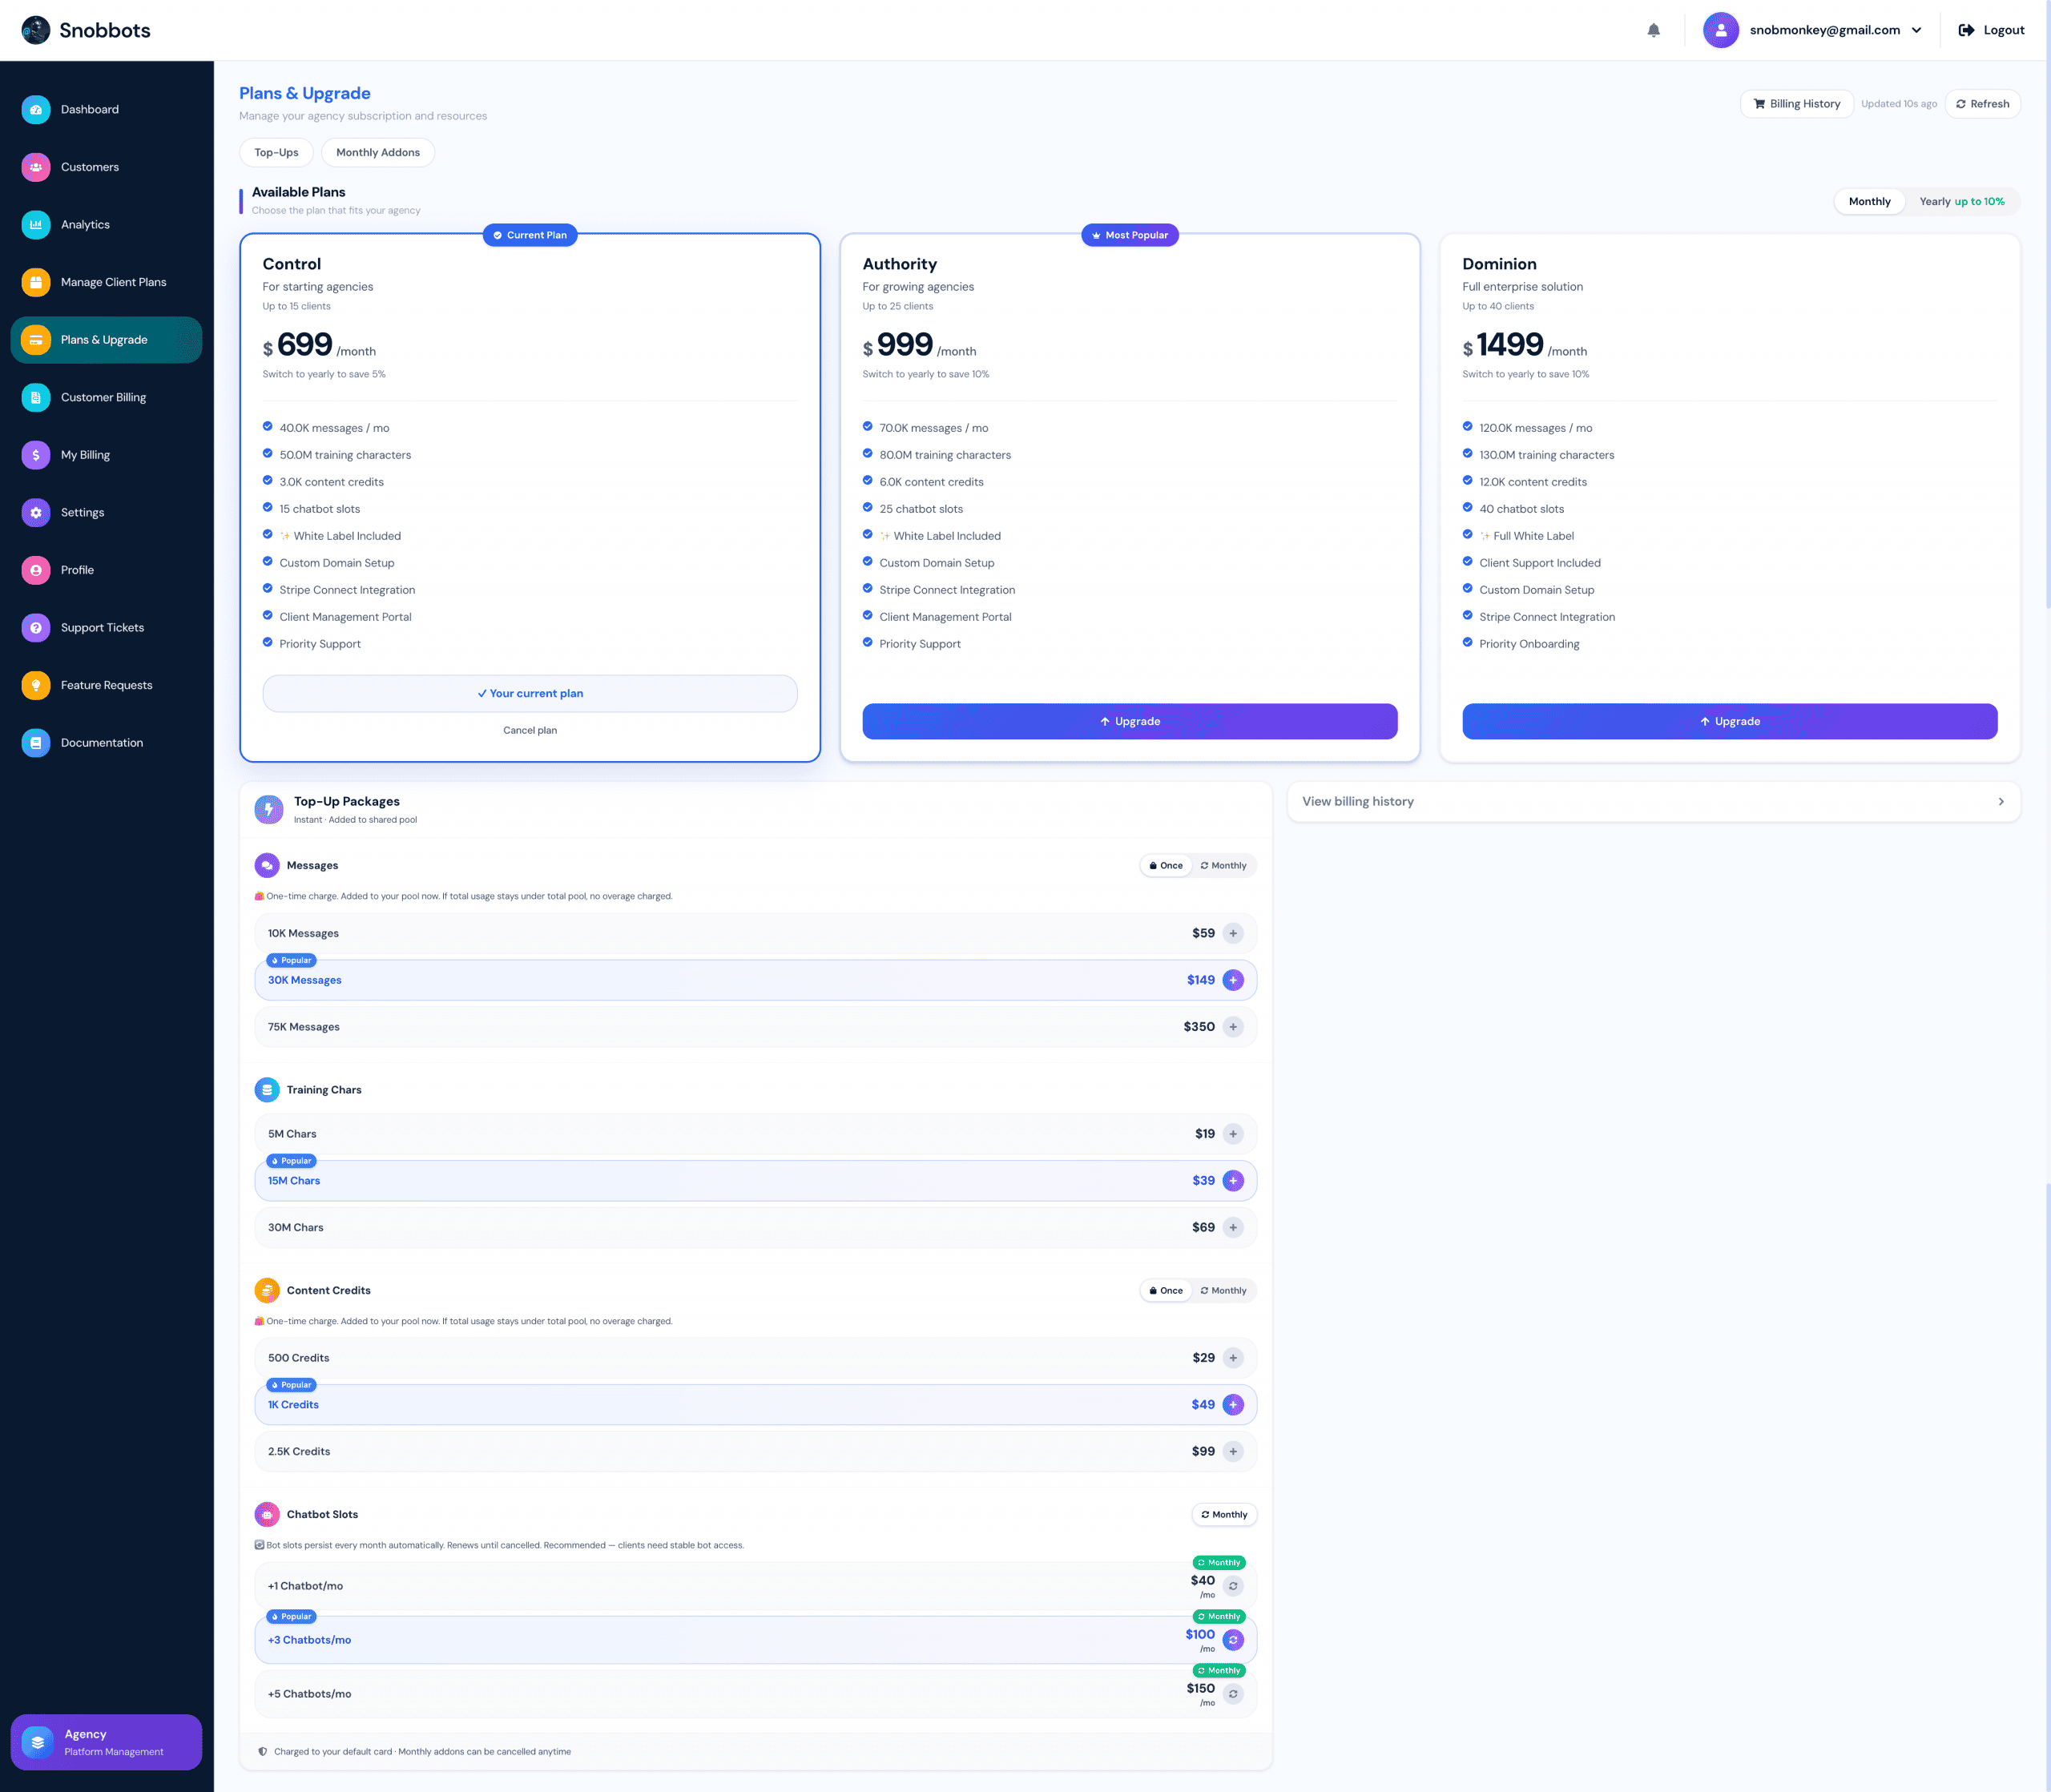
Viewing Your Current Agency Plan
Your current subscription is clearly marked as Your Current Plan.
Each Agency plan displays the resources and features included with the subscription, such as:
-
Monthly message allowance
-
Training character allowance
-
Content credits
-
Chatbot slots
-
White Label features
-
Custom domain functionality
-
Stripe Connect integration
-
Client management features
-
Support level
You can switch between Monthly and Yearly pricing to compare the available subscription options and any applicable annual savings.
Upgrading or Downgrading Your Plan
If your Agency grows and requires additional capacity, you can upgrade to a higher plan directly from this page.
Higher plans provide increased allowances for resources such as messages, training characters, content credits and chatbot slots, alongside the features shown for that plan.
You can also downgrade your subscription if your requirements change.
Before changing plans, review the resource allowances carefully to ensure the new plan provides sufficient capacity for the customers you currently manage.
Agency Top-Ups
If you need additional resources but do not want to change your main Agency plan, you can purchase Top-Up Packages.
Available top-ups can include:
Messages – increase the number of AI chatbot messages available within your Agency resource pool.
Training Characters – add additional capacity for training customer chatbots with website and business information.
Content Credits – purchase additional credits for supported content-generation features.
Chatbot Slots – increase the number of chatbots that can be created across your customer accounts.
The available package sizes and prices are displayed directly on the page.
Depending on the resource, you may be able to choose between a one-time top-up or a monthly add-on. The page will clearly indicate which purchasing options are available for each resource.
One-Time Top-Ups and Monthly Add-Ons
It is important to understand the difference between the two options.
One-time top-ups provide additional resources as a single purchase and are added to your Agency resource pool.
Monthly add-ons provide additional ongoing capacity and are charged each month until cancelled. This is particularly useful when your Agency consistently requires additional capacity beyond the allowance included with your main subscription.
The relevant purchase type and renewal terms are shown before you add the resource.
Billing History
Select Billing History to review previous charges and transactions associated with your Agency subscription, upgrades and additional resource purchases.
This gives you one central area for managing the subscription and resources that your White Label Agency purchases directly from SnobBots.
Note: The plans and top-ups shown under Plans & Upgrade are for your Agency account. They are different from the customer plans and top-up packages you create under Manage Client Plans, which are the products you set up and sell to your own customers.
Customer Billing
The Customer Billing section provides a complete overview of payments made by customers who subscribe to plans or purchase additional resources through your White Label platform.
This area allows you to monitor customer revenue and quickly identify successful, pending or failed payments.
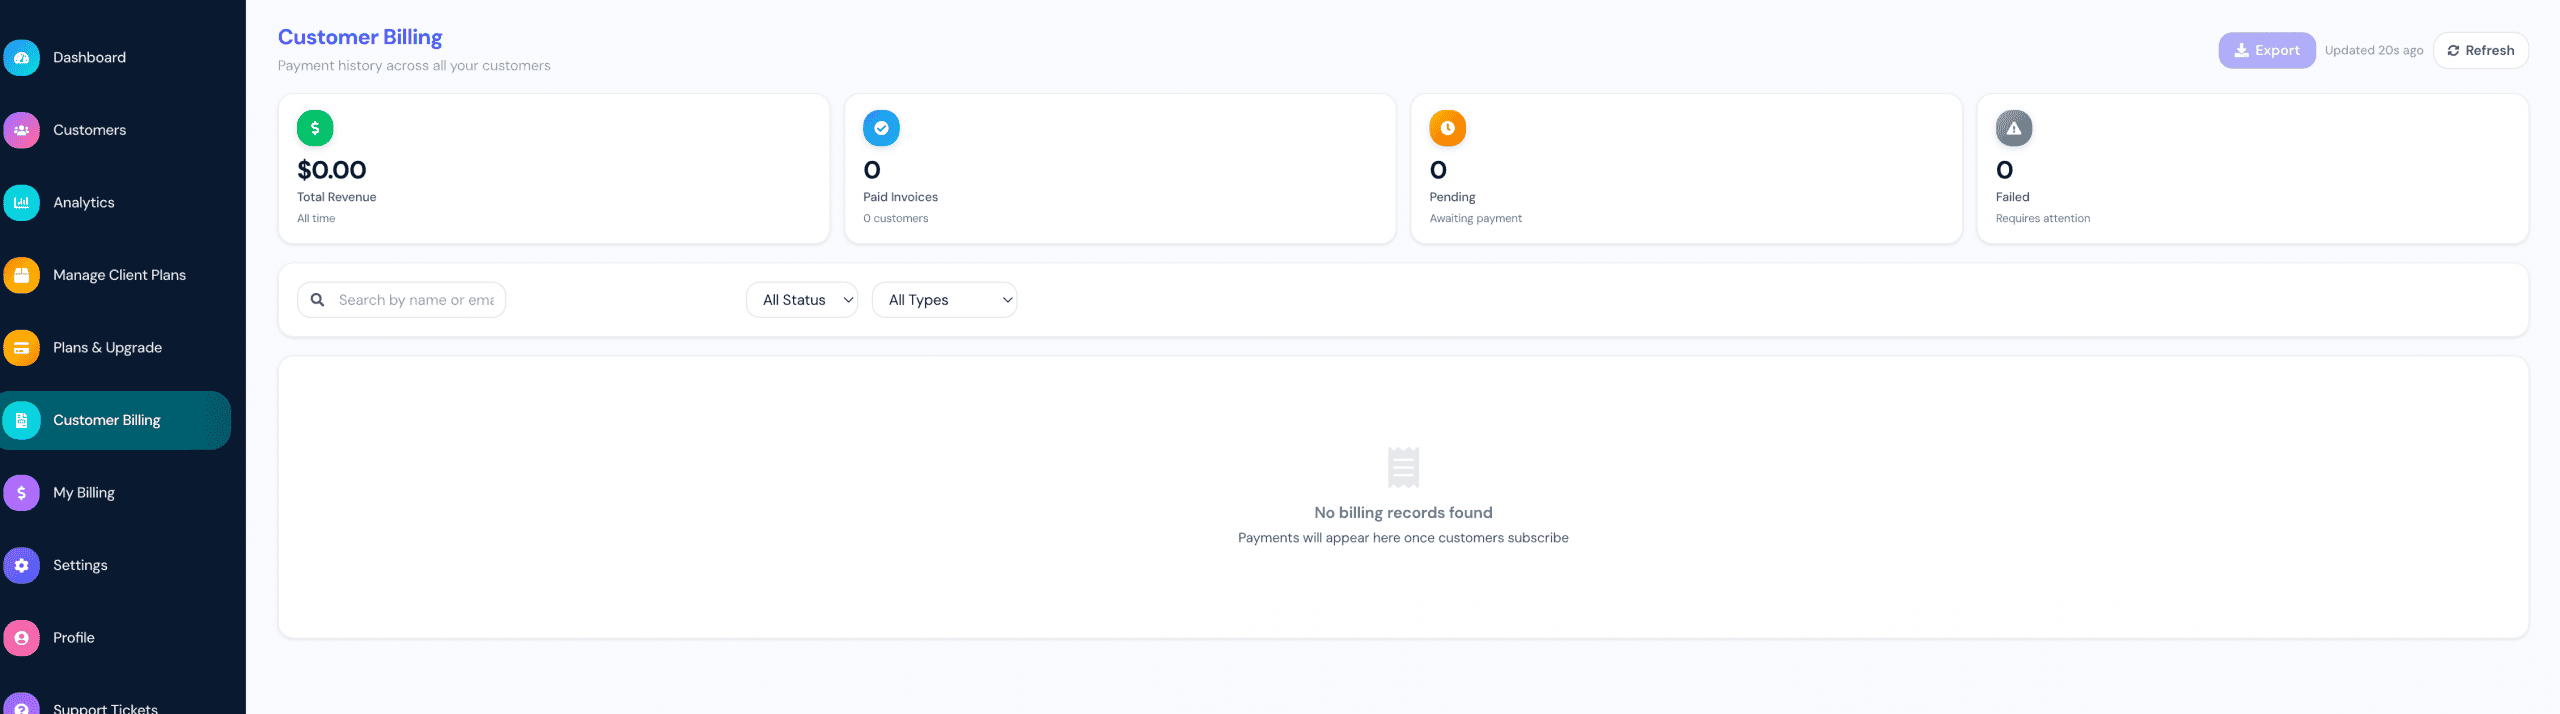
Billing Overview
At the top of the Customer Billing page, you can see a summary of your customer payment activity, including:
-
Total Revenue – the total revenue received from your customers.
-
Paid Invoices – the number of successfully paid invoices.
-
Pending Payments – payments that are currently awaiting completion.
-
Failed Payments – payments that were unsuccessful and may require attention.
These figures provide a quick overview of the payment status across your customer base.
Viewing Customer Payments
Once customers begin subscribing to your plans or making purchases, their billing transactions will appear within the payment history.
You can review individual transactions to see information relating to the customer, payment and transaction status.
Payment statuses allow you to quickly distinguish between successful, pending and failed payments, making it easier to identify transactions that may require attention.
Searching and Filtering Payments
As your transaction history grows, you can use the available search and filtering tools to locate specific billing records.
You can search for a particular customer and filter transactions by payment status or payment type, allowing you to focus on the information you need without searching through the entire billing history.
Exporting Payment History
Customer billing information can also be exported using the Export option.
This allows you to download your payment history for your own records, reporting, reconciliation or accounting purposes.
Note: Customer Billing relates to payments made to your White Label Agency by your customers. It is separate from My Billing, which covers payments your Agency makes to SnobBots for your own subscription, upgrades and resources.
My Billing
The My Billing section allows you to view and manage the billing relationship between your White Label Agency and SnobBots.
This section is separate from Customer Billing, which shows payments made by your customers to your Agency. My Billing only covers your own Agency subscription, purchases and payments to SnobBots.
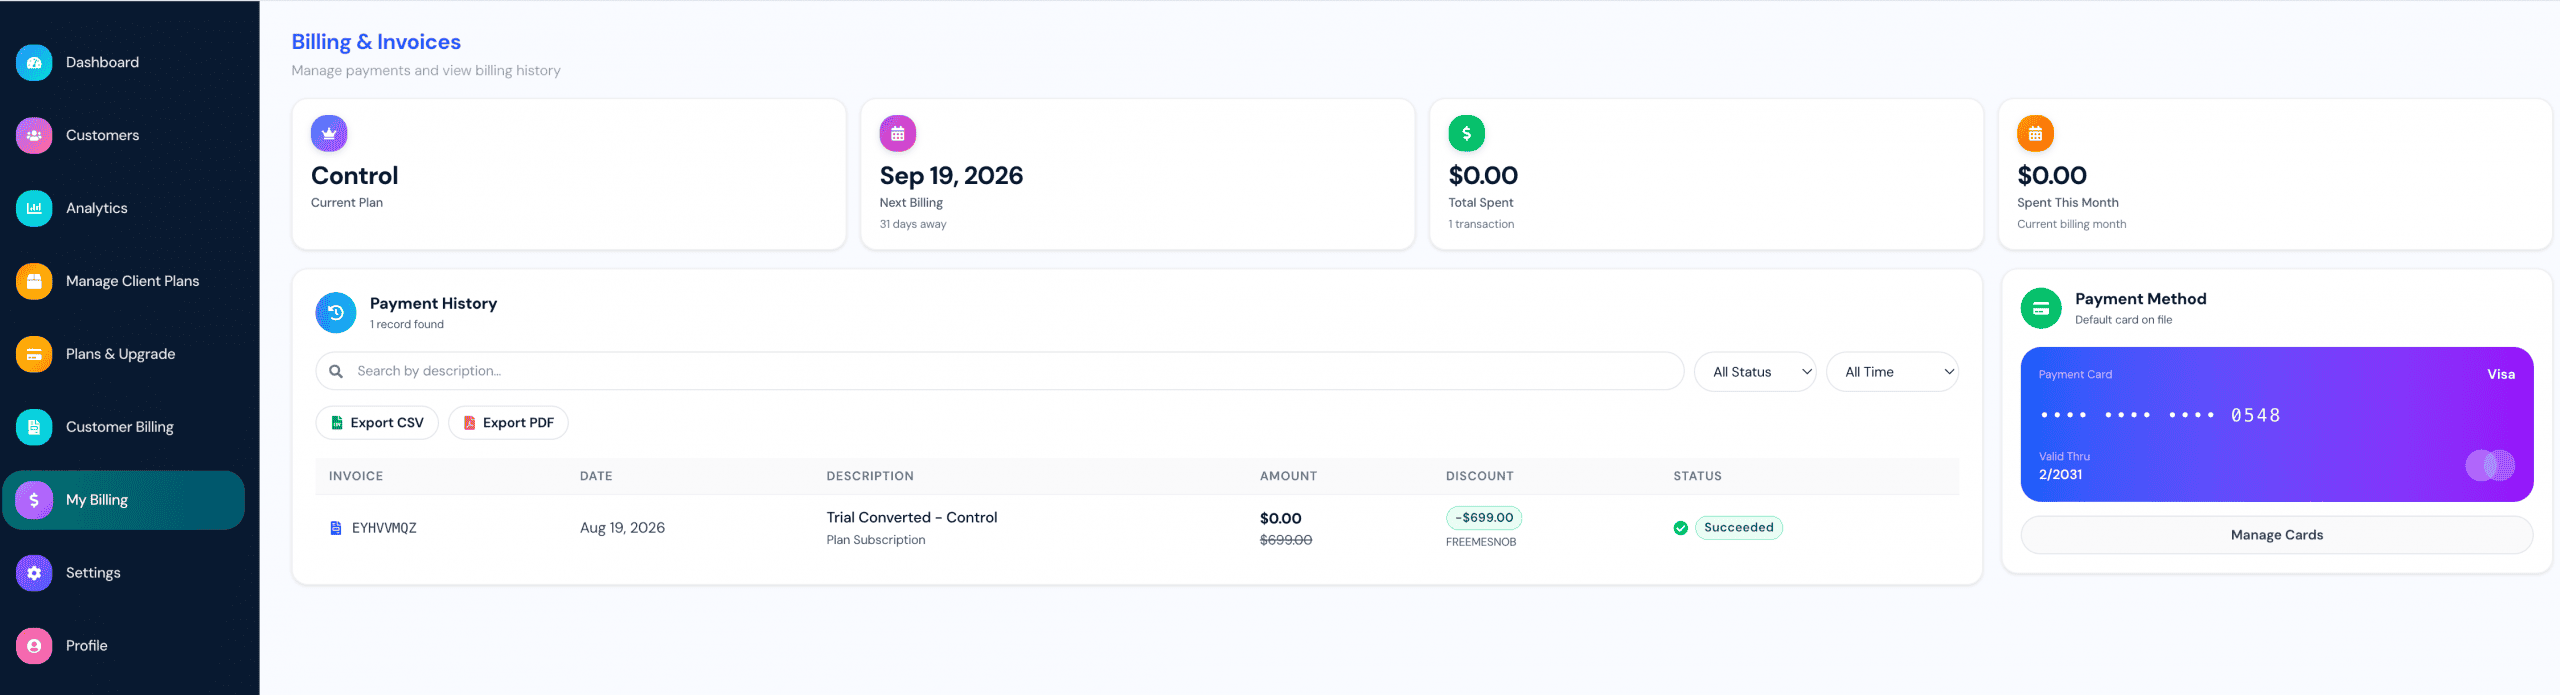
Billing Overview
At the top of the page, you can quickly view the key information relating to your Agency account, including:
-
Current Plan – the White Label Agency plan you are currently subscribed to.
-
Next Billing Date – when your next subscription payment is due.
-
Total Spent – the total amount your Agency has paid to SnobBots.
-
Spent This Month – the amount charged during your current billing month.
This provides a simple overview of your current subscription and billing position.
Payment History
The Payment History section contains a record of transactions associated with your Agency account.
For each transaction, you can view information including the:
Invoice – the reference associated with the transaction.
Date – when the transaction took place.
Description – what the payment relates to, such as your Agency subscription.
Amount – the amount charged.
Discount – any applicable promotional or subscription discount.
Status – whether the transaction was successful, pending or unsuccessful.
You can also use the available search and filtering options to find specific transactions or view payments from a particular period.
Exporting Your Billing History
Your Agency billing history can be downloaded for your own records, bookkeeping or accounting purposes.
Billing information can be exported in available formats including PDF, Excel or CSV, making it easier to keep external financial records or provide transaction information to your accountant.
Payment Method
The Payment Method section displays the default card currently linked to your Agency account and used for payments to SnobBots.
For security, only limited card information is displayed, such as the card type, final digits and expiry date.
Select Manage Cards if you need to manage the payment cards associated with your Agency account, including adding another card or changing your default payment method.
Note: My Billing shows what your Agency pays to SnobBots. To review payments that your customers make to your Agency, use the separate Customer Billing section.
Settings
The Settings section is the central area for configuring and managing your White Label platform. It brings together the main settings required to customise your brand, connect your domain, receive customer payments and manage how your Agency pays SnobBots.
The Settings area is divided into five sections:
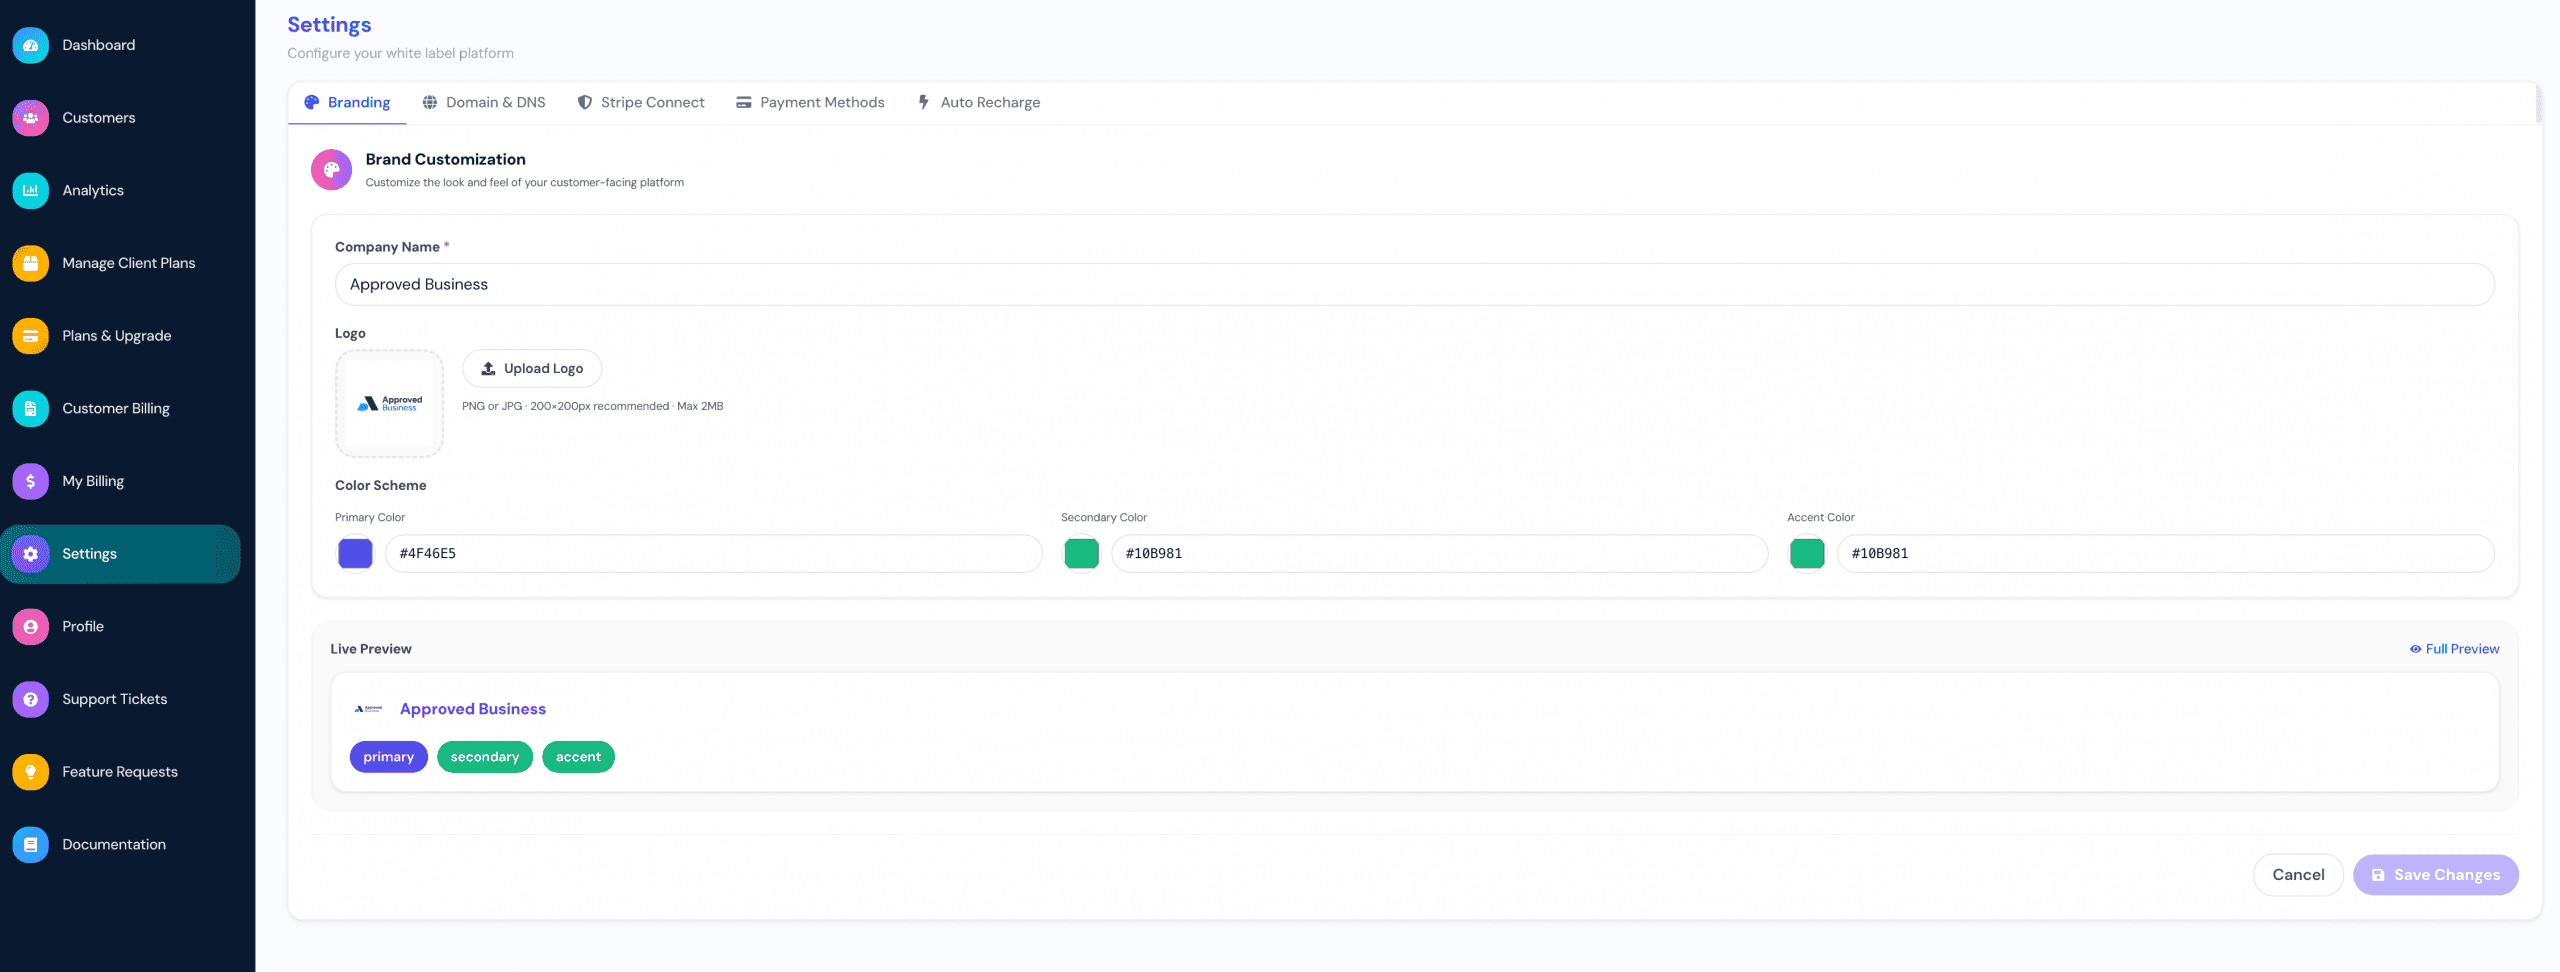
Branding
The Branding section controls how your White Label platform appears to your customers.
Here you can manage your:
-
Company name
-
Company logo
-
Primary colour
-
Secondary colour
-
Accent colour
The Live Preview shows how your branding will appear, while Full Preview allows you to see a complete preview of your customer-facing website before making it live.
After making changes, select Save Changes to apply them.
Domain & DNS
The Domain & DNS section allows you to connect your own branded domain to the White Label platform.
Once you enter your domain, SnobBots provides the DNS records that need to be added through your domain provider. You can then verify the connection from within the platform.
Once successfully verified, your customers can access the platform through your own domain and branding, rather than through SnobBots.
Stripe Connect
The Stripe Connect section connects your Agency’s own Stripe account to the platform.
Once connected, payments made by your customers for your plans and top-ups are processed through your connected Stripe account and paid to you.
You can also access your Stripe account to manage payments, payouts, refunds and other Stripe-related activity.
Payment Methods
The Payment Methods section manages the cards your Agency uses to pay SnobBots.
Your existing default card is displayed here, and you can:
-
Add additional payment cards.
-
Select which card should be your default.
-
Remove cards that are no longer required, provided another card has been made the default first.
Your default payment method is used for your Agency subscription and applicable SnobBots charges.
Auto Recharge
The Auto Recharge section allows you to configure automatic resource top-ups for your Agency.
When enabled, Auto Recharge can automatically purchase additional resources when your available balance reaches the configured threshold. This helps prevent your Agency and its customers from unexpectedly running out of resources.
Auto Recharge uses your Agency’s default payment method, so you should make sure your payment card remains valid and up to date.
Important: The Settings section controls several fundamental parts of your White Label platform. Make sure your branding, domain connection, Stripe account and payment details are configured correctly before making the platform available to customers.
Branding
Customising Your White Label Branding
The Branding section allows you to customise the appearance of your White Label platform so that it reflects your own company and brand, rather than SnobBots.
Your branding is applied to the customer-facing platform, helping you create a consistent experience for customers accessing your services through your custom domain.
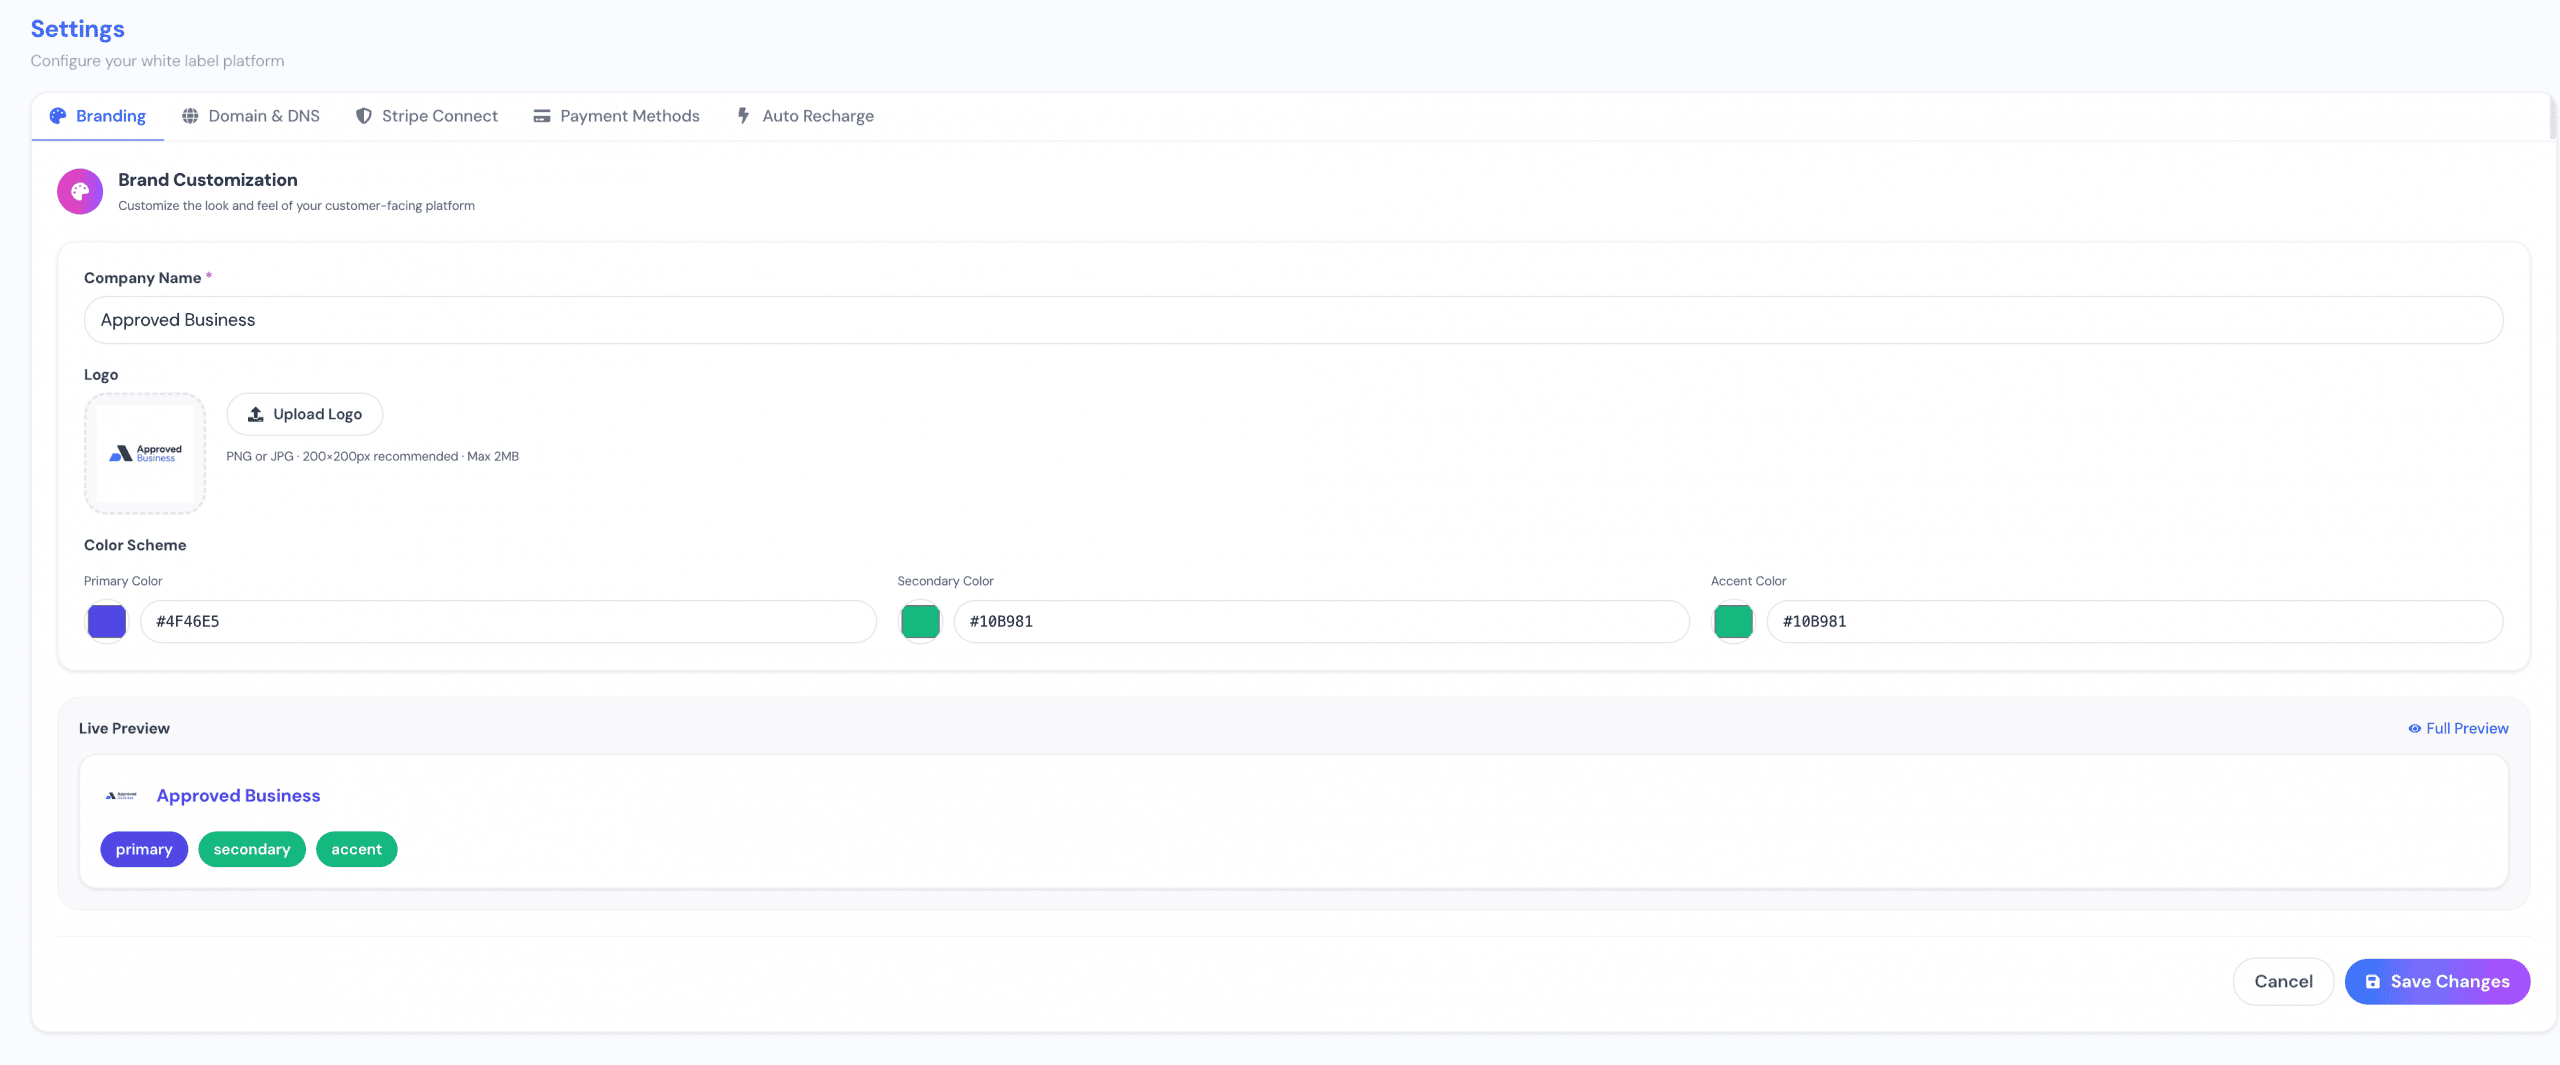
To configure your branding, go to:
Settings → Branding
Company Name
Enter the Company Name that you want displayed throughout your White Label platform.
This should normally be the business or brand name your customers recognise.
For example:
Approved Business
The company name will be incorporated into relevant areas of your customer-facing platform.
Upload Your Logo
Select Upload Logo to add your own company logo.
For best results, use a clear, high-quality version of your logo that works well against the background of your platform.
The platform supports PNG and JPG images, with approximately 200 × 200 pixels recommended and a maximum file size of 2 MB.
Once uploaded, your logo will replace the standard platform branding in relevant customer-facing areas.
Choose Your Brand Colours
The Colour Scheme section allows you to customise the platform colours to match your existing brand identity.
You can configure:
-
Primary Colour
-
Secondary Colour
-
Accent Colour
You can select the colours using the colour controls or enter the appropriate colour values directly.
These colours are then used throughout your White Label platform for elements such as buttons, highlights, links and other interface components.
Choose colours that complement your logo and maintain good contrast so that text and buttons remain easy for customers to read.
Preview Your Branding
As you configure your branding, the Live Preview section provides a quick indication of how your company name, logo and selected colours will appear.
This allows you to experiment with different branding combinations before applying them to your live platform.
Full Preview
For a more complete view, select Full Preview.
The Full Preview opens a complete representation of your customer-facing White Label website using your selected branding.
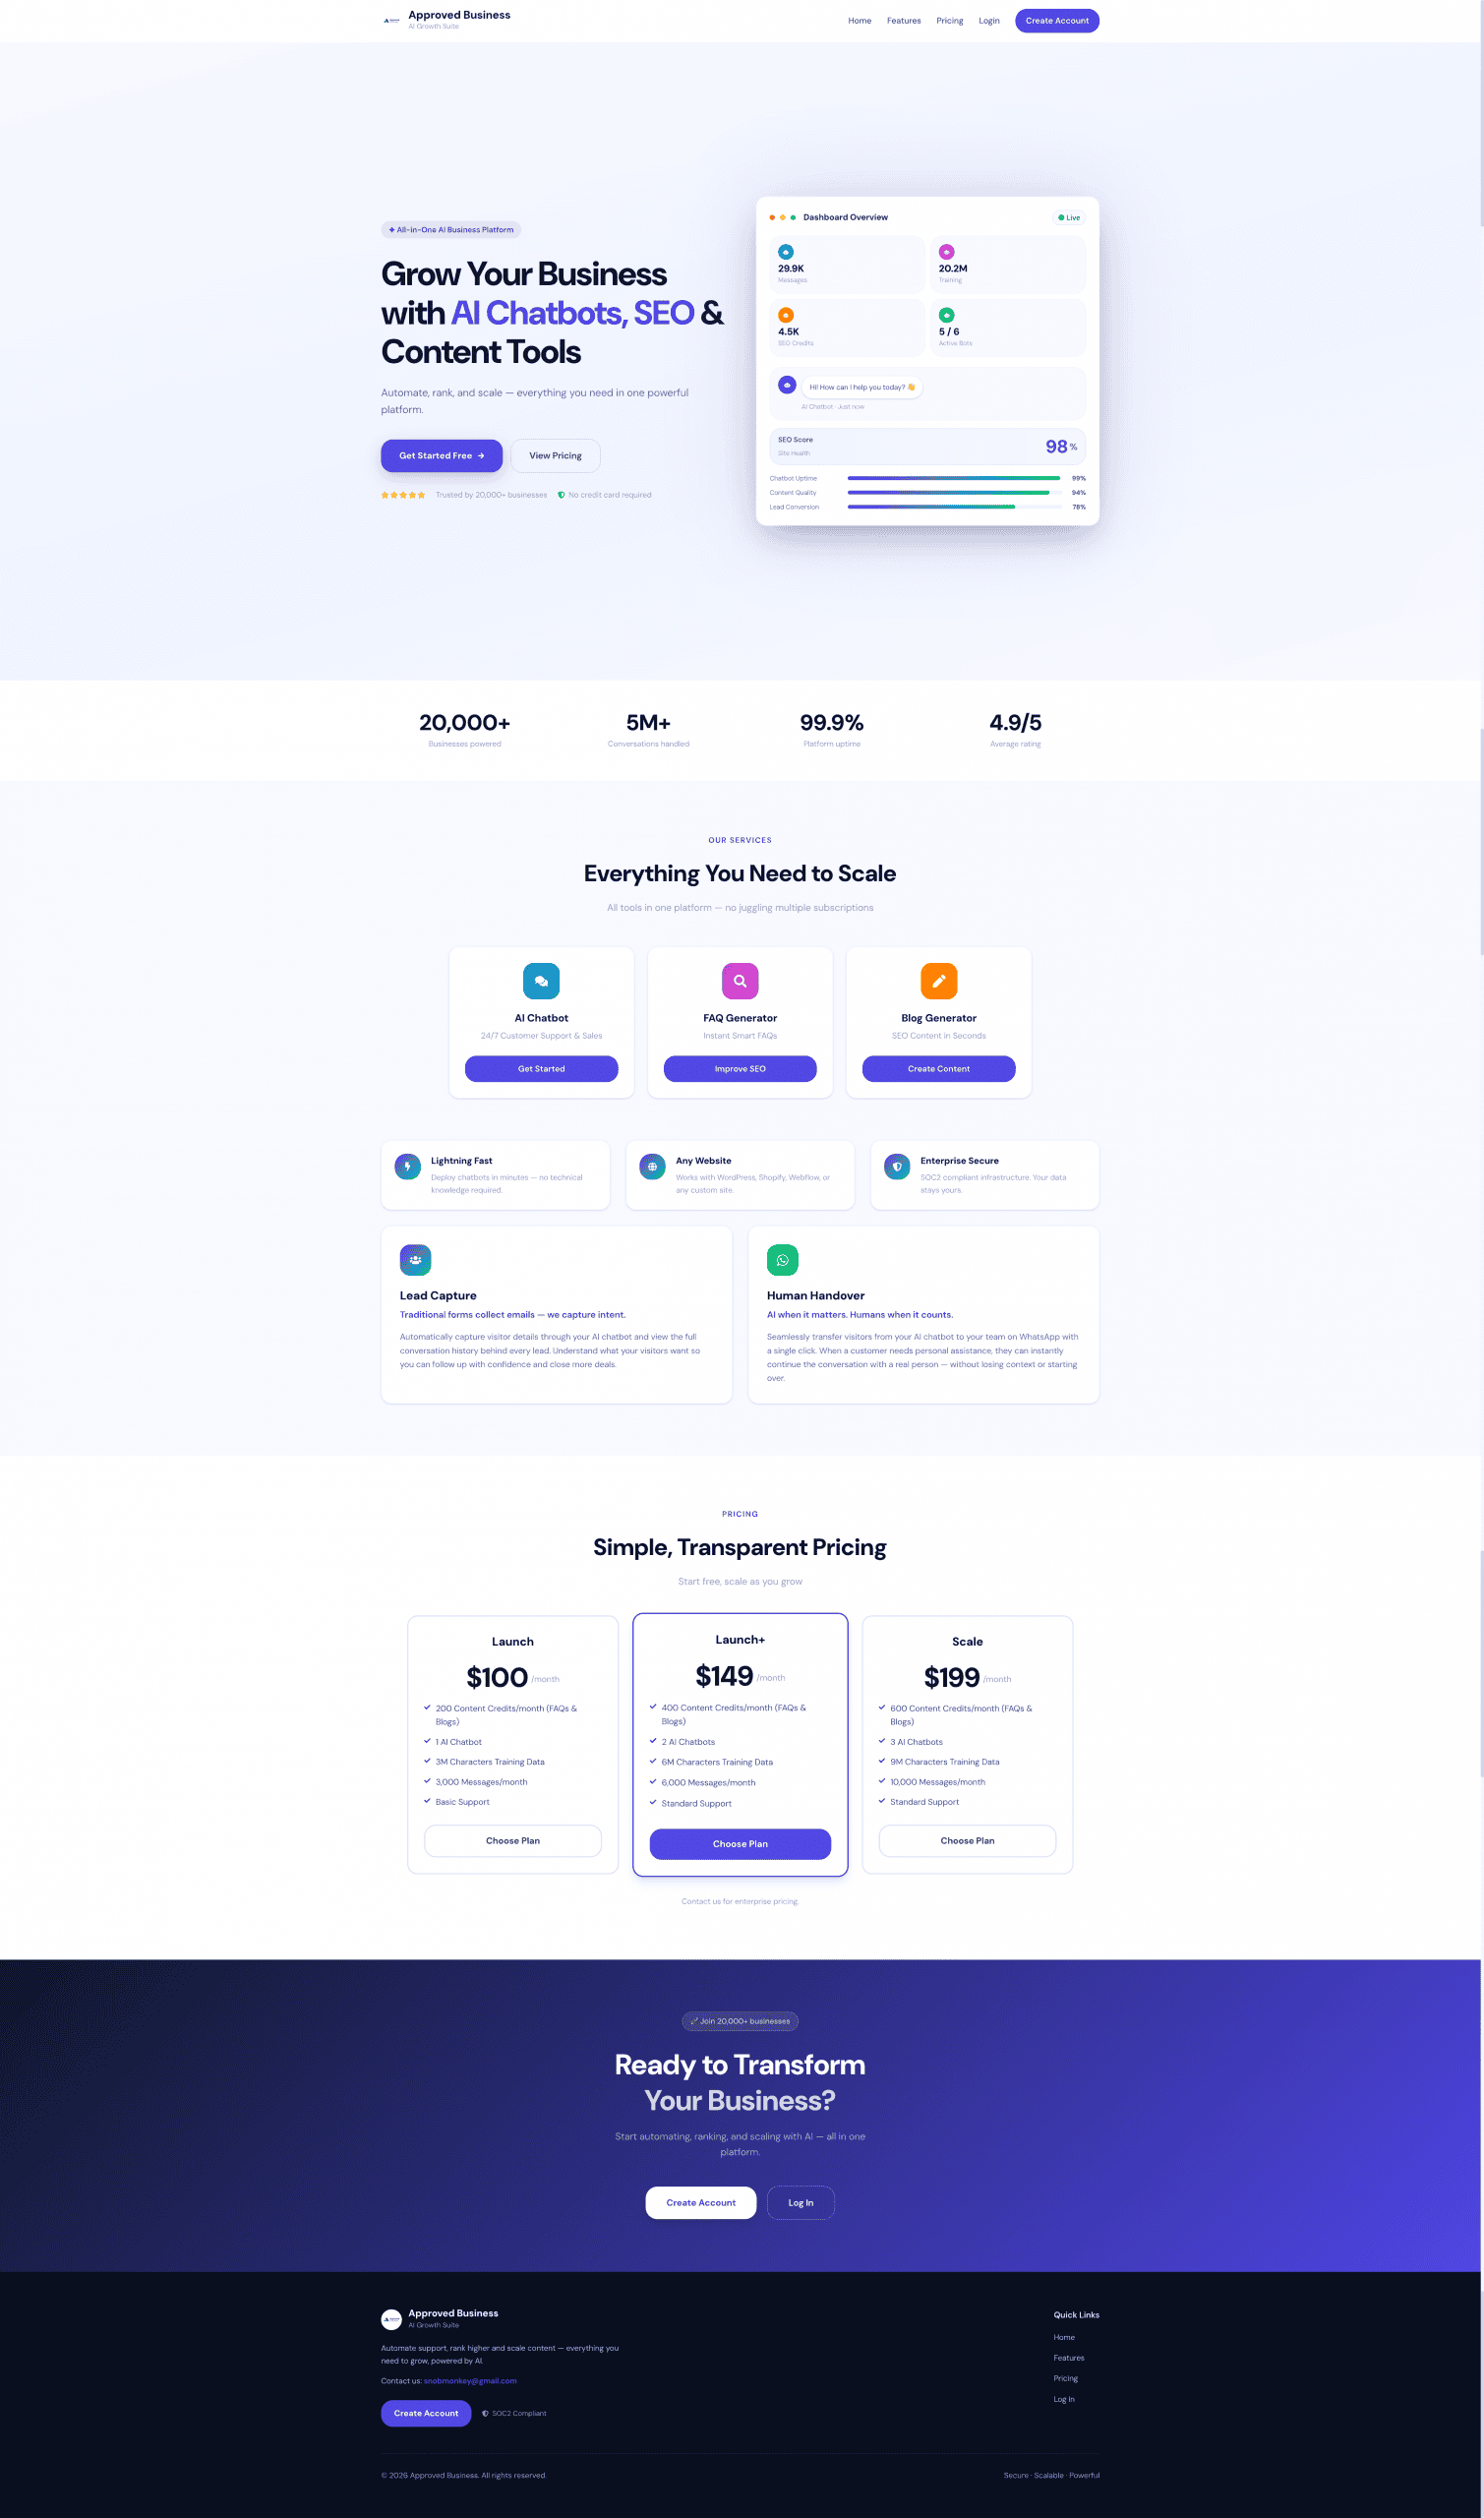
This allows you to see how your brand will appear across the full website, including areas such as:
-
Header and navigation
-
Logo and company name
-
Main website sections
-
Buttons and calls to action
-
Features and services
-
Pricing
-
Customer sign-up and login options
-
Footer and other branded elements
The Full Preview is particularly useful for checking that your logo, colours and overall branding work well together before making the platform available to customers.
Save Your Changes
Once you are happy with your branding, click Save Changes.
Your saved branding will then be applied to the relevant customer-facing areas of your White Label platform.
You can return to the Branding section at any time to update your company name, logo or colour scheme as your brand evolves.
Creating a Consistent White Label Experience
For the strongest White Label experience, configure your Branding together with your Custom Domain.
This means customers can visit your own domain and see your company name, logo, colours and customer-facing platform without needing to interact with the SnobBots brand.
Tip: Before launching your platform, use Full Preview to review the website as your customers will see it. Check your logo, brand colours, text visibility, buttons and overall presentation on the complete page before going live.
Domain and DNS
Connecting Your Custom Domain & DNS
Your SnobBots White Label platform can operate through your own branded domain, allowing customers to access the platform without seeing SnobBots branding in the web address.
For example, you could use:
ai.yourcompany.com
or:
yourcompanyai.com
To connect your domain, you will need access to the DNS settings provided by your domain registrar or DNS provider.
Add Your Custom Domain
From your Agency Dashboard, select Settings from the left-hand menu and then open the Domain & DNS tab.
Under Custom Domain Setup, enter the domain or subdomain you want customers to use to access your White Label platform.
Enter the domain only, without http:// or https://.
For example:
ai.yourcompany.com
or:
yourcompany.com
Your custom domain should represent your own business or brand. As this is a White Label platform, you should not use a domain containing the SnobBots name.
Once you have entered your chosen domain, click Add Domain.
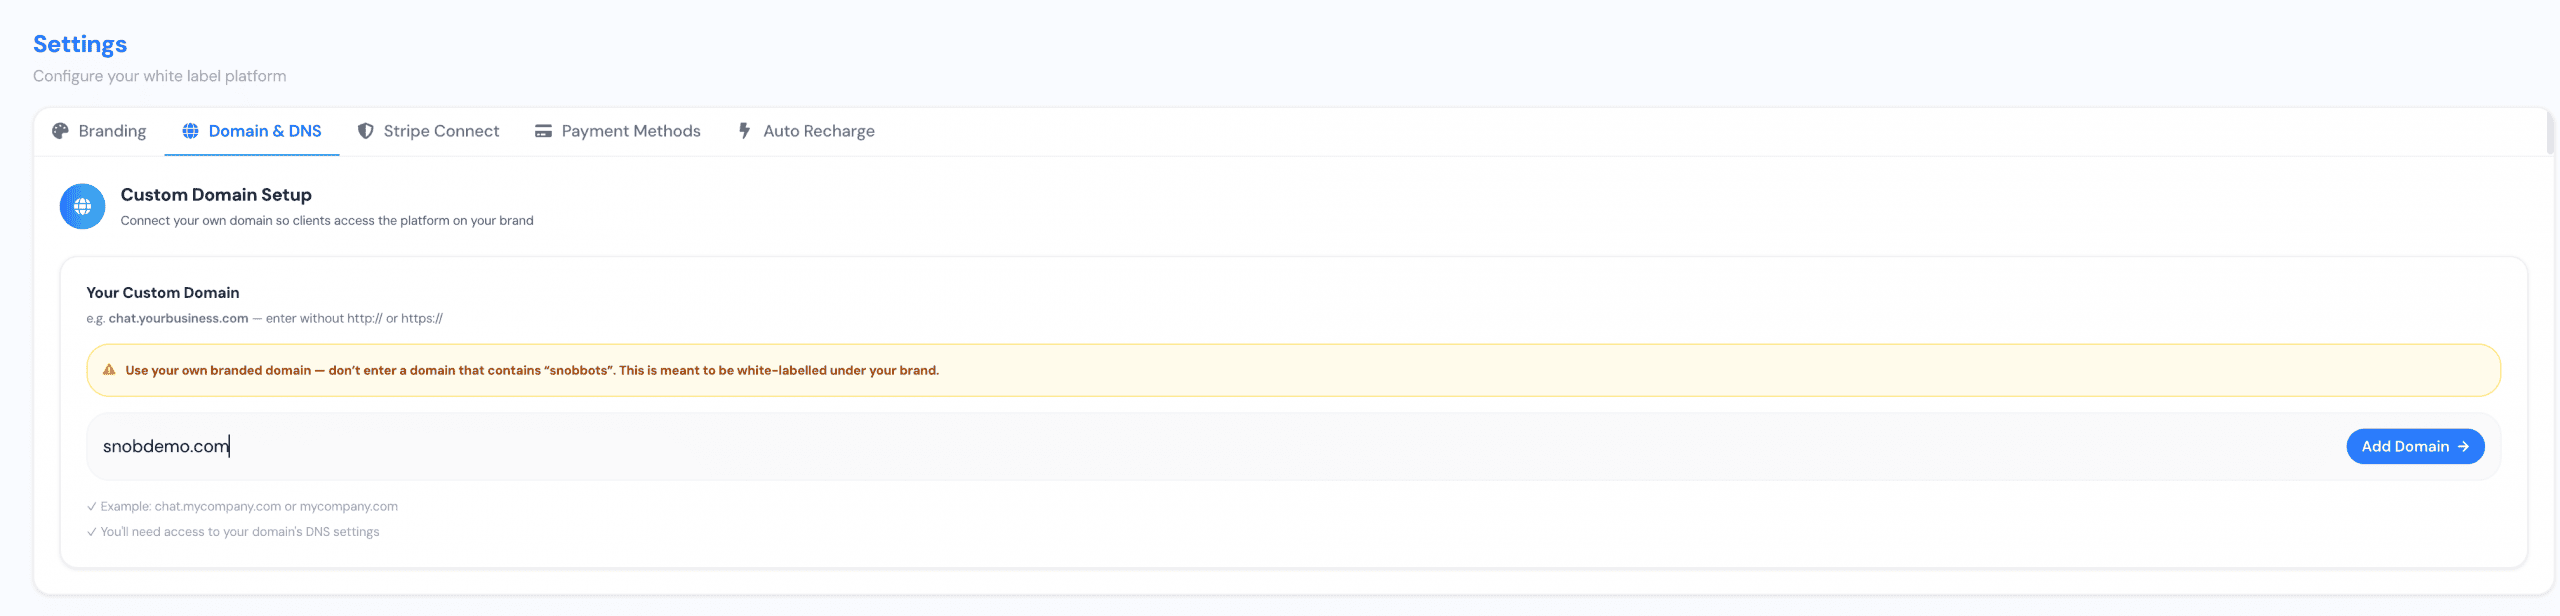
Add the DNS Records
After adding your domain, SnobBots will generate the DNS records required to connect it to your White Label platform.
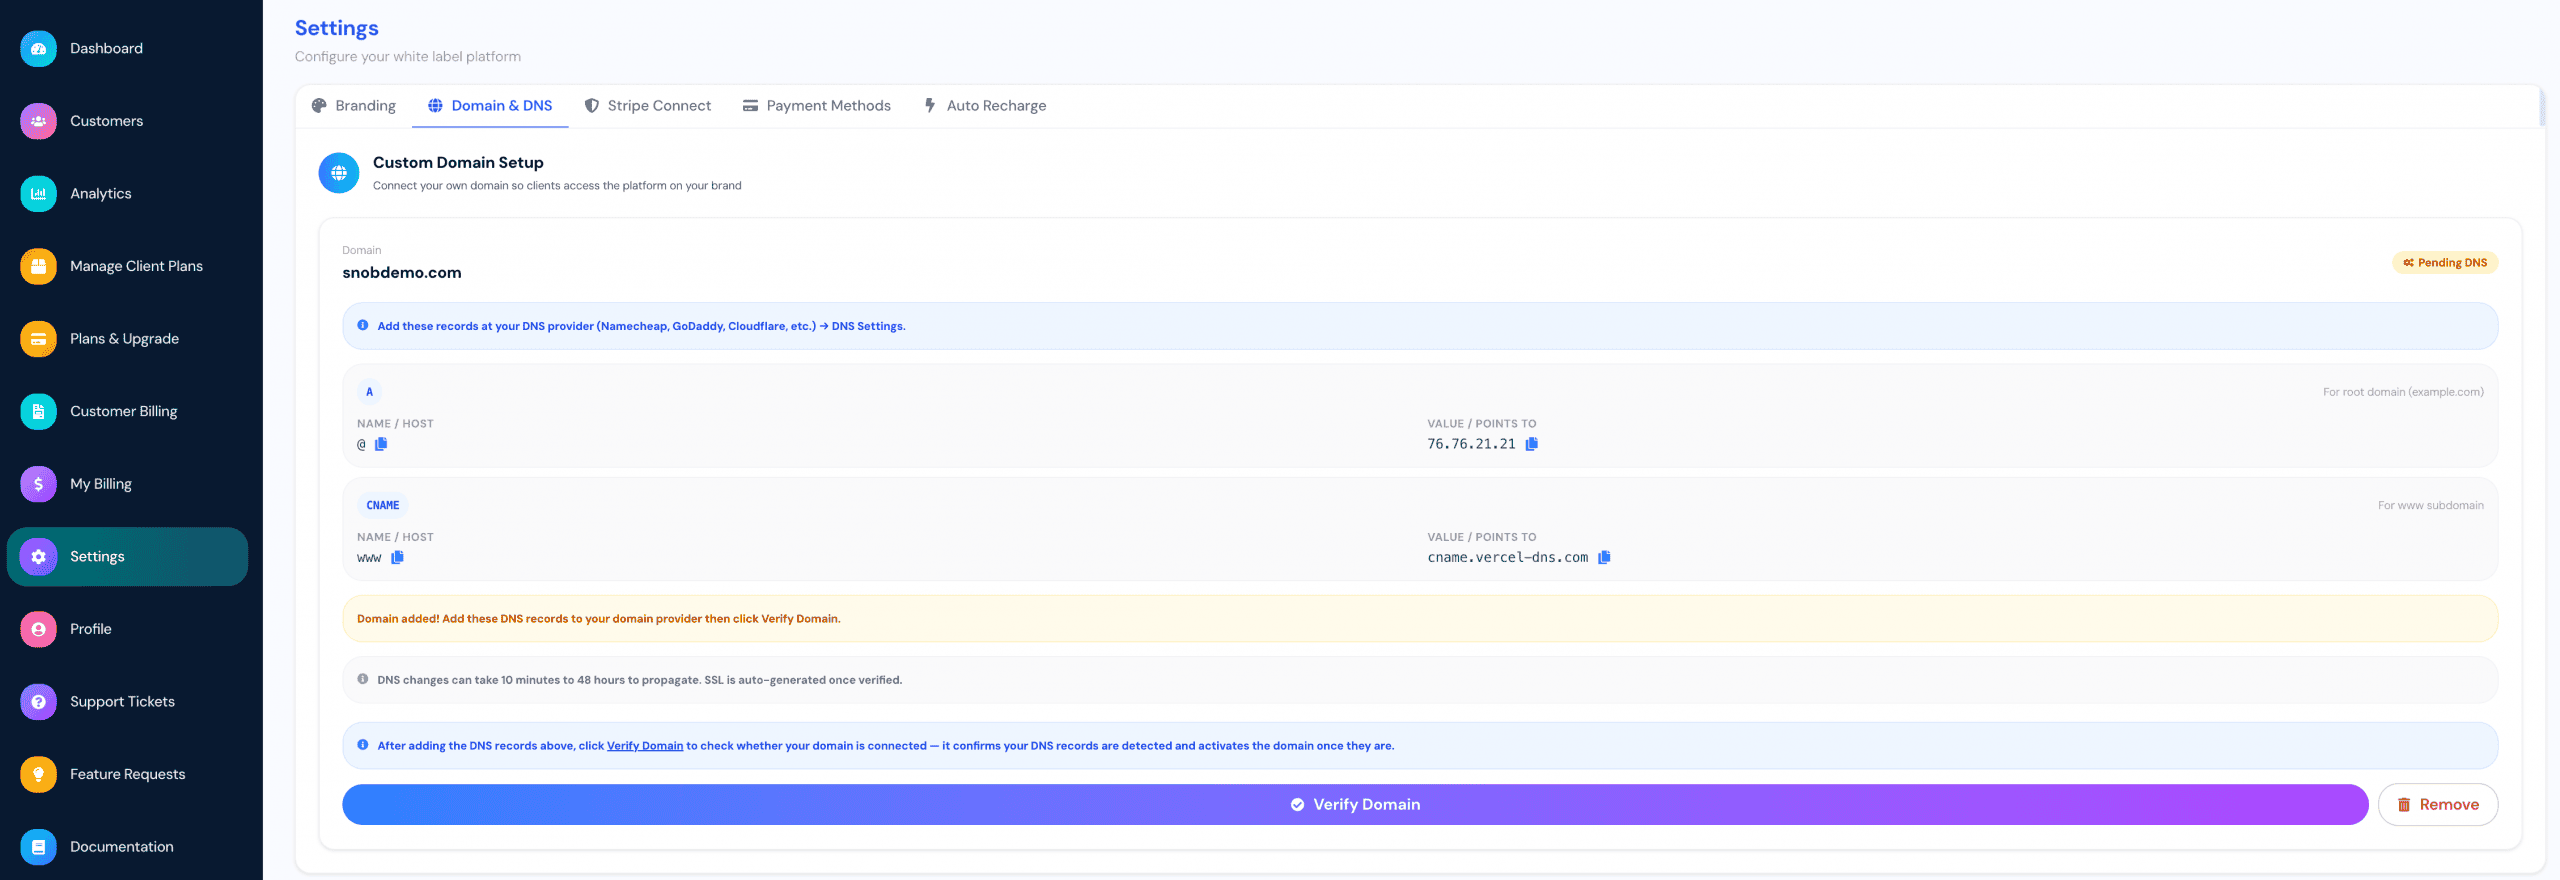
The records will be displayed directly within the Domain & DNS section.
Depending on whether you are connecting a root domain, a subdomain or both, you may be provided with records such as:
A Record
For a root domain, SnobBots may provide an A record.
The screen will display:
-
Name / Host
-
Value / Points To
Add these values exactly as shown to the DNS settings for your domain.
CNAME Record
A CNAME record may also be provided for a subdomain such as www.
Again, SnobBots will display:
-
Name / Host
-
Value / Points To
Copy these values into the corresponding fields at your DNS provider.
Use the copy icons next to the values where available to help avoid typing errors.
Where Do I Add the DNS Records?
DNS records are managed by the company or service controlling the DNS for your domain.
This could be your domain registrar, hosting provider or a dedicated DNS service, such as GoDaddy, Namecheap or Cloudflare.
Sign in to the service that manages your domain and locate its DNS, DNS Management, DNS Records or similarly named section.
Create the records shown by SnobBots using exactly the record type, host/name and value displayed on your Domain & DNS screen.
Important: Different DNS providers use slightly different terminology and interfaces. Some providers may automatically represent the root domain using @, while others handle it differently. Always enter the information according to the requirements of your DNS provider.
Verify Your Domain
After you have added the required DNS records, return to:
Settings → Domain & DNS
Your domain will initially display a Pending DNS status.
Click Verify Domain.
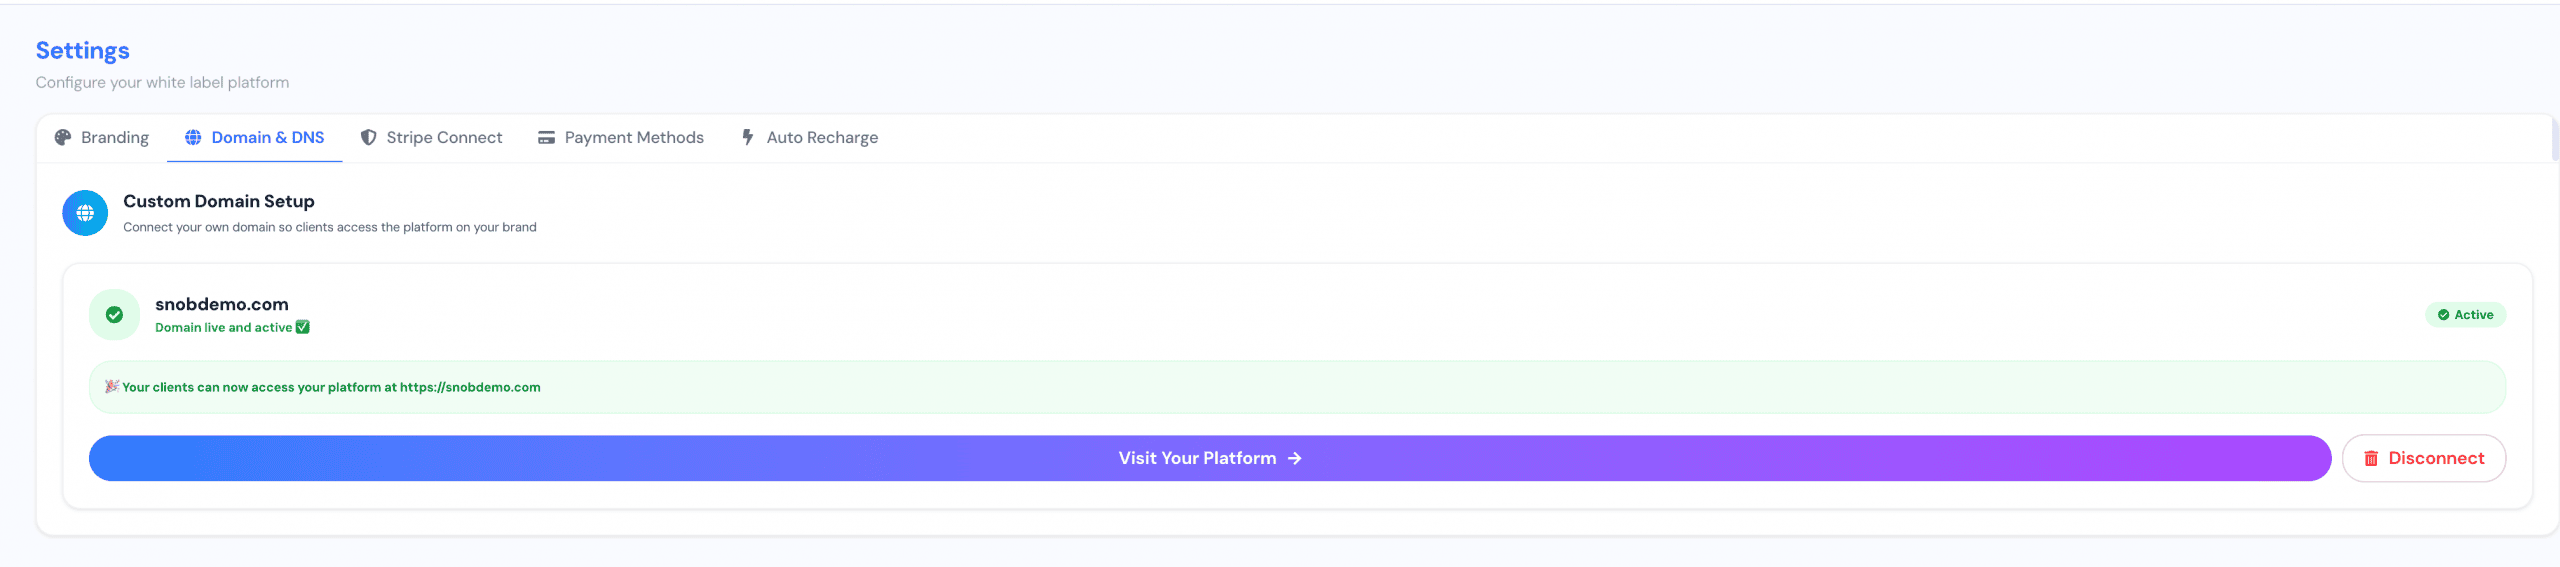
SnobBots will check whether the required DNS records can be detected.
If the records have been configured correctly and have propagated, your domain will be verified and activated.
If verification is unsuccessful immediately after adding the records, this does not necessarily mean something is wrong. DNS changes can take time to propagate across the internet.
Propagation can take anywhere from approximately 10 minutes to 48 hours, depending on your DNS provider and existing DNS configuration.
Wait for the changes to propagate and then click Verify Domain again.
SSL Security
Once your domain has been successfully verified, the SSL certificate required for secure HTTPS access is generated automatically.
You do not need to purchase or manually install a separate SSL certificate through SnobBots.
Once activated, customers will be able to access your White Label platform securely using:
Domain Successfully Connected
When the process is complete, the Domain & DNS section will display your domain as:
Active – Domain live and active
The platform will also confirm the web address your customers can now use.
Click Visit Your Platform to open your White Label platform using your newly connected domain.
Your customers can now access the platform through your branded web address.
Disconnecting a Domain
If you need to stop using the connected domain, select Disconnect from the Domain & DNS section.
Only disconnect a live domain if you intend to replace it or stop using it, as customers will no longer be able to access your White Label platform through that address once it has been disconnected.
If Your Domain Will Not Verify
If the domain remains on Pending DNS, check the following:
-
Make sure the DNS record type matches the record shown by SnobBots.
-
Check that the Name / Host value has been entered correctly.
-
Check that the Value / Points To information exactly matches the value provided by SnobBots.
-
Make sure there are no conflicting DNS records for the same host.
-
Allow sufficient time for DNS propagation.
-
Return to SnobBots and click Verify Domain again.
If the records are correct but the domain still cannot be verified after allowing sufficient propagation time, contact SnobBots Support for assistance.
Important: Always use the DNS values currently displayed inside your own SnobBots Agency account. Do not copy DNS values from screenshots, examples or another Agency account, as the configuration shown to you should be treated as the authoritative setup information for your domain.
Stripe Connect
Connecting Your Stripe Account
The Stripe Connect section allows you to connect your own Stripe account to your SnobBots White Label Agency platform so that you can receive payments from your customers directly into your own Stripe account and linked bank account.
This connection is required if you want to charge customers through the plans you create inside your White Label platform.
Open Stripe Connect
From your Agency account, go to:
Settings → Stripe Connect
If no Stripe account has been connected yet, the page will show Stripe Not Connected.
The page also confirms that:
-
Your Stripe credentials are handled securely
-
Payments go directly to your Stripe account
-
You retain control of pricing, refunds and disputes through Stripe
Click Connect Stripe Account to begin.
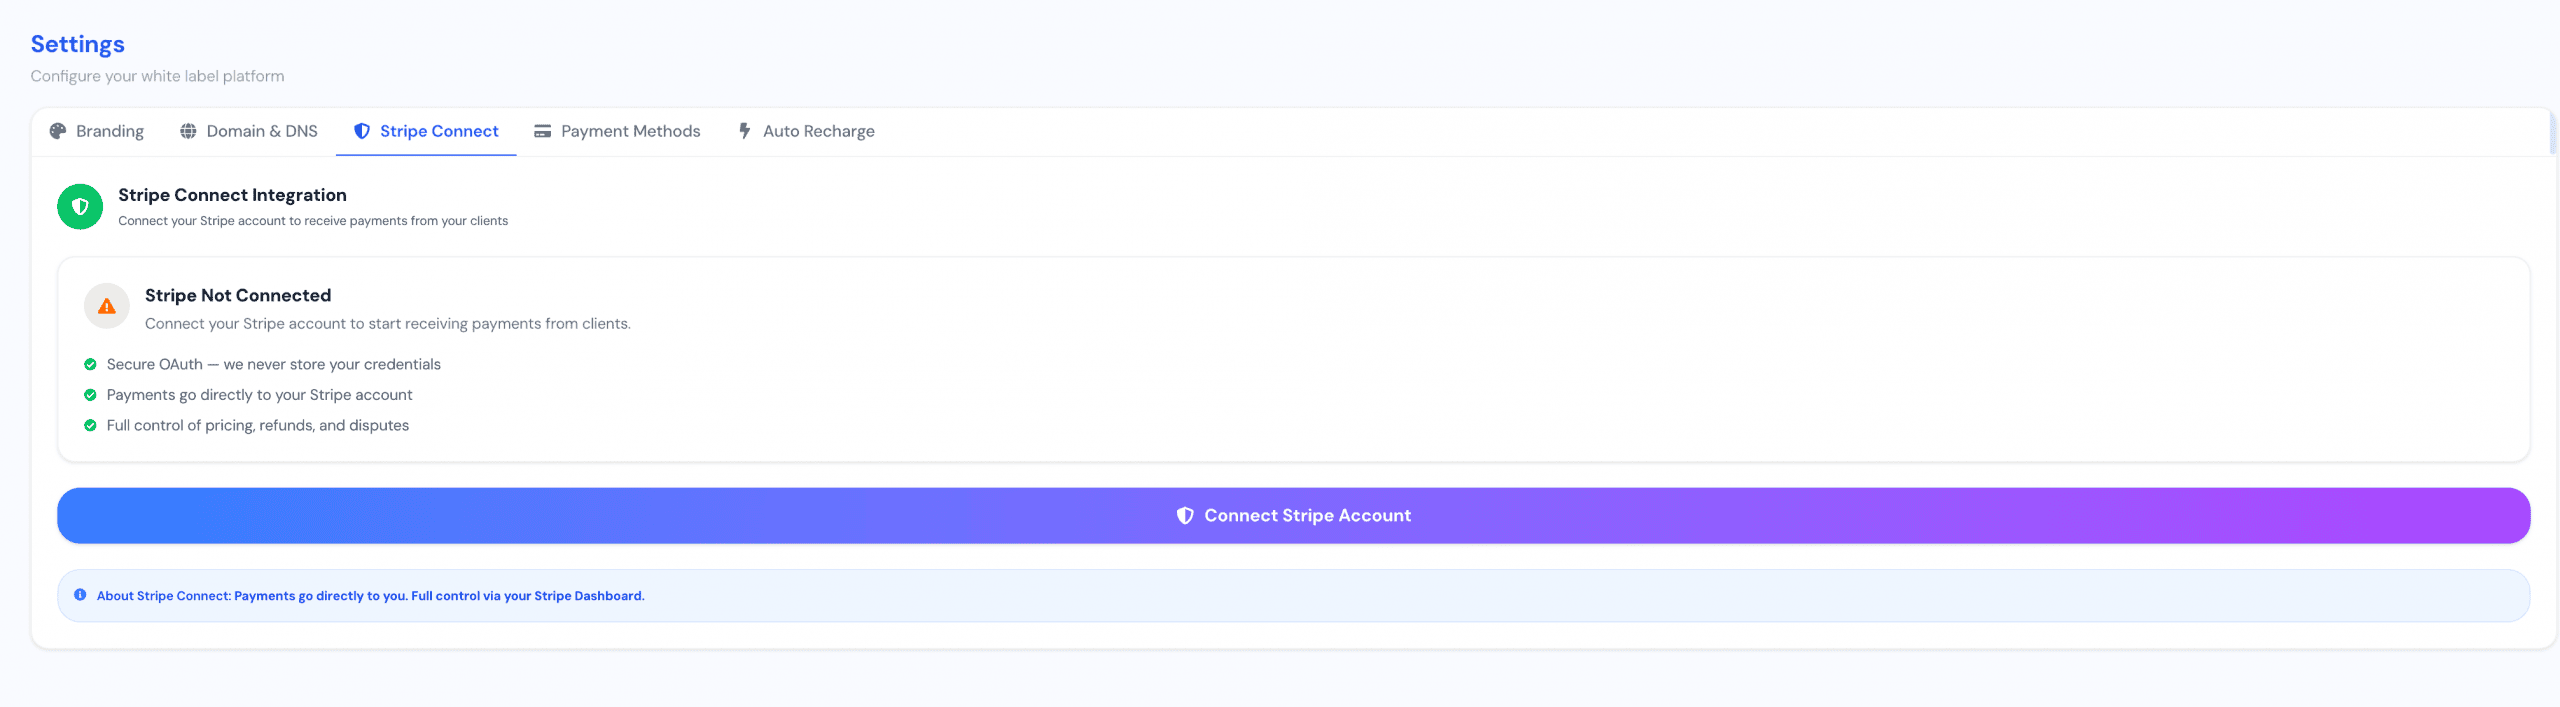
Start the Stripe Connection
You will see a screen explaining that you are about to connect your Stripe account so that you can receive payments from your customers.
Click Connect with Stripe.
You will then be redirected securely to Stripe’s own onboarding process.
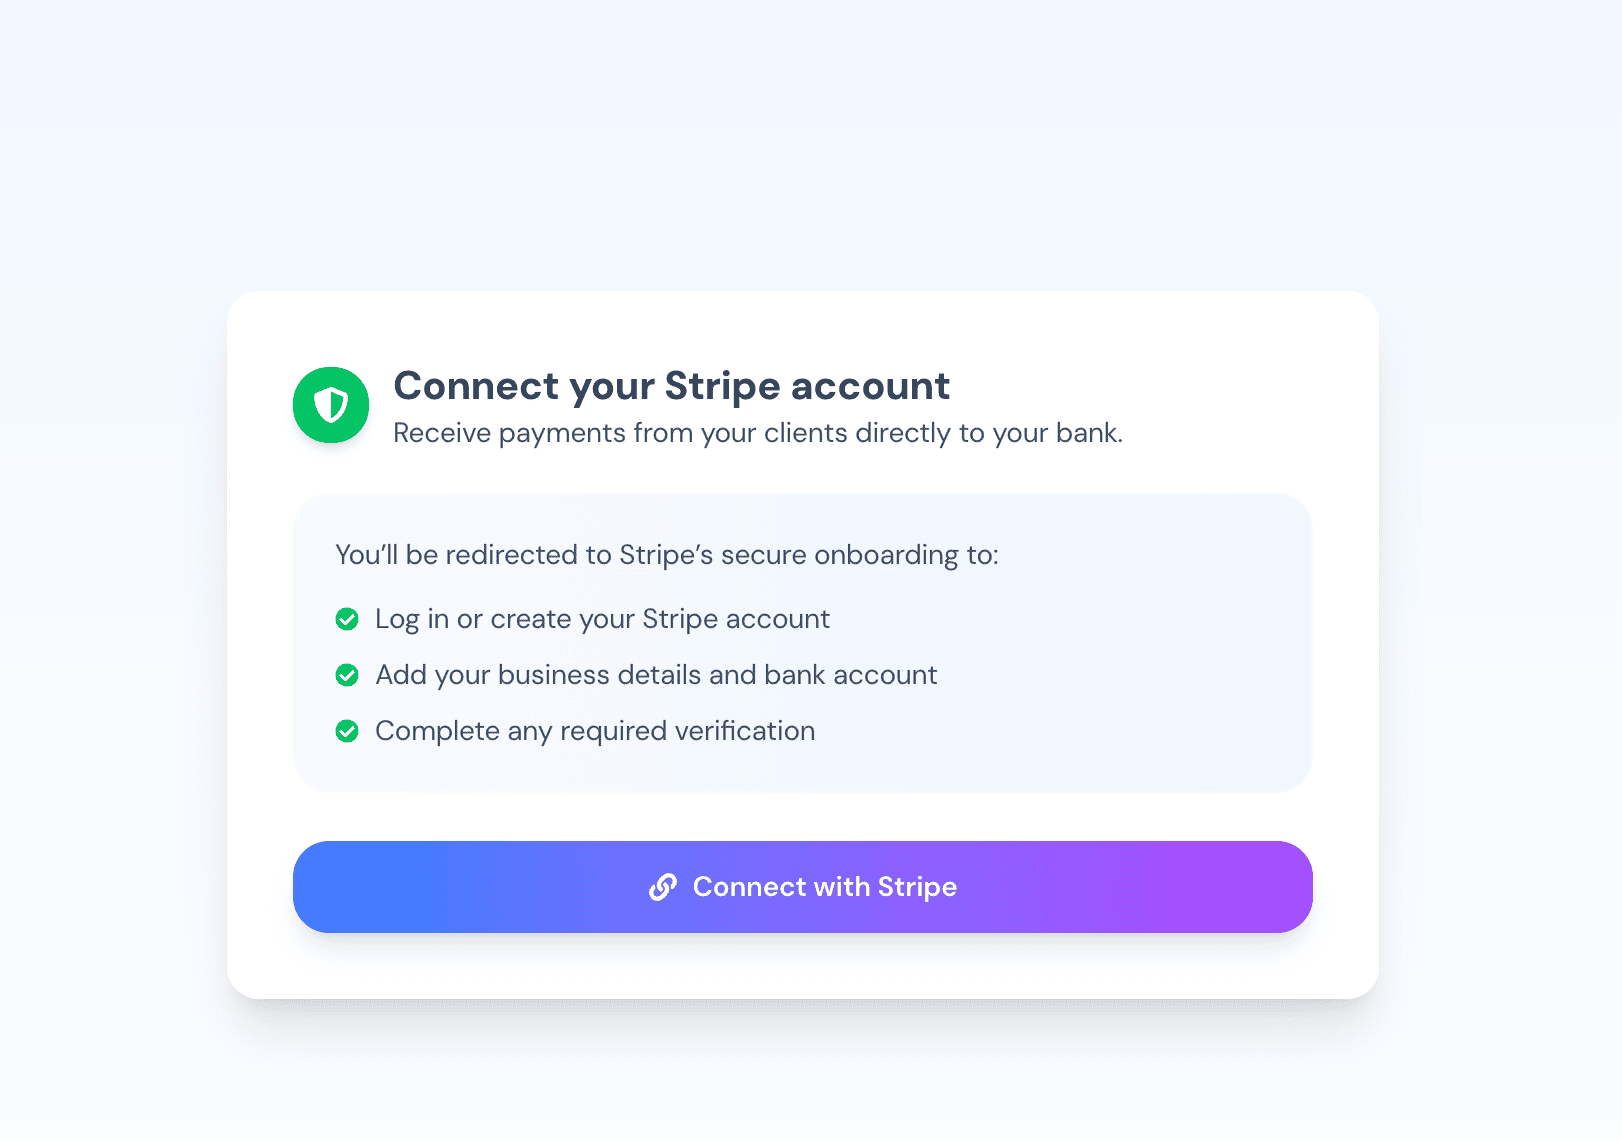
Log In or Create a Stripe Account
If you already have a Stripe account, sign in using your existing Stripe credentials.
If you do not currently have a Stripe account, you can create one during this process.
Stripe may ask you to provide or confirm information such as:
-
Business details
-
Contact information
-
Bank account information
-
Business ownership or representative information
-
Identity verification details
The exact information requested can vary depending on your country, business type and Stripe’s verification requirements.
Complete Stripe Verification
As part of the connection process, Stripe may ask you to verify your identity or account.
For example, Stripe may send a verification code to your registered mobile number.
Enter the verification code when requested.
If Stripe offers another verification method, such as a security key, you can use that option where appropriate.
This verification is handled directly by Stripe.
Select the Stripe Account to Connect
If your Stripe login has access to more than one Stripe account, Stripe will ask you to choose which account you want to connect to SnobBots.
Select the correct Stripe business account.
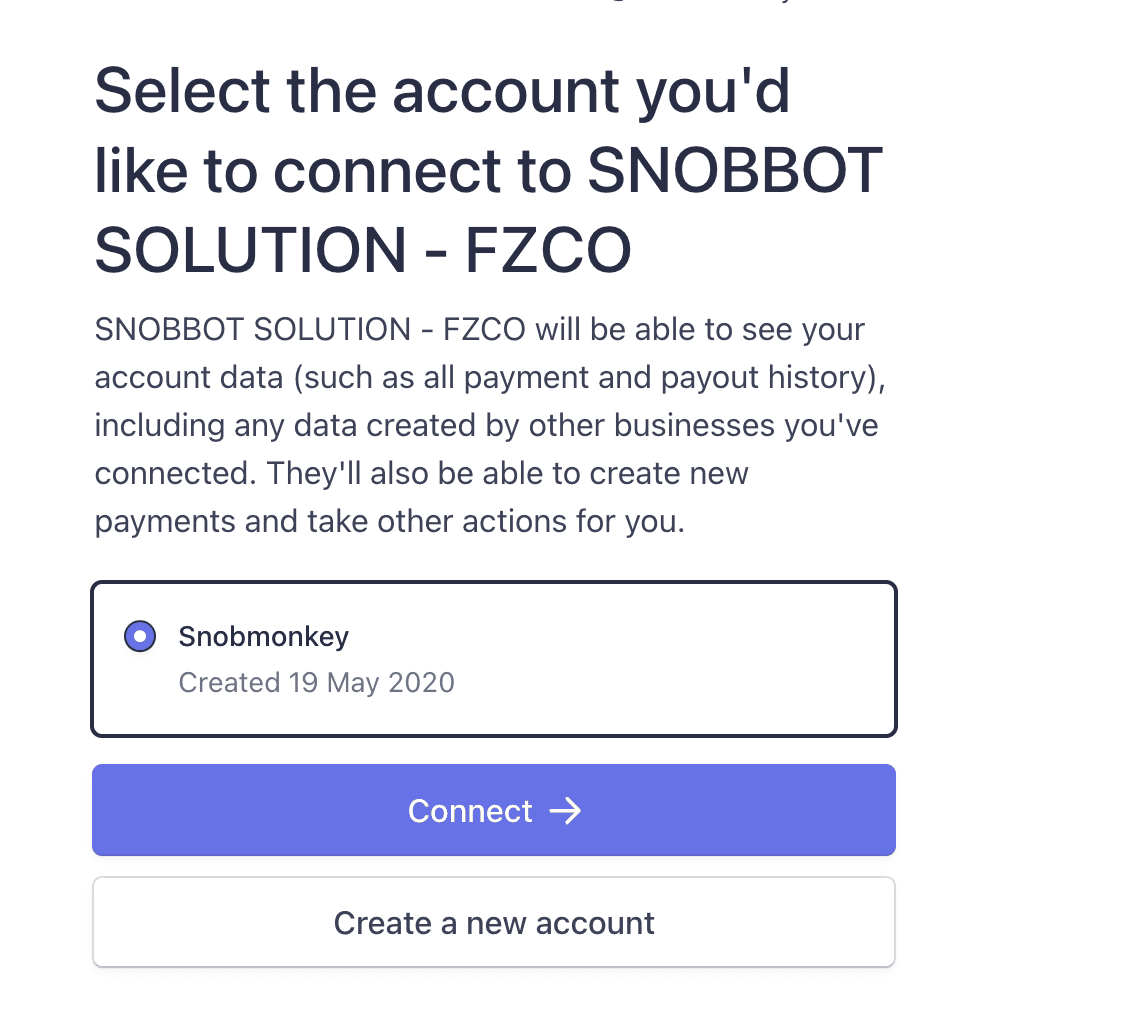
Check the account carefully before continuing, particularly if you manage several businesses through the same Stripe login.
Once you have selected the correct account, click Connect.
If you do not yet have the required Stripe business account, you can also choose Create a new account and complete Stripe’s onboarding process.
Authorise the Connection
Stripe will explain that the connected platform may be able to access relevant account information and perform payment-related actions required to operate the integration.
Review the information shown by Stripe and continue only when you are satisfied that you have selected the correct account.
Once authorised, Stripe will complete the connection and return you to the SnobBots platform.
Stripe Connected Successfully
After the connection has been completed, you will see a Stripe Connected! confirmation screen.
This confirms that:
-
Your Stripe account has been linked successfully
-
The connected Stripe account has been recognised
-
Customer payments can be sent through your connected Stripe account
-
Payouts will follow the banking and payout settings configured within your Stripe account
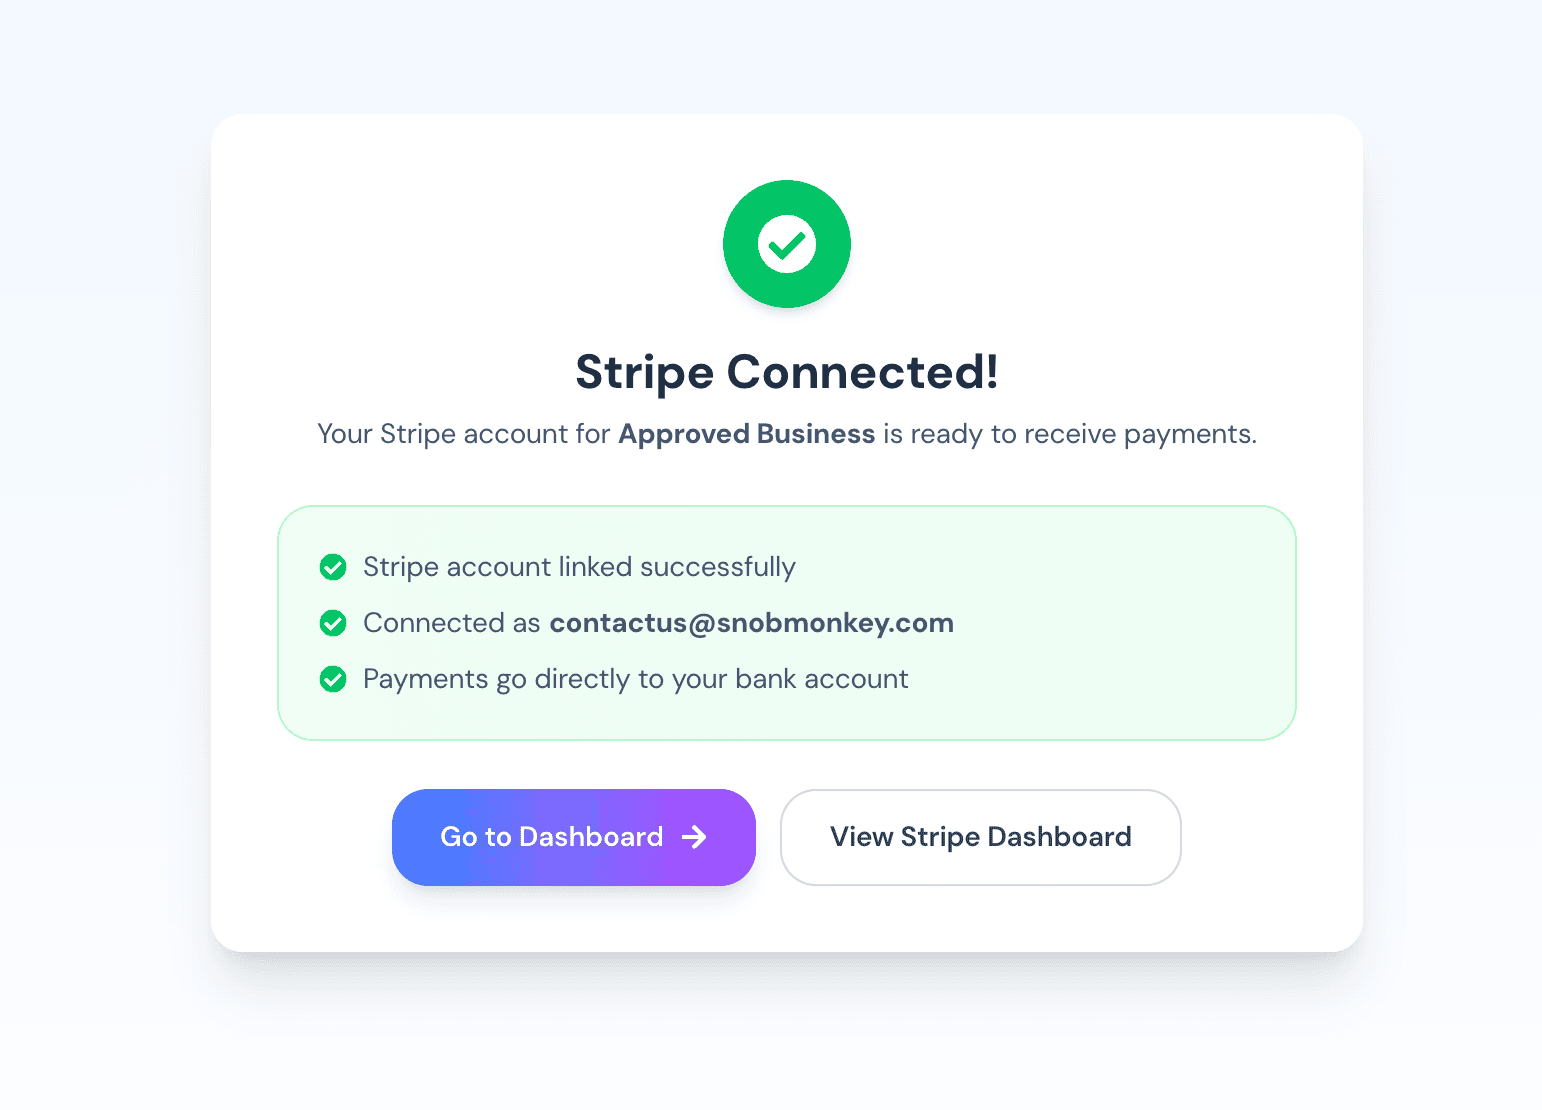
From this screen, you can choose:
Go to Dashboard – Return to your SnobBots Agency Dashboard.
View Stripe Dashboard – Open your Stripe account to manage payments, payouts, disputes, refunds and other Stripe settings.
How Customer Payments Work
Once Stripe Connect is active, customers purchasing plans through your White Label platform can make payments through the payment flow connected to your Stripe account.
The payment is processed through Stripe and managed within your connected Stripe account.
This means you maintain visibility and control over areas such as:
-
Customer payments
-
Payouts
-
Refunds
-
Payment disputes
-
Stripe transaction history
-
Your connected bank account
Your customers are paying through your White Label business, while Stripe provides the payment-processing infrastructure behind the scenes.
Check Your Stripe Connection Status
You can return to:
Settings → Stripe Connect
at any time to check whether your Stripe account is connected.
You should also check the Stripe Connect status on your Agency Dashboard, particularly before making your platform available to paying customers.
If Stripe is not connected, customers will not be able to complete payments through your White Label platform.
Using the Correct Stripe Account
Make sure the Stripe account you connect belongs to the business that will receive payments from your White Label customers.
If you manage multiple Stripe accounts, double-check the business name and account details during the Stripe connection process before authorising access.
Important: Stripe Connect is separate from the card stored under Payment Methods. Your Payment Method is used to pay your own SnobBots Agency subscription and applicable Agency charges. Stripe Connect is used to receive payments from your customers.
Payment Methods
The Payment Methods section allows you to manage the cards used to pay for your SnobBots White Label Agency subscription and applicable Agency account charges.
When you first create your Agency account, the card entered during registration is automatically saved as your default payment method.
Accessing Payment Methods
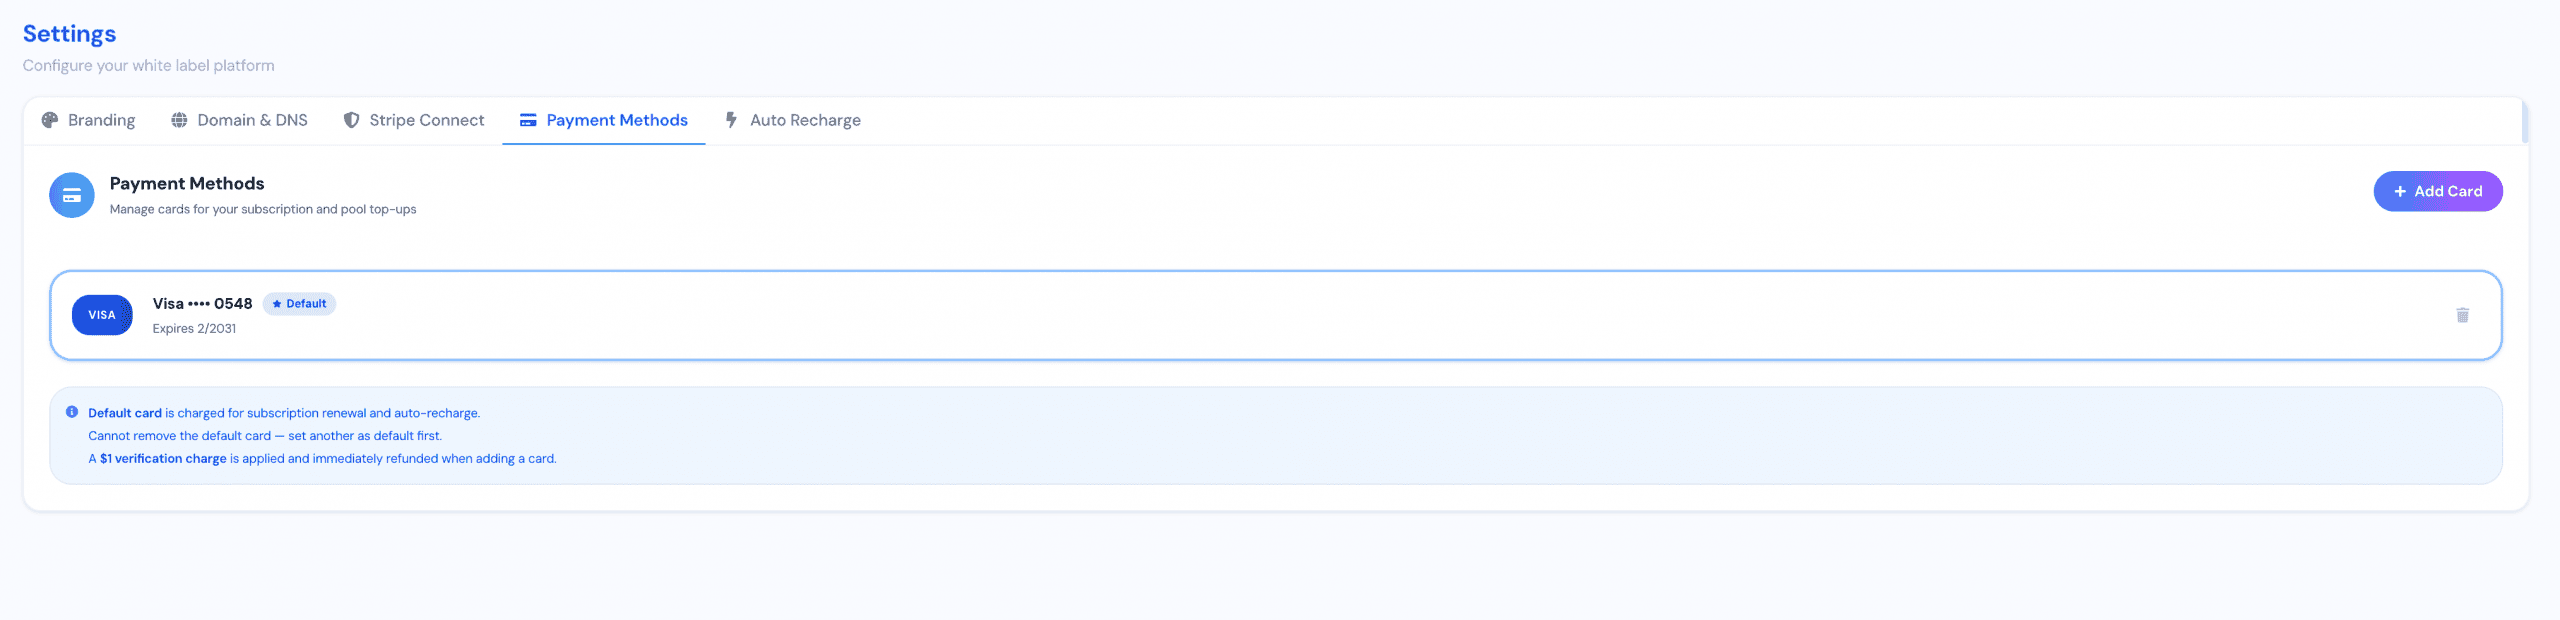
From your Agency account, go to:
Settings → Payment Methods
Here you can view the payment methods currently saved to your account.
For security, only limited card information is displayed, such as the card type, last four digits and expiry date.
Your Default Card
The card marked Default is your primary payment method.
Your default card is used for:
-
Your Agency subscription renewal
-
Applicable automatic recharges
-
Other eligible charges associated with your Agency account
If you only have one payment method saved, that card will remain your default payment method.
Adding Another Card
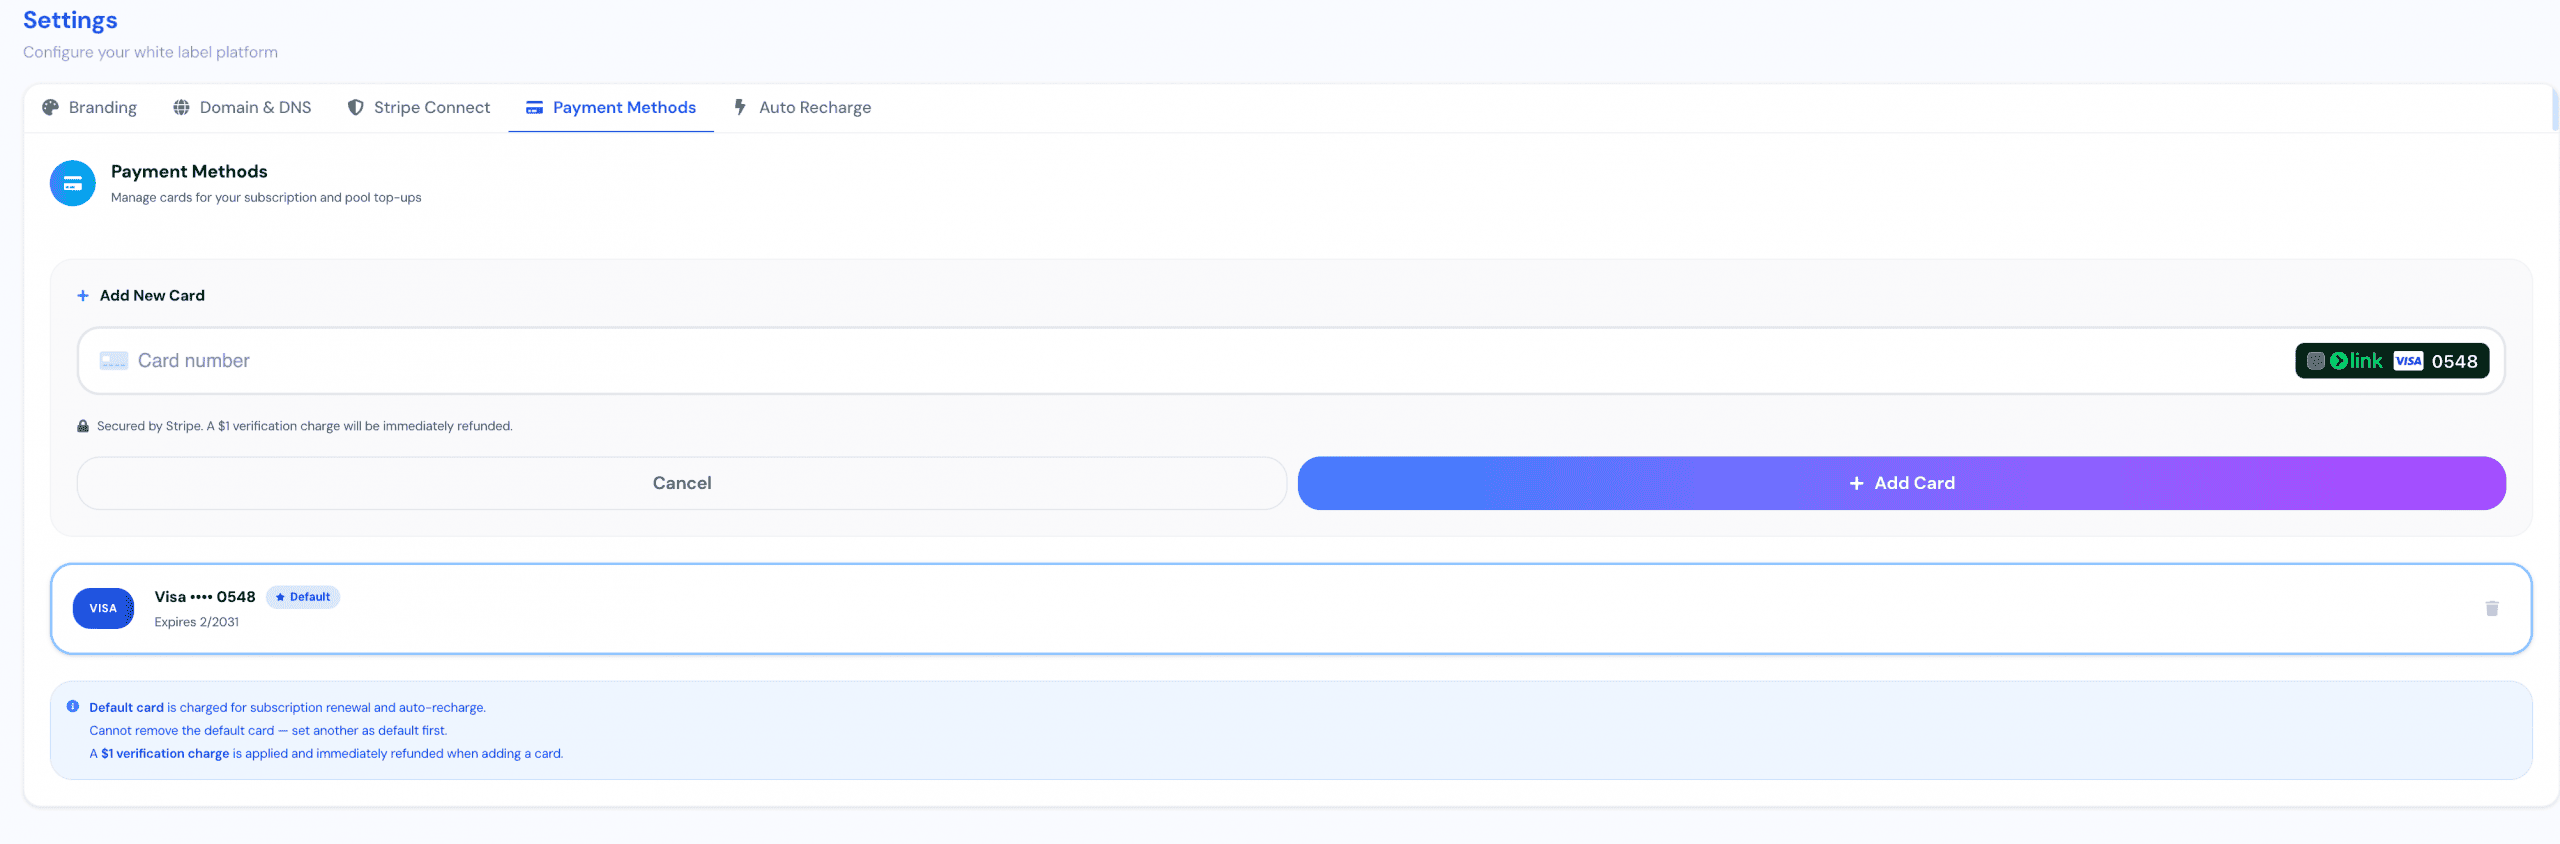
You can add additional payment methods at any time.
Click + Add Card and enter the details of the new card.
Once the card details have been entered, click Add Card to save it to your account.
Payment information is securely processed through Stripe.
When adding a new card, a temporary $1 verification charge may be applied to verify the payment method. This verification charge is immediately refunded.
Changing Your Default Card
If you have more than one card saved, you can choose which card should be used as your default payment method.
Select the card you want to use and choose the option to Set as Default.
Once changed, the newly selected card will be used for future subscription renewals and applicable automatic recharges.
This is useful if, for example, you need to replace an expiring card or want future Agency charges to be taken from a different payment method.
Removing a Card
Payment methods that are no longer required can be removed from your account.
However, your current default card cannot be removed while it remains the default payment method.
If you want to remove your current default card:
-
Add another card to your account.
-
Set the new card as your Default payment method.
-
You can then remove the previous card.
This helps ensure that your Agency account always has an active payment method available for subscription and other applicable charges.
Keeping Your Payment Details Up to Date
Make sure your default payment method remains valid and has not expired.
Keeping an active payment method on your account helps prevent failed subscription payments or interruptions to services that rely on automatic billing.
Important: The Payment Methods section manages payment methods for your SnobBots Agency account. It is separate from Stripe Connect, which is used to receive payments from your own White Label customers.
Auto-recharge
The Auto Recharge feature automatically tops up your account resources whenever they become low, ensuring your AI chatbot continues running without interruption.
When enabled, Snobbots monitors your available resources and purchases your selected bundle automatically whenever any of the trigger thresholds are reached.
Setting Up Auto Recharge
- From the left-hand menu, click Settings.
- Open the Auto Recharge tab.
- Turn the Auto Recharge switch On.
- Select the bundle you would like to purchase automatically:
- Small Bundle – 100 Credits, 500 Messages, 7,500 Characters
- Medium Bundle – 300 Credits, 1,500 Messages, 15,000 Characters
- Large Bundle – 700 Credits, 3,000 Messages, 40,000 Characters
- Choose your Monthly Spending Cap to limit how much can be spent on automatic recharges each month. Available limits include £29, £49, £99, £100, £200, or No Limit.
- Review the Auto Recharge Summary to confirm your selected bundle, resources, and monthly spending cap.
- Click Save Settings to apply your changes.
Auto Recharge Triggers
A recharge will be processed automatically when any one of the following thresholds is reached:
- Content Credits drop below 50
- Messages drop below 100
- Training Characters drop below 5,000
Note: The monthly spending cap prevents automatic recharges from exceeding your selected limit within a calendar month. Once the cap is reached, no further automatic purchases will be made until the next month unless you increase or remove the spending limit.
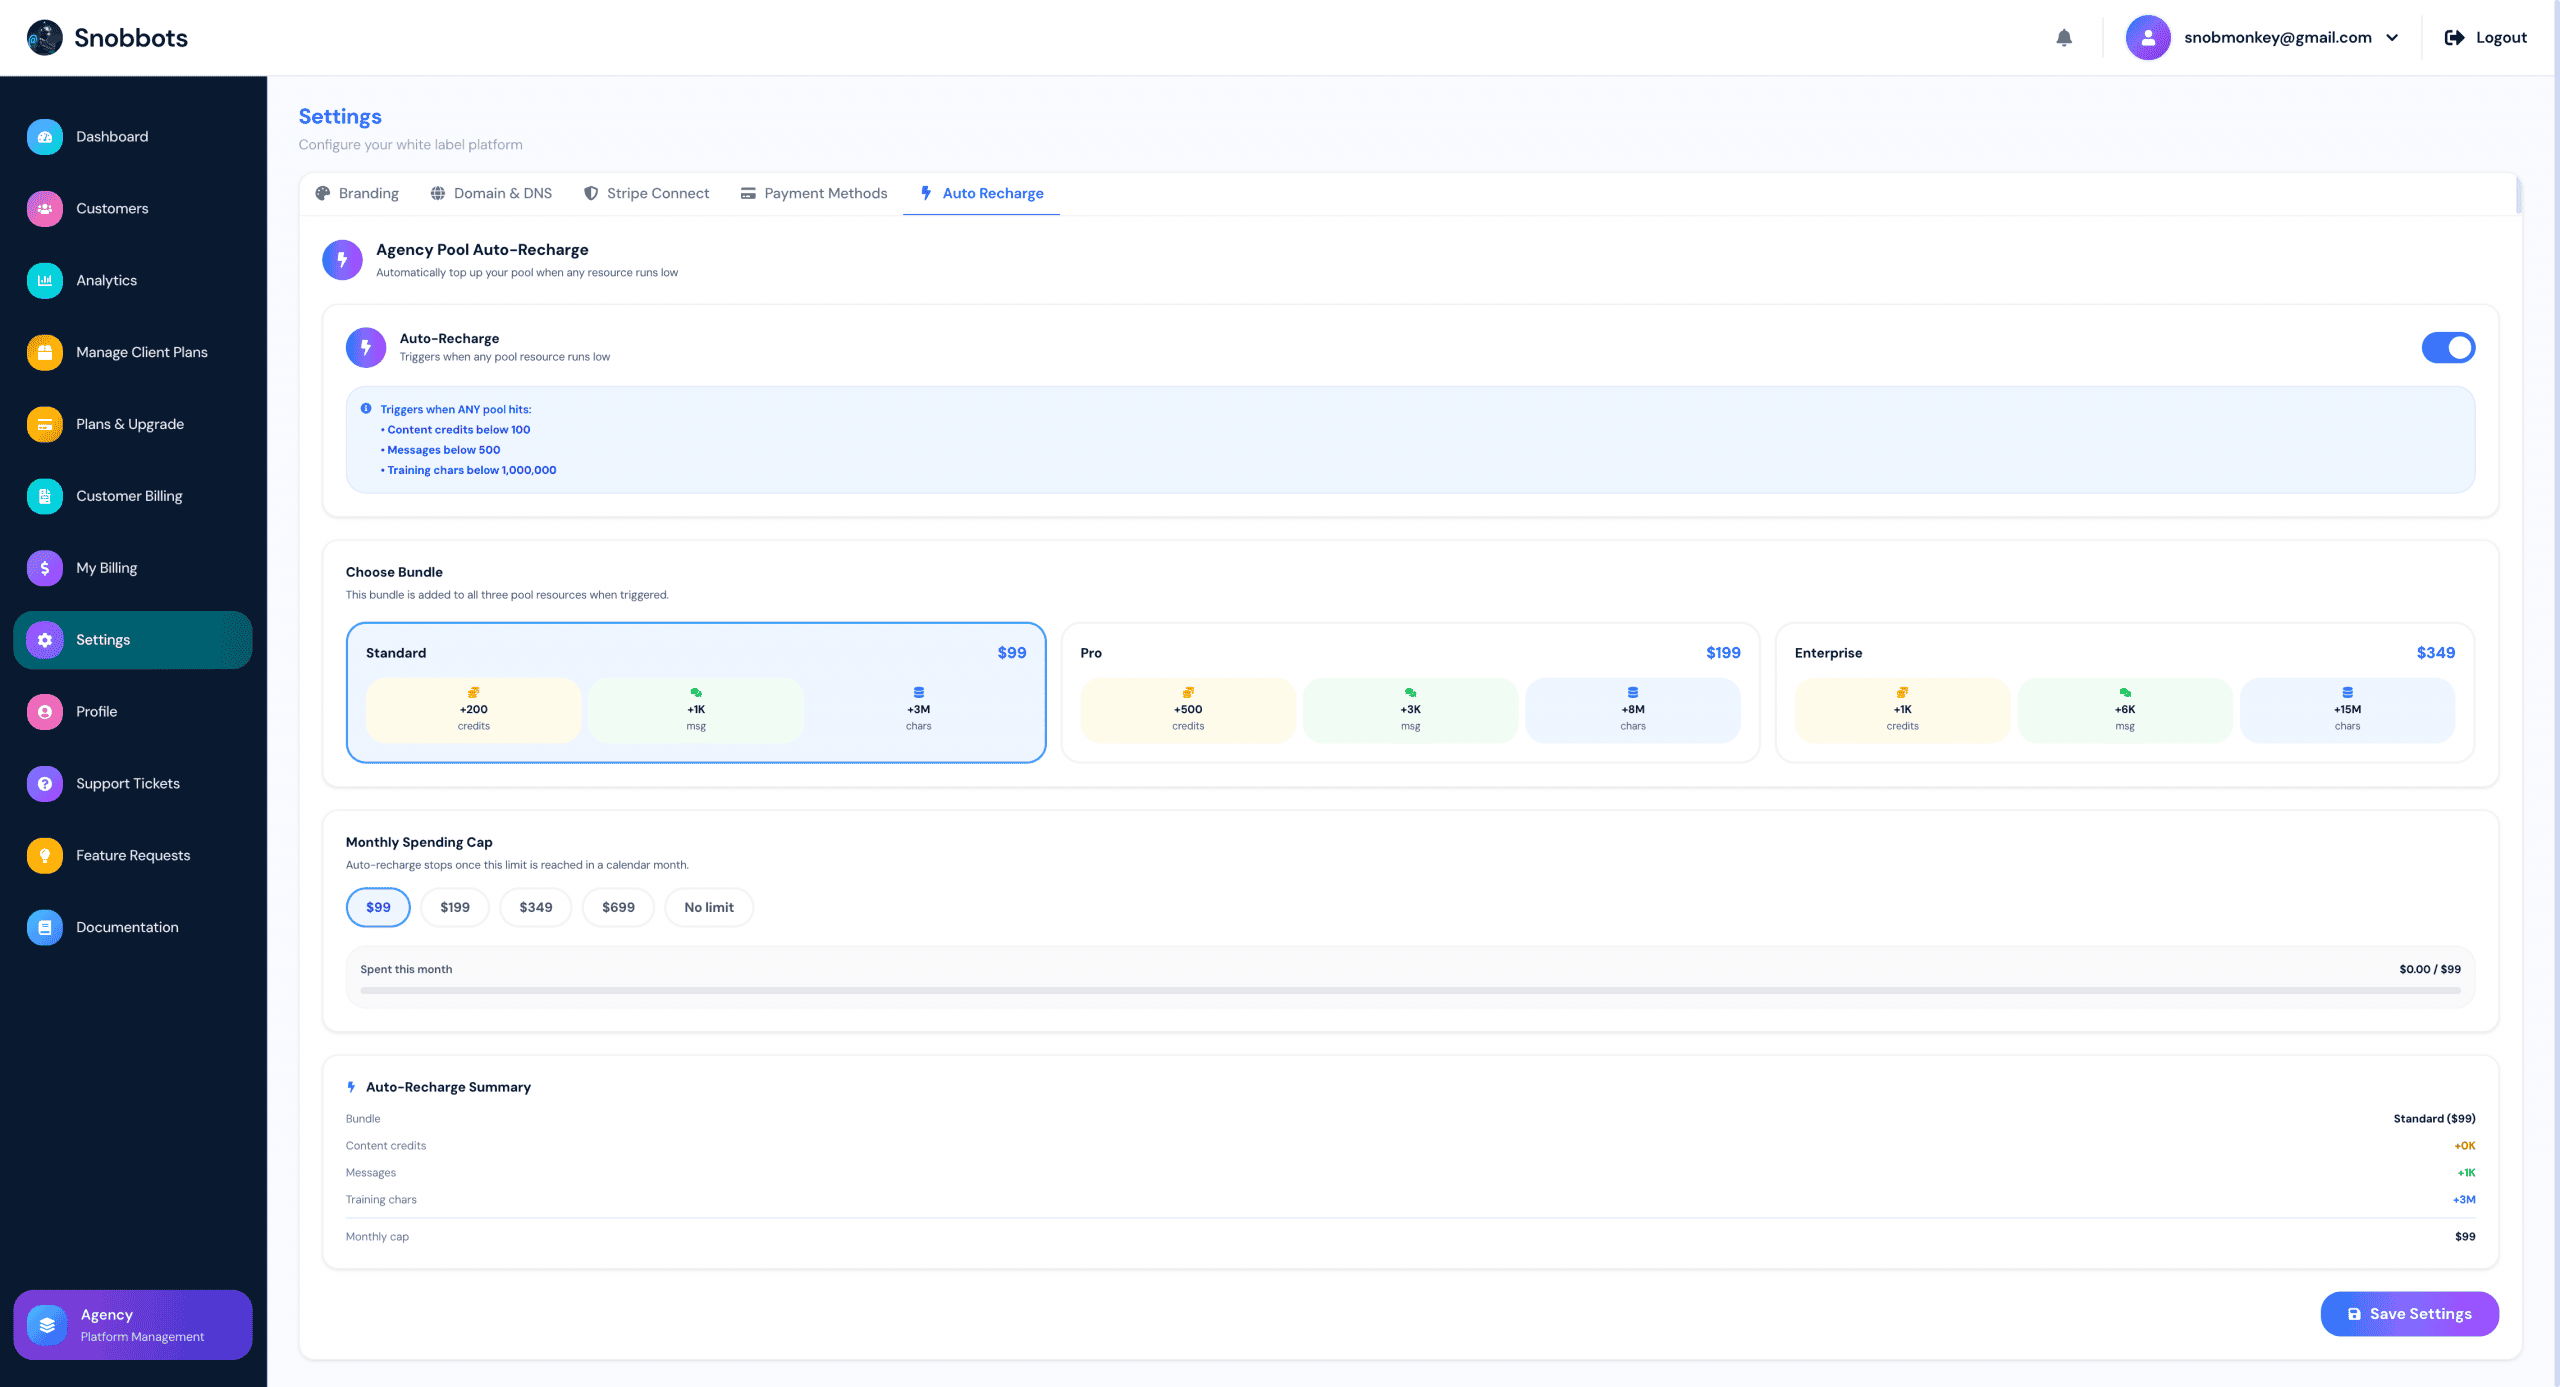
Profile
The Profile section allows you to manage the personal account information associated with your White Label Agency account.
It is divided into two sections: Profile Information and Change Password.

Profile Information
The Profile Information tab displays the details associated with your account.
From here, you can:
-
Upload or change your profile image/logo – select the image icon to upload a new image for your account.
-
Change your displayed name – update the name shown within your Agency account.
-
View your email address – the email address associated with your account is displayed here. This email address cannot be changed from the Profile section.
After making any changes, click Save Profile to update your account.
Note: The information in the Profile section relates to your individual Agency account. Your customer-facing company name, logo and colours are managed separately under Settings → Branding.
Changing Your Password
To update the password used to access your account, select the Change Password tab.
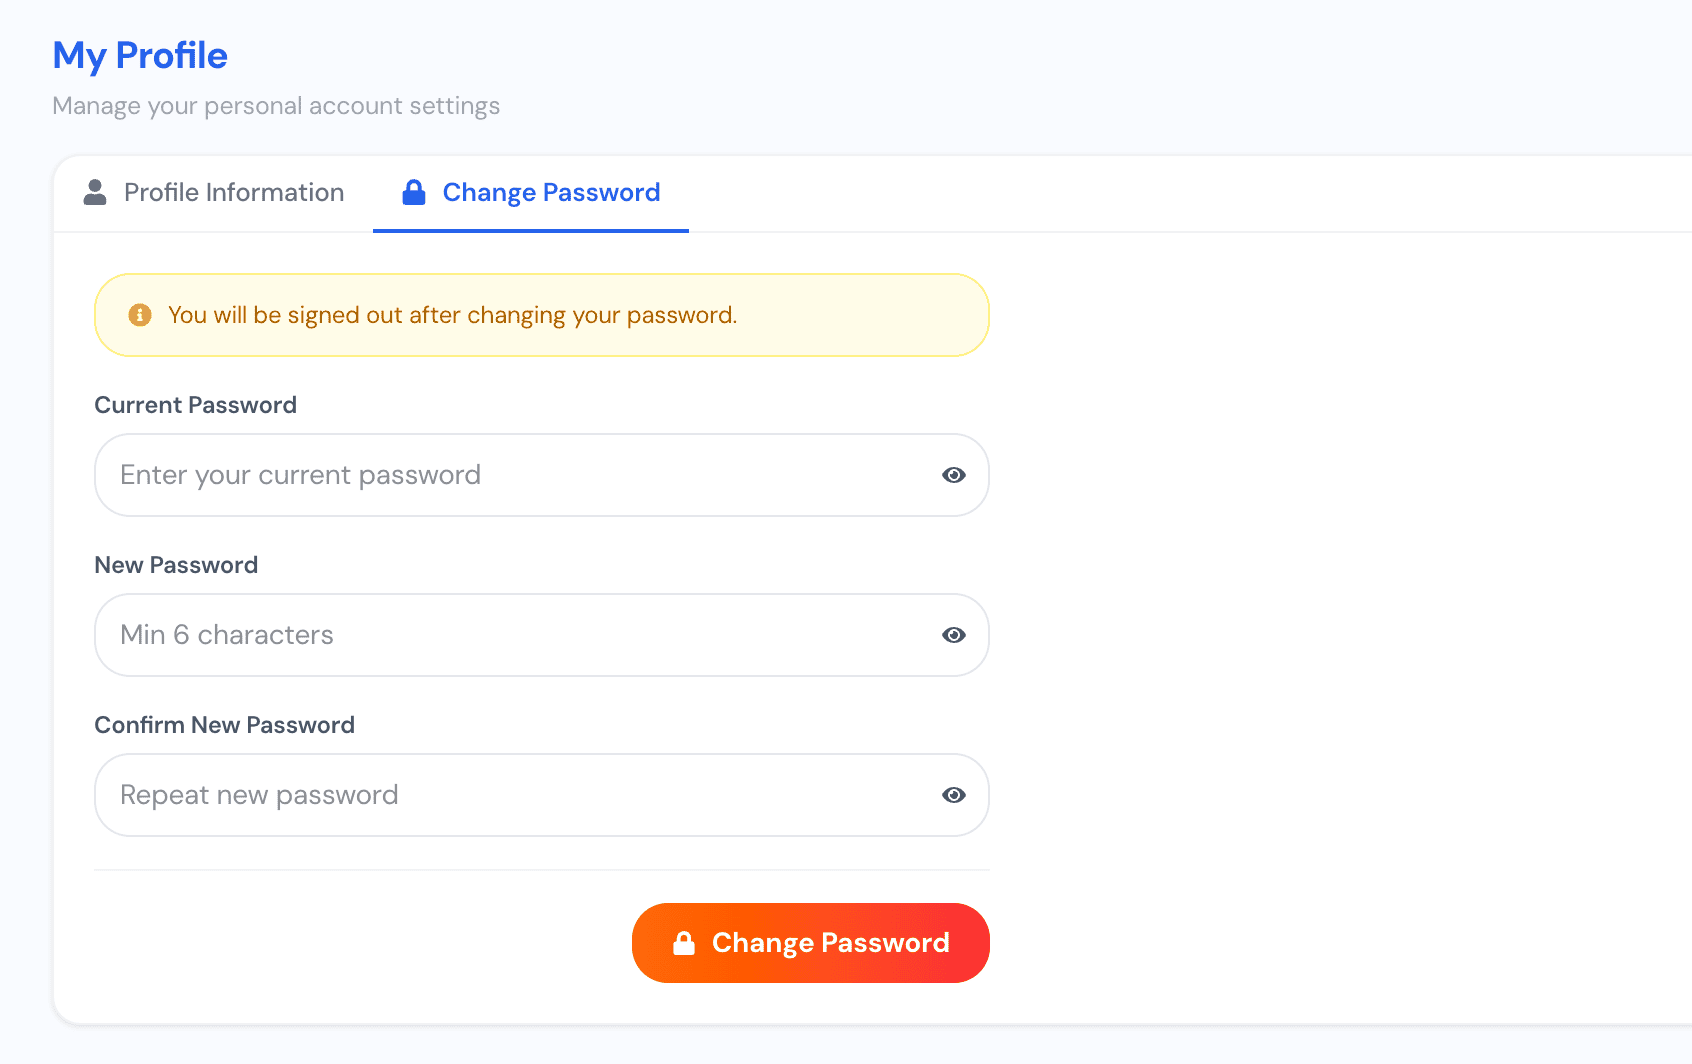
You will need to enter:
-
Current Password – enter the password you currently use to access your account.
-
New Password – enter your new password. Your password must contain at least 6 characters.
-
Confirm New Password – enter the new password again to confirm it.
Once all three fields have been completed, click Change Password.
For security, you will automatically be signed out after your password has been changed. You can then log back into your account using your new password.
The eye icon beside each password field can be used to temporarily show or hide the password while entering it.
Important: Make sure you know your new password before completing the change, as your current login session will end immediately after the password is successfully updated.
Support Ticket
The Support Tickets section allows you to manage support in two directions: support requests raised by your own customers, and support requests you raise directly with SnobBots.
The section is divided into two tabs: Client Tickets and My Tickets.
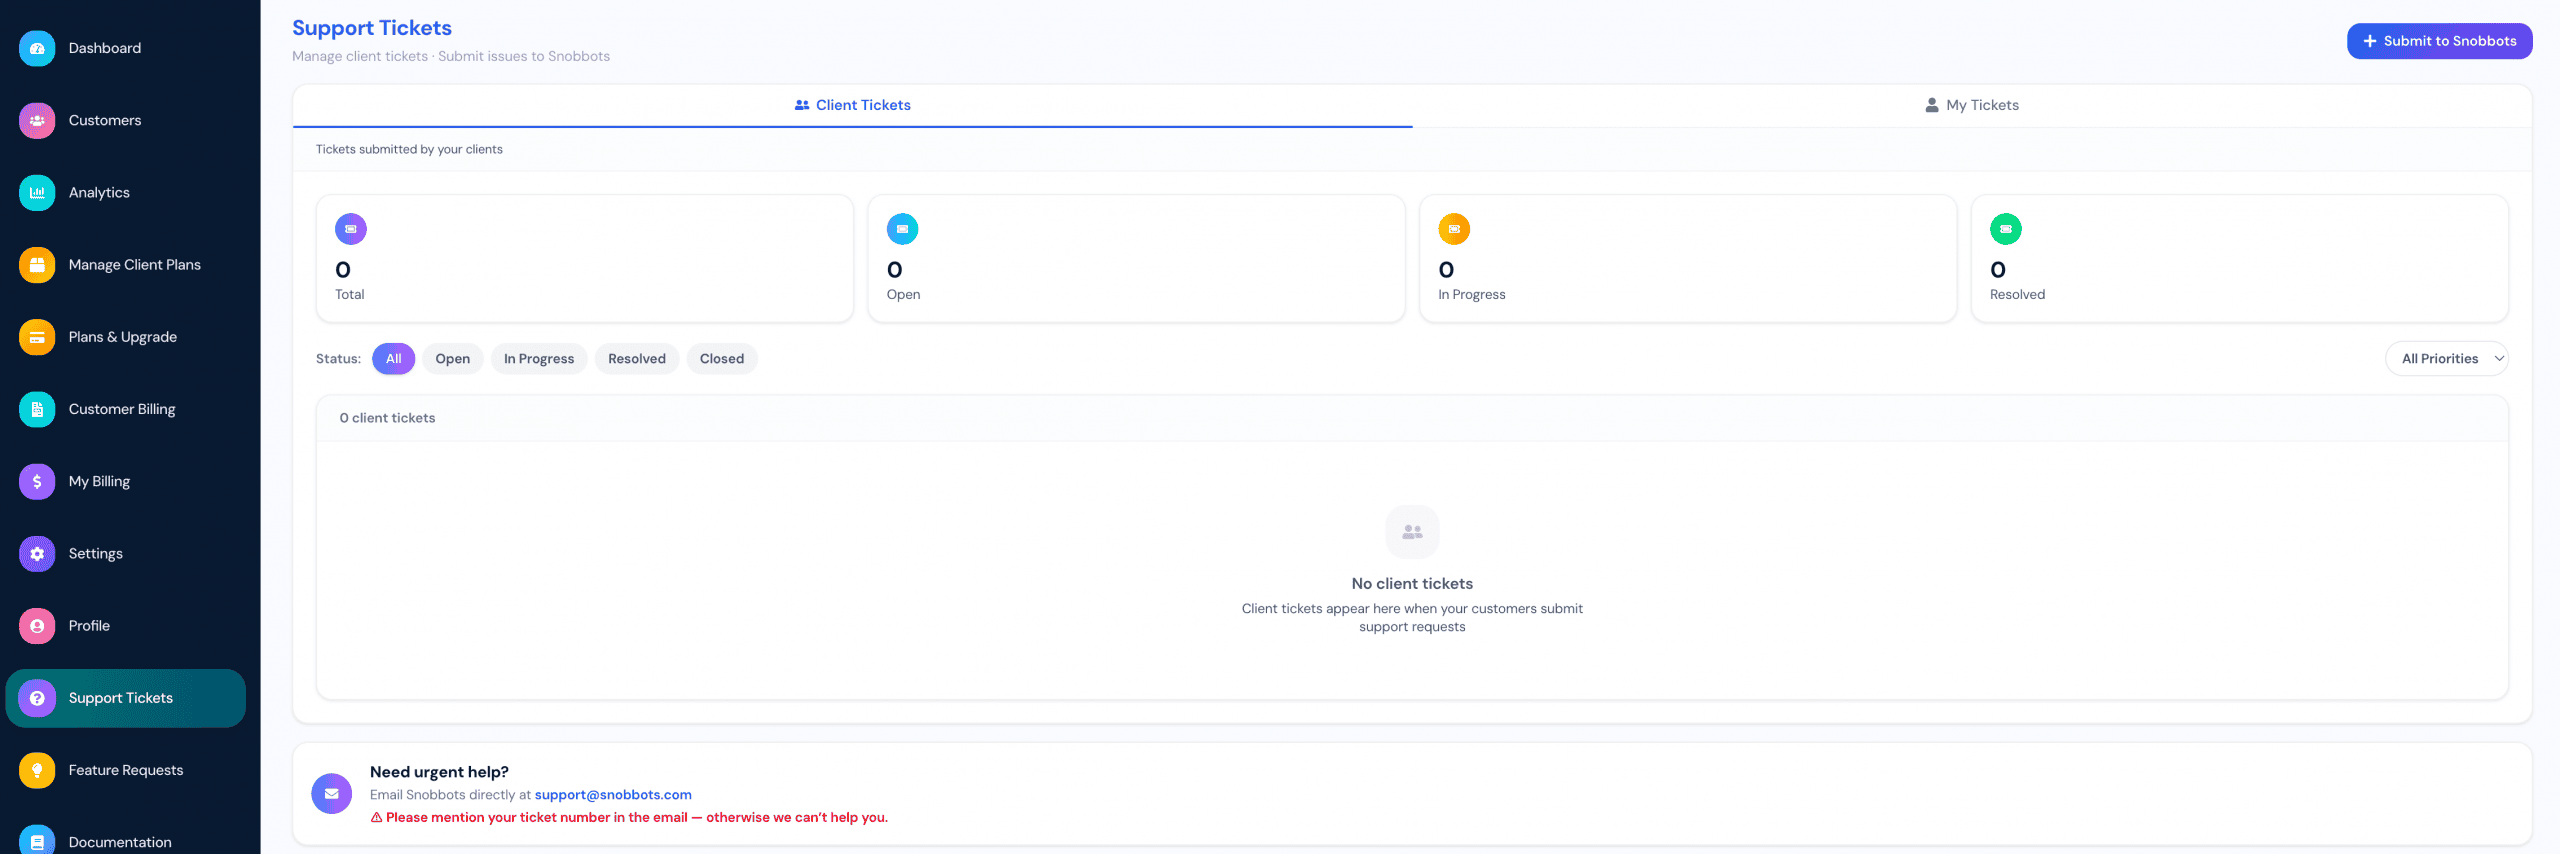
Client Tickets
The Client Tickets tab contains support requests submitted by customers using your white label platform.
When one of your customers submits a support request, it will appear here for your agency to manage. This means you can provide customer support directly under your own brand without the customer needing to contact SnobBots.
At the top of the page, you can see an overview of your tickets, including:
-
Total – total number of customer support tickets.
-
Open – tickets that have been submitted and are awaiting action.
-
In Progress – tickets currently being dealt with.
-
Resolved – tickets where the issue has been resolved.
You can filter tickets by All, Open, In Progress, Resolved or Closed, as well as by priority, making it easier to concentrate on requests that require attention.
As tickets are handled, their status can be updated so both your agency and your customers can keep track of their support requests.
My Tickets
The My Tickets tab is separate from your customer support system. This section contains support requests that your agency has submitted directly to SnobBots.
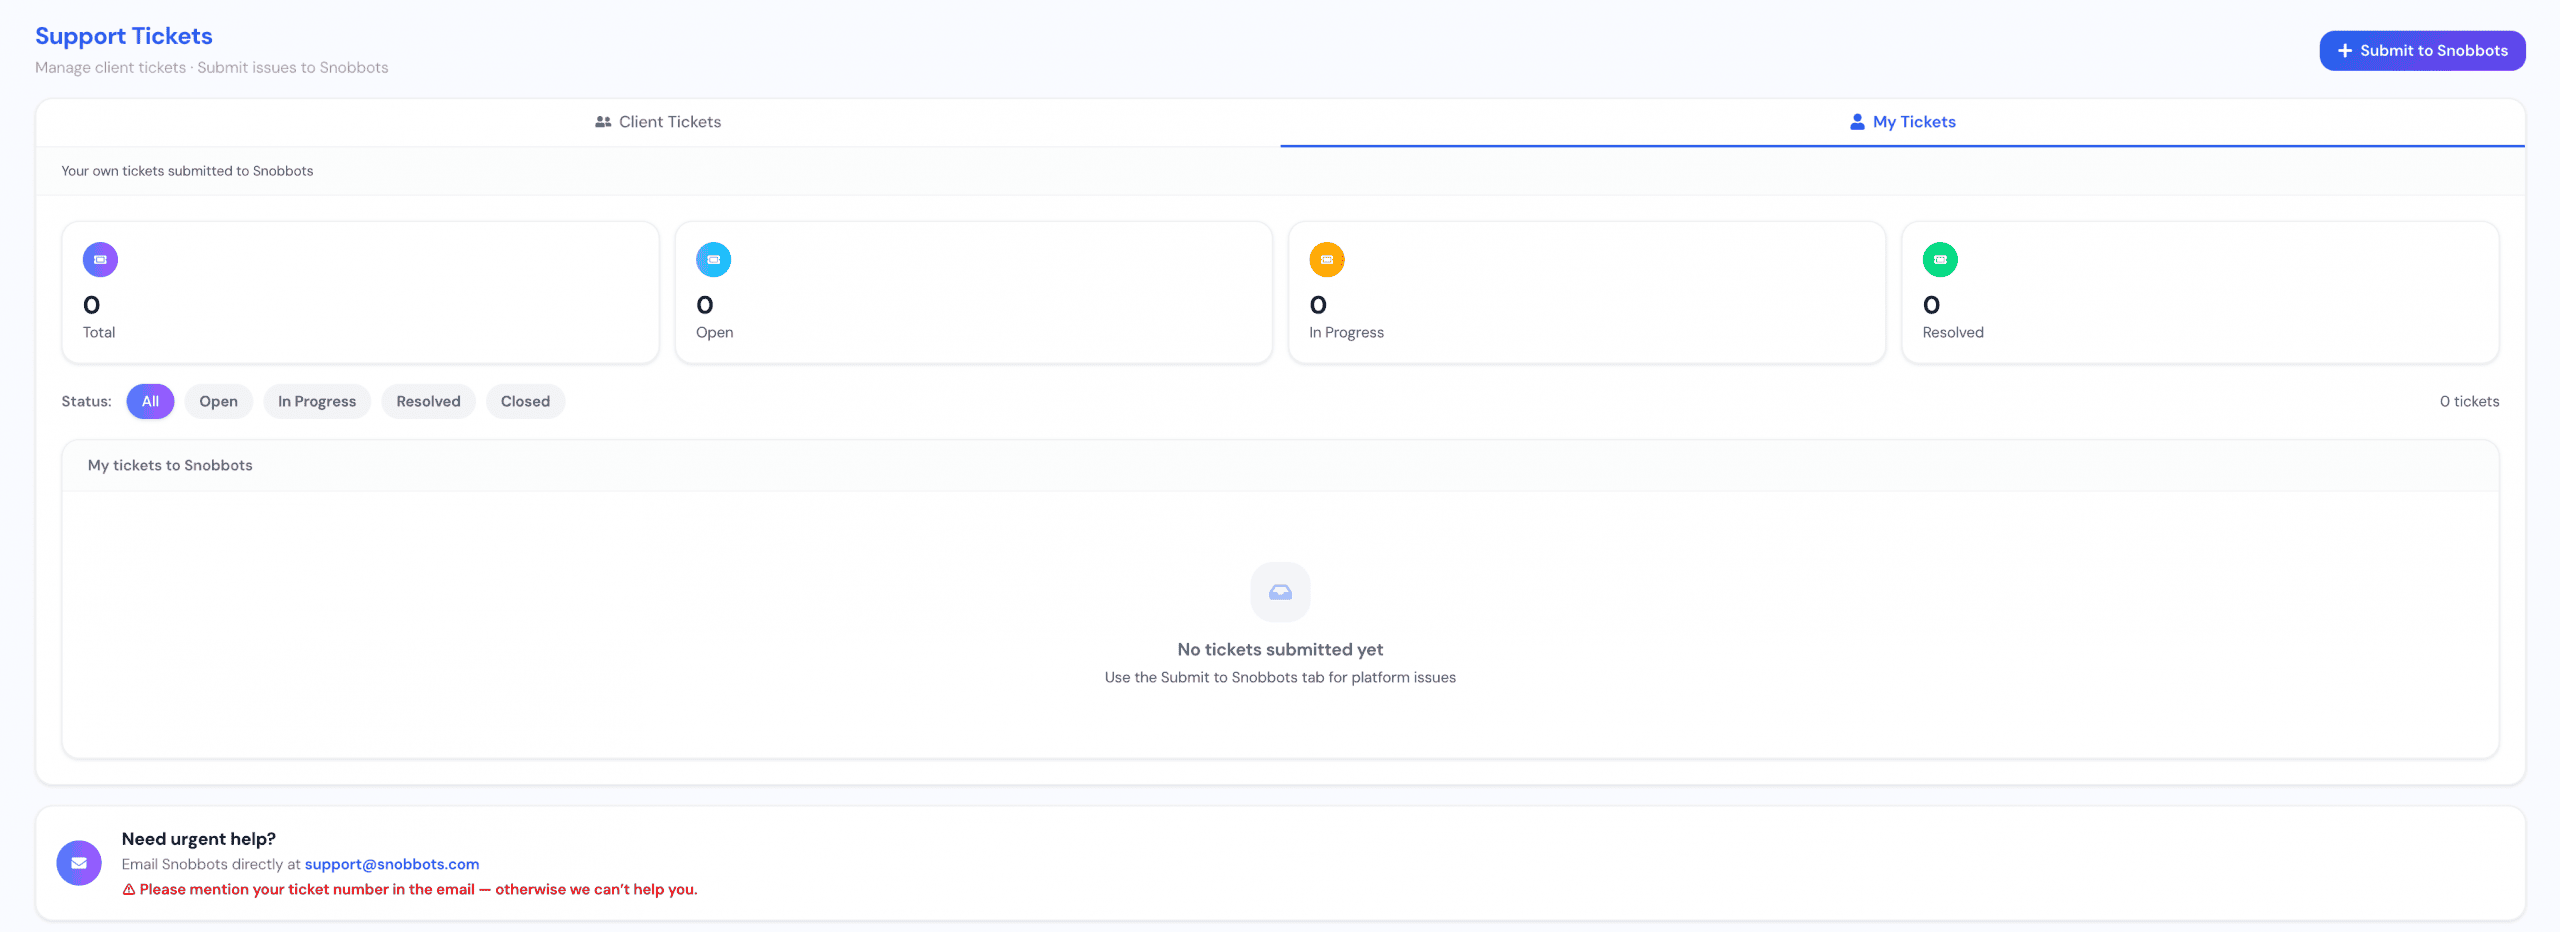
If you experience a problem with the SnobBots platform or require assistance from the SnobBots team, click Submit to SnobBots to create a support ticket.
Your submitted tickets will then appear under My Tickets, where you can monitor their progress.
The dashboard provides a summary showing:
-
Total
-
Open
-
In Progress
-
Resolved
You can also filter your tickets by All, Open, In Progress, Resolved or Closed.
Client Tickets vs My Tickets
The distinction is important:
Client Tickets are raised by your customers and handled by your agency.
My Tickets are raised by your agency and handled by SnobBots.
This keeps your customer support operation separate from any technical or platform support you require from SnobBots.
Urgent Support
If you need additional assistance regarding an existing SnobBots support request, you can contact support@snobbots.com.
When contacting SnobBots by email about a ticket, make sure you include your ticket number so the support team can identify the request and assist you correctly.
Feature Request
The Feature Requests section allows you to submit ideas, suggest improvements, report bugs and request new integrations for the SnobBots platform.
You can also track the progress of your submitted suggestions and see whether they are pending, under review or completed.
Accessing Feature Requests
To access this section:
-
Log in to your SnobBots account.
-
Select Feature Requests from the left-hand navigation menu.
The Feature Requests dashboard will display a summary of your submitted suggestions.
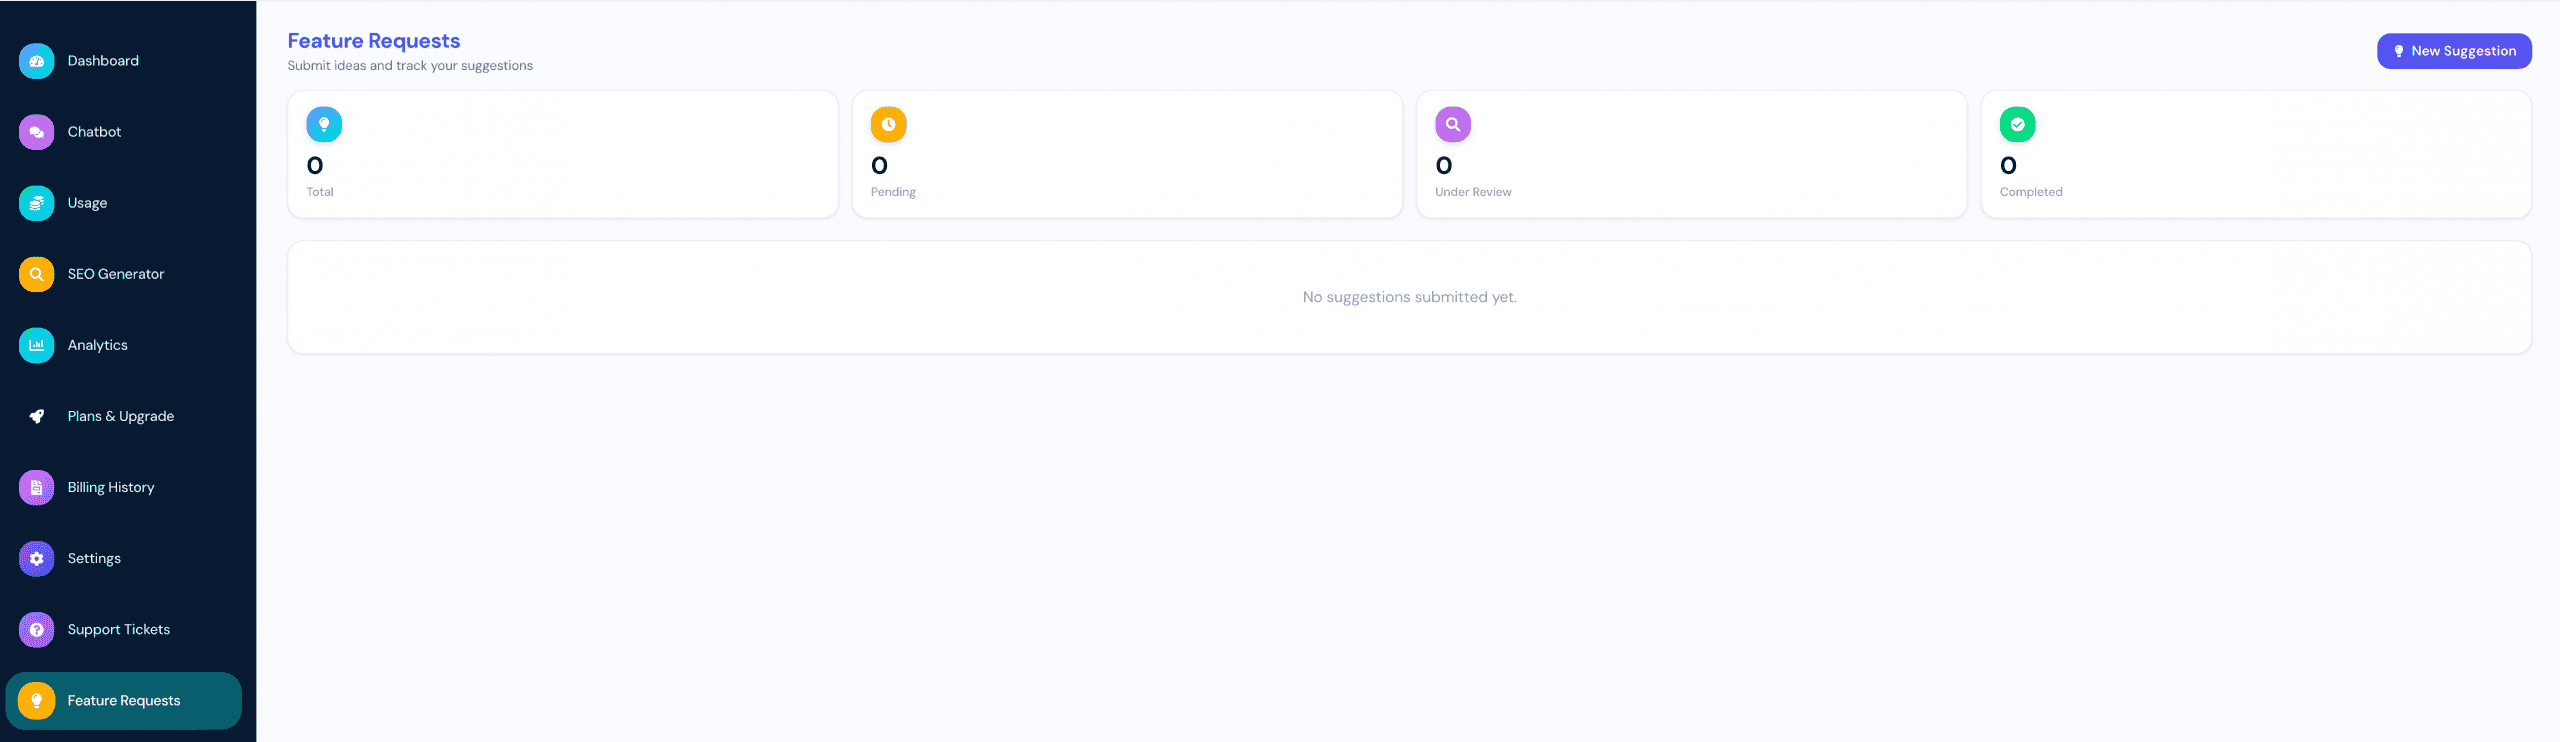
Understanding the Feature Request Dashboard
The summary cards at the top of the page show the current status of your requests.
• Total – The total number of suggestions you have submitted.
• Pending – Suggestions that have been received and are waiting to be reviewed.
• Under Review – Suggestions currently being assessed by the SnobBots team.
• Completed – Suggestions that have been completed or addressed.
Your submitted requests will appear in the main area beneath the summary cards.
If you have not submitted any requests, the page will display “No suggestions submitted yet”.
Submitting a New Suggestion
To submit a feature request:
-
Select New Suggestion in the upper-right corner of the page.
-
Complete the Submit a Suggestion form.
-
Review the information you have entered.
-
Select Submit Suggestion.
Fields marked with an asterisk are required and must be completed before the suggestion can be submitted.
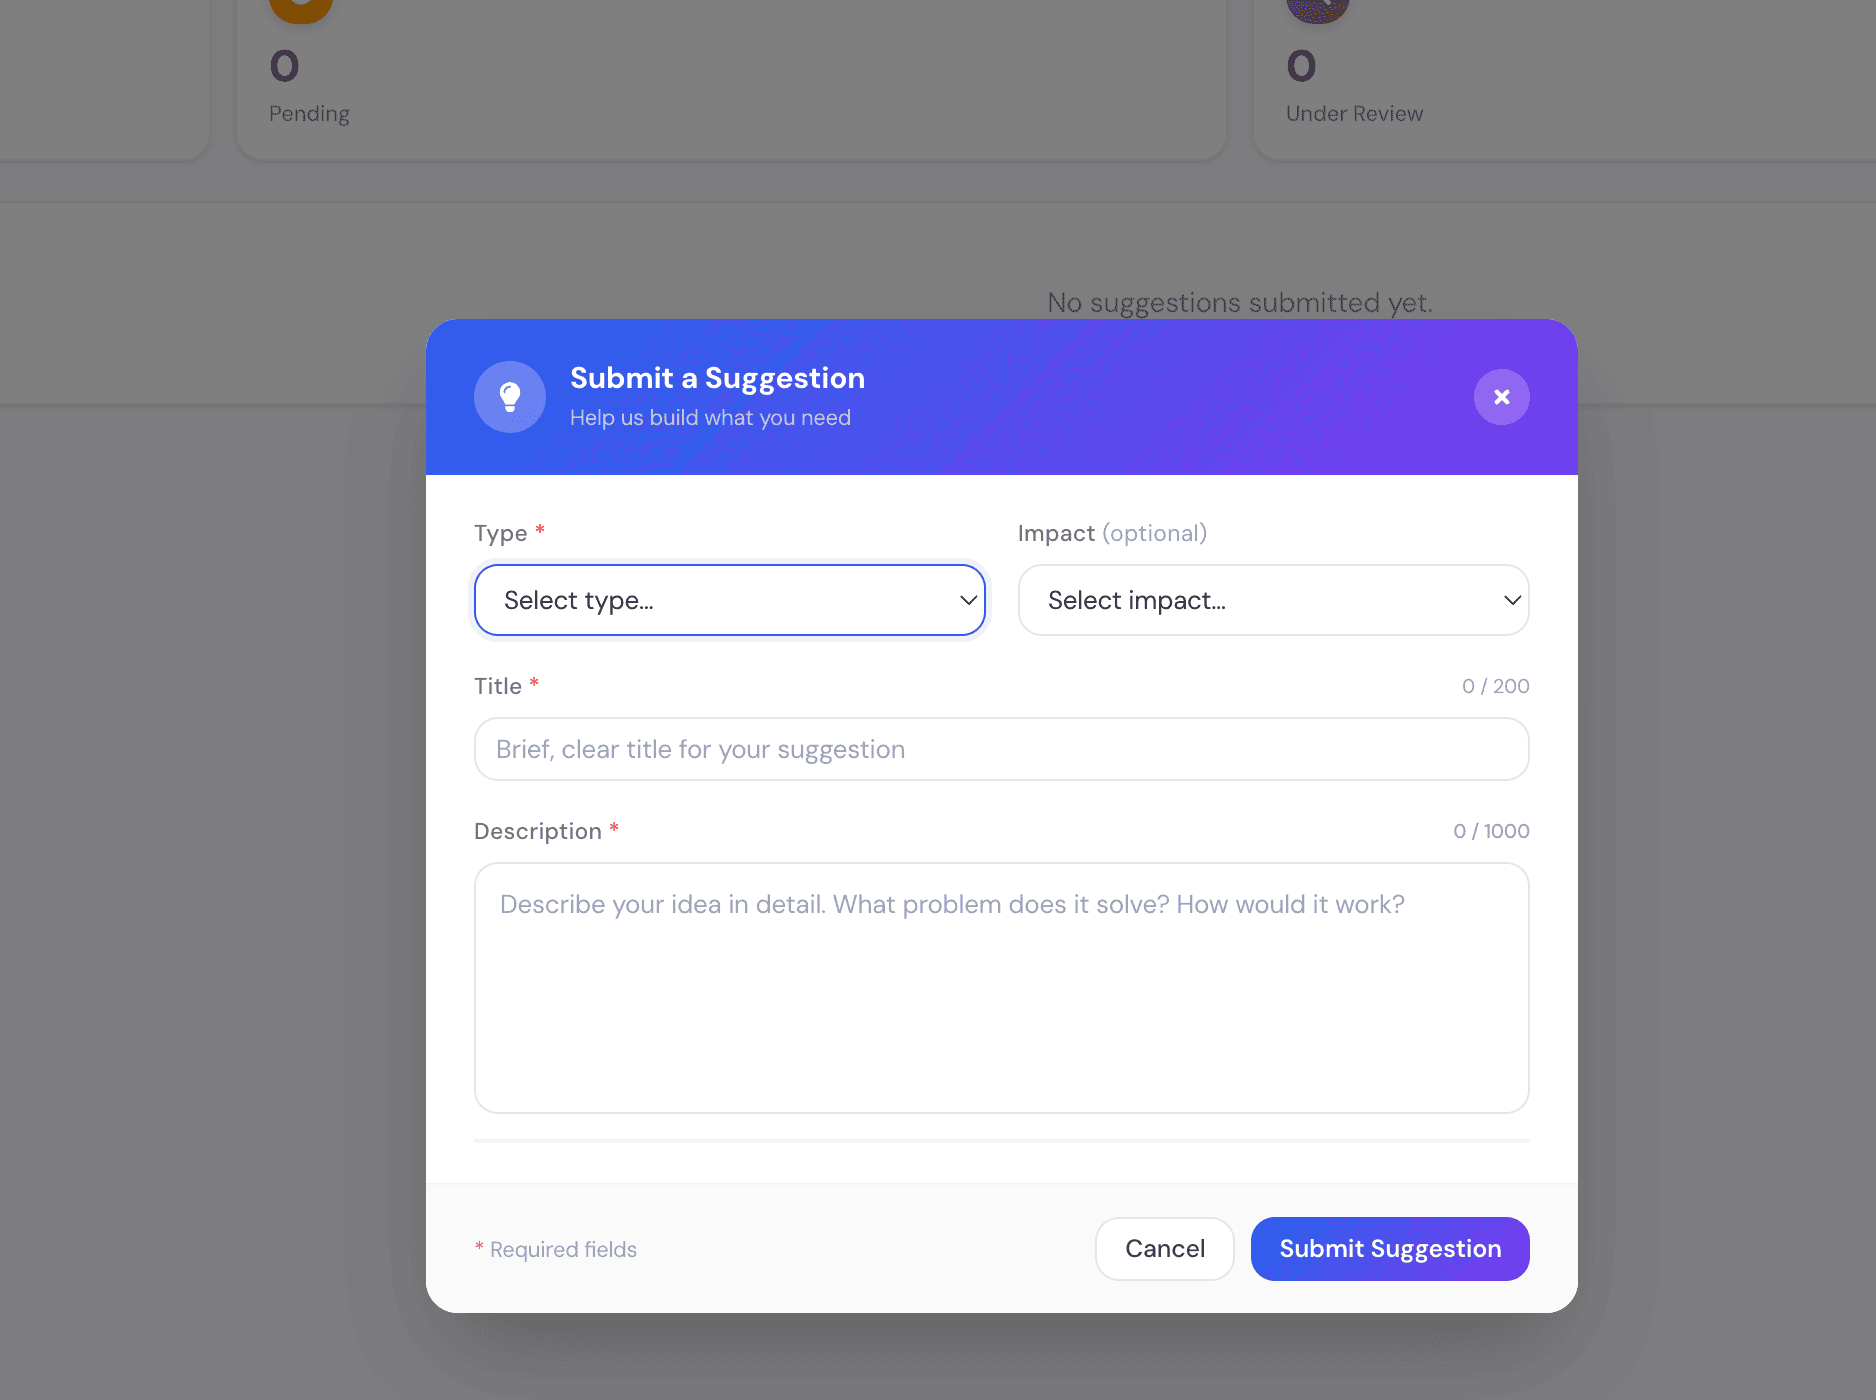
Selecting the Request Type
The Type field identifies the category of your request and is required.
Select the option that best matches your suggestion:
• New Feature – Request a new tool, function or capability that is not currently available.
• Improvement – Suggest a change to improve an existing feature, workflow or part of the platform.
• Bug Report – Report a feature that is not working as expected.
• Integration Request – Request support for another website platform, application or third-party service.
• Other – Use this option when your suggestion does not fit any of the available categories.
Selecting the correct type helps the SnobBots team understand and assess your request more efficiently.
Selecting the Impact
The Impact field explains how significantly the request affects your work or use of the platform.
This field is optional.
The available impact levels are:
• Low – A minor suggestion or convenience that does not affect your normal use of the platform.
• Medium – An issue or improvement that would noticeably improve your experience or workflow.
• High – An important issue that significantly affects your ability to use a feature or complete a task.
• Critical – A serious issue that prevents an essential operation and has no practical workaround.
Choose the impact level carefully. Critical should be reserved for problems that prevent essential business activity or use of the platform.
Writing the Title
The Title field is required and can contain up to 200 characters.
Enter a short and clear title that summarises the request.
Good examples include:
• Add Microsoft Teams chatbot integration.
• Allow conversation reports to be exported as PDF files.
• Chatbot preview not loading after colour update.
• Add date filtering to the Leads section.
Avoid vague titles such as “New idea”, “Problem” or “Please fix this”.
A specific title makes the request easier to understand and review.
Writing the Description
The Description field is required and can contain up to 1,000 characters.
Use this section to explain:
• What you are requesting.
• What problem it would solve.
• How you expect the feature to work.
• How the issue affects your current workflow.
• Who would benefit from the change.
• Any relevant example or use case.
Provide enough information for the SnobBots team to understand the request without needing to guess what you mean.
Describing a New Feature
When requesting a new feature, explain:
• What the feature should do.
• Where it should appear within the platform.
• How users would interact with it.
• What problem it would solve.
• Why it would be useful.
Example:
“Add an option to schedule chatbot performance reports to be emailed automatically each week. This would help agencies provide regular updates to their clients without manually exporting the data.”
Suggesting an Improvement
When suggesting an improvement, describe:
• The existing feature or process.
• What you find difficult or inefficient.
• What you would change.
• How the change would improve the experience.
Example:
“Add a search field to the chatbot training section so users can quickly find and update existing questions and answers.”
Reporting a Bug
When submitting a bug report, include:
• The feature or page where the problem occurred.
• What you were trying to do.
• What you expected to happen.
• What actually happened.
• Whether the problem occurs every time or only occasionally.
• Any error message displayed.
• The browser or device being used, where relevant.
Clear instructions for reproducing the issue can make it easier for the team to investigate.
Example:
“When I select Save Appearance after changing the chatbot colour, the page confirms the update, but the new colour does not appear in the live preview.”
Requesting an Integration
When requesting a new integration, include:
• The name of the platform or service.
• How you currently use it.
• How you want it to connect with SnobBots.
• What information or actions should pass between the systems.
• How the integration would improve your workflow.
Example:
“Add a native Microsoft Teams integration that sends new chatbot leads to a selected Teams channel.”
Reviewing Your Suggestion
Before submitting, check that:
• The correct request type has been selected.
• The impact level accurately reflects the importance of the request.
• The title is short and descriptive.
• The description clearly explains the idea or problem.
• Any important examples or steps have been included.
• The suggestion does not contain passwords, payment card information or other sensitive data.
Submitting the Suggestion
Once the form is complete, select Submit Suggestion.
If you decide not to continue, select Cancel or use the close icon in the upper-right corner of the form.
After a successful submission, the request will appear on the Feature Requests dashboard and will be included in the status totals.
Tracking a Feature Request
Use the Feature Requests dashboard to monitor the status of your suggestions.
A request may move through the following stages:
• Pending – The request has been submitted and is waiting for review.
• Under Review – The SnobBots team is assessing the request.
• Completed – The request has been completed or otherwise addressed.
The summary cards will update as the status of your requests changes.
Feature Requests and Support Tickets
Use Feature Requests for ideas, improvements, integration requests and non-urgent bug reports.
Use Support Tickets when you need help with an account-specific problem, failed payment, access issue or urgent technical fault.
For a critical problem affecting live business activity, submit a support ticket so the issue can be investigated directly.
Data Security
SnobBots takes reasonable and commercially accepted measures to help protect customer and visitor data from unauthorised access, misuse, disclosure, or alteration.
Security measures may include:
- Secure server infrastructure
- Encrypted communications where applicable
- Restricted internal access controls
- Authentication and account protection systems
- Platform monitoring and maintenance procedures
- Secure storage of uploaded training data and chatbot configurations
Only authorised personnel and systems required for platform operation are permitted access to relevant data.
While we work to maintain a secure environment, users should understand that no internet-based system or electronic storage method can ever be guaranteed as 100% secure.
Businesses using SnobBots are also responsible for maintaining secure passwords, authorised account access, and appropriate internal handling of customer information.
AI Model Usage
SnobBots uses advanced artificial intelligence and large language model technologies to generate responses, automate workflows, and assist with customer interactions.
AI-generated responses are produced based on:
- Website content
- Uploaded files and knowledge bases
- User-provided training information
- Conversation context and instructions
- Configured tone and behavioural settings
Although SnobBots is designed to provide intelligent and accurate responses, AI-generated content may occasionally contain inaccuracies, incomplete information, or unexpected outputs.
Businesses remain responsible for reviewing and validating important information, decisions, recommendations, and customer communications generated through the platform.
SnobBots should not be relied upon as a substitute for professional legal, financial, medical, or regulated industry advice.
Data Privacy
SnobBots respects user privacy and is committed to handling personal data responsibly and transparently.
Depending on platform usage, SnobBots may collect and process information such as:
- Names
- Email addresses
- Contact information
- Conversation history
- Website interaction data
- Usage analytics and system activity
This information is used to:
- Operate and improve the platform
- Provide chatbot functionality
- Deliver lead capture and communication tools
- Monitor platform performance and analytics
- Improve customer support and user experience
- Maintain platform security and reliability
SnobBots does not sell personal customer data to third parties.
Data may only be shared where necessary for platform operation, legal compliance, service delivery, or approved integrations connected by the user.
Users retain responsibility for ensuring their own compliance with applicable data protection laws and regulations within their jurisdiction, including GDPR and other regional privacy requirements.
For full details, users should review the official SnobBots Privacy Policy, Terms & Conditions, and Disclaimer pages.
Based on:
SnobBots Glossary
A
AI Agent
An AI-powered assistant capable of interacting with users, answering questions, automating tasks, and performing actions such as lead generation or scheduling. In SnobBots, an AI agent and an AI chatbot refer to the same system.
AI Chatbot
A public-facing version of an AI agent that is embedded on a website. It engages with visitors, answers queries, and interacts with users in real time.
AI Model
The underlying machine learning model used to power an AI agent’s behaviour. SnobBots may use different models such as GPT-3.5 or GPT-4 depending on your subscription level and performance needs.
Agency Dashboard
The admin view for organisation owners who manage SnobBots accounts, branding, client settings, and platform-wide configurations.
Agency Profile
The area where white-labelled branding, colours, display names, and platform identity settings are configured.
Agency User
A user who signs up to manage their own instance of the SnobBots platform under a white-labelled setup.
Agency Wallet
A central billing wallet used for metered activity, such as AI message generation, data storage, or add-on agents. Usage costs are deducted from the balance in real time.
Auto Billing
The automated system that tops up wallet balances or subscription credits when they fall below a specified threshold.
B
Base System Prompt
The core instruction set that defines an AI agent’s personality, rules, tone, and behaviour. It guides how the agent responds in different scenarios.
Billing Usage & Settings
The dashboard area where subscription details, payment method, usage history, and cost breakdowns are displayed.
C
Chatbot
A conversational interface powered by an AI agent. The chatbot knows your business information and interacts with users through natural language.
Chatbot Dashboard
The configuration panel where users can adjust AI behaviour, set system prompts, upload training data, manage integrations, and personalise the chatbot’s design.
Characters (Storage)
The amount of text stored in an AI agent’s knowledge base. Character count represents how much information can be uploaded or scraped for training.
Citations / Sources
References that show which pieces of your uploaded knowledge the AI relied on when generating a response.
Complimentary Credit
Free credit allocated to new users during trials or onboarding. This credit can be used for AI message generation or storage.
Context Window
The maximum amount of text an AI model can process at one time. A larger context window allows the AI to handle more detailed conversations and documents.
Conversational AI
The AI technology that enables agents to understand and respond to natural language input. This powers human-like conversations between users and your AI chatbot.
Cost per AI Message Sent
The usage cost charged each time an AI agent generates a message. Costs vary depending on the AI model used.
Custom Menu Links
Additional navigation items added to the left-hand dashboard menu, linking to external resources or internal pages.
Custom Styling
Branding controls that allow agencies to change colours, logos, and visuals across their white-labelled SnobBots platform.
D
Default Chatbot
The chatbot that is automatically duplicated for all newly created sub-accounts. Only one default can exist at a time.
Default Prompts
Base prompts that automatically apply to newly created agents unless manually changed.
Deployment Channels
The platforms where AI chatbots can be deployed — such as websites, messaging apps, or email systems.
E
Embed
The process of installing a chatbot on a website via an iframe or script snippet.
F
Free Trial Settings
Controls for managing how much credit, storage, or agent capacity a user receives during a trial period.
K
Knowledge Base
The structured information uploaded or imported to train an AI agent. This includes text, FAQs, URLs, documents, and more.
M
Marketplace
A space where agencies can showcase their pre-built chatbots for clients to clone, customise, and deploy.
Markdown
A simple formatting language used to structure text with headings, lists, bold italics, links, and more.
P
Permissions
Settings that determine what a user can access or edit inside a sub-account or agency dashboard.
R
Rebilling
The ability for agencies to sell additional usage, storage, or agent capacity to clients at their chosen markup.
S
SaaS (Software as a Service)
A subscription-based software delivery model where users access applications via the cloud rather than installing them locally.
SaaS Configurator
The settings area where agencies create and customise their SnobBots subscription packages, pricing tiers, and feature availability.
Sentiment
A feature that interprets the emotional tone behind a user’s input to help the AI respond more appropriately.
Storage (Characters)
The total character limit available for storing knowledge-base content. Additional storage may be purchased as needed.
Storage Balance
The remaining available storage an account can use to upload new training data.
Sub-Account
A client’s dedicated environment within an agency’s white-labelled SnobBots platform.
Sub-Account Admin
The primary user responsible for managing a sub-account.
Sub-Account Wallet
A billing wallet specific to each client account, used to pay for AI usage or add-on features.
Subscription Packages
Customisable bundles created by agencies that define the features, agent count, storage, and credits included for their clients.
T
Temperature
An AI creativity setting. Higher temperatures produce more varied, creative responses; lower temperatures provide more focused, predictable output.
U
User
A person interacting directly with the AI chatbot or managing a sub-account.
V
Vault
A secure location where API keys and private credentials are stored, enabling clients to use their own OpenAI API keys if permitted.
W
Wallet Balance
The amount of credit available to cover AI message costs, storage purchases, or other usage-based charges.
White Label
The ability for agencies to rebrand the SnobBots platform as their own service.
White Label API
A customised API endpoint that displays the agency’s branding instead of SnobBots branding, enabling seamless integration into client systems.